There may be times when clients have to cancel their scheduled appointments for a period, usually due to extenuating circumstances. It is possible to manage this time period easily through the On Hold option within the client profile.
It is essential to remember that any appointments will only show up in the roster if they are entered before you place the client on hold. The system will alert you if you want to leave the roster or not; if you select "Yes," then the roster will still be visible. To remove it, you will need to individually cancel all the appointments that are currently in the system.
Placing a Client On Hold
Creating an on hold period for a client can be accessed in a few different ways:
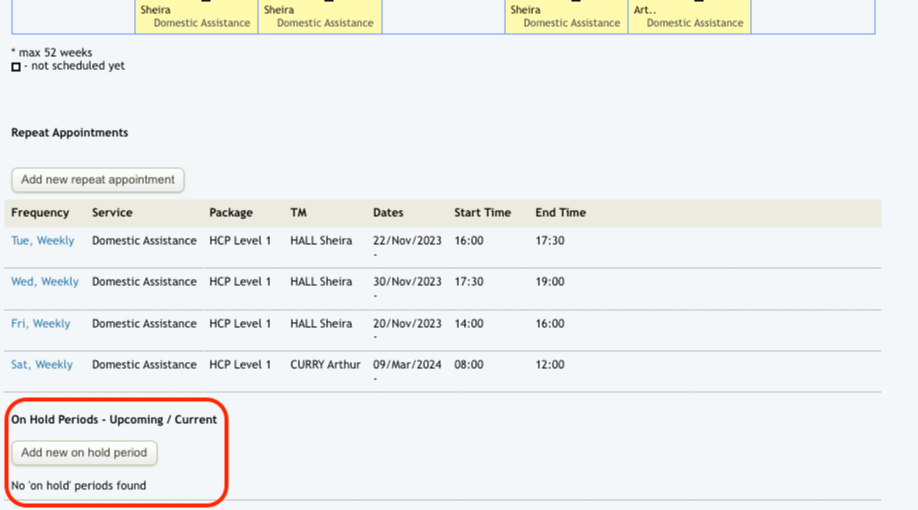
Selecting the client from the Client List, go to the Appointments tab and review On Hold Periods, click Add new on hold period.
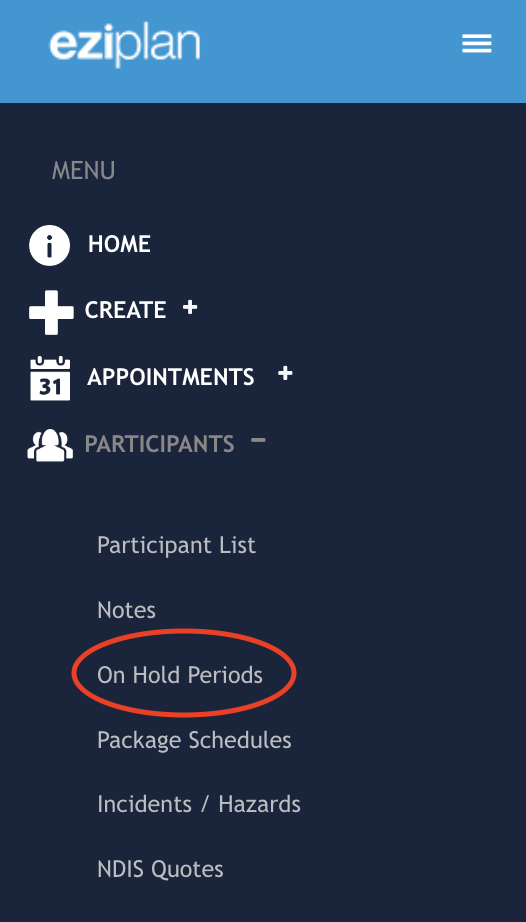
Selecting On Hold Periods from the Client menu, click Add new period, select your client from the client list, and click Proceed.
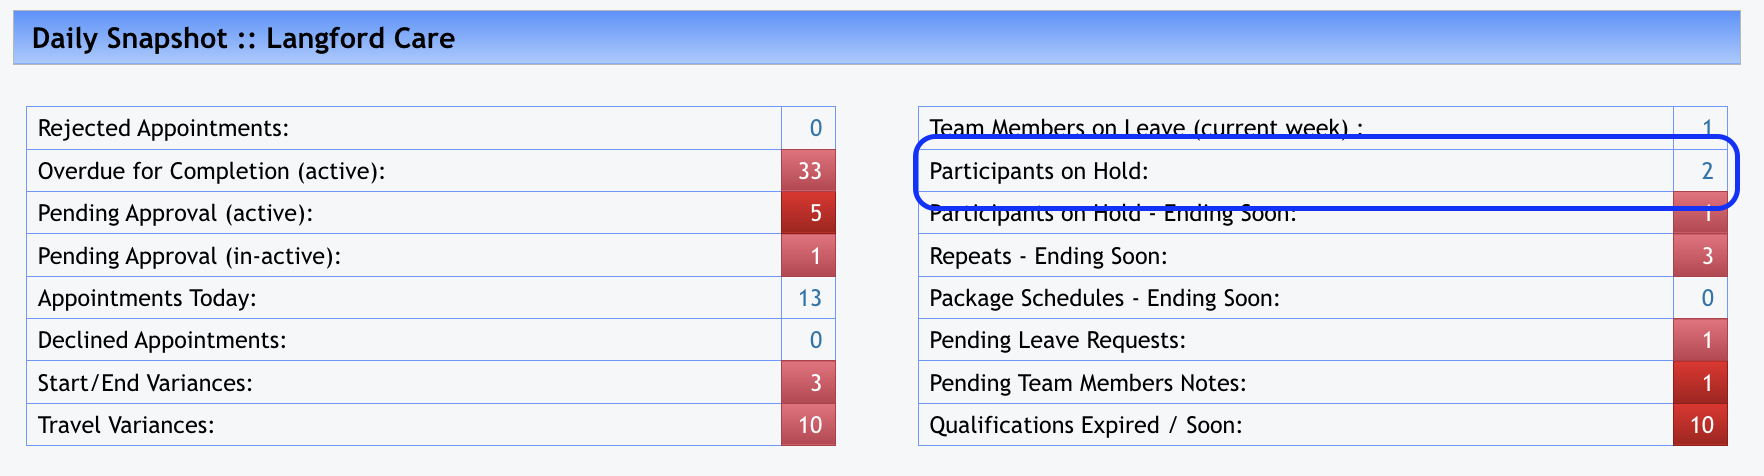
Click the Clients On Hold shortcut on the Home page.
|
|
When you place on client on hold the following information is available to you:
Specify a type to indicate the reason for the on hold period.
Specify the start date, and end date (if known). No end date will indicate 'on hold' in the clients schedule into the future. If you do specify an end date, then you will be able to review clients who have on hold periods soon to expire.
Cancel any scheduled appointments from the on hold entry, allowing a one step process to manage your weekly planner and timesheets.
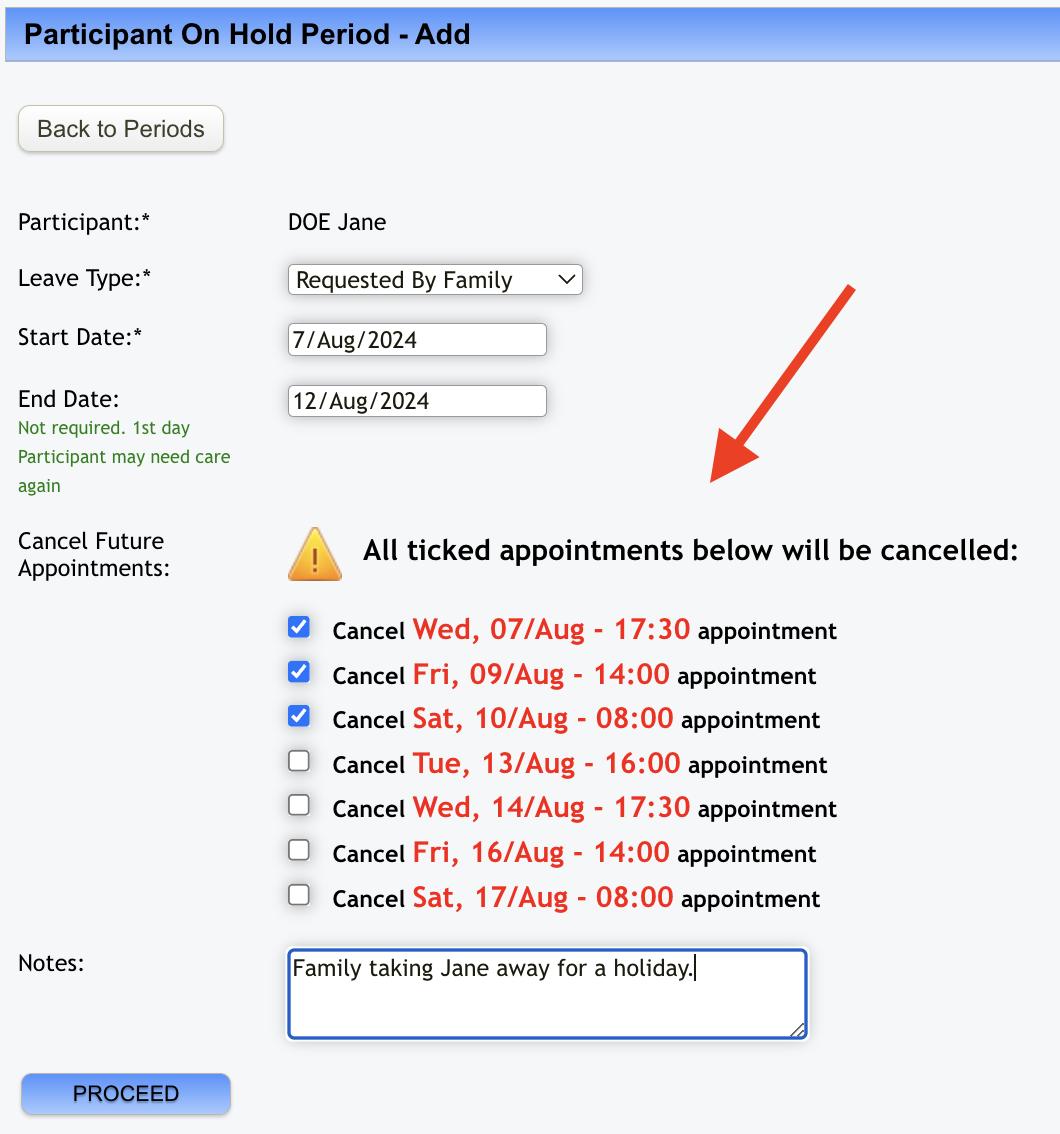
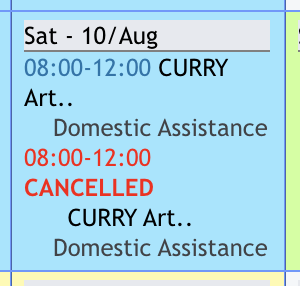
Click on proceed and the on hold period will be in place. You can see this period reflected in the appointment calendar of the client/participant.

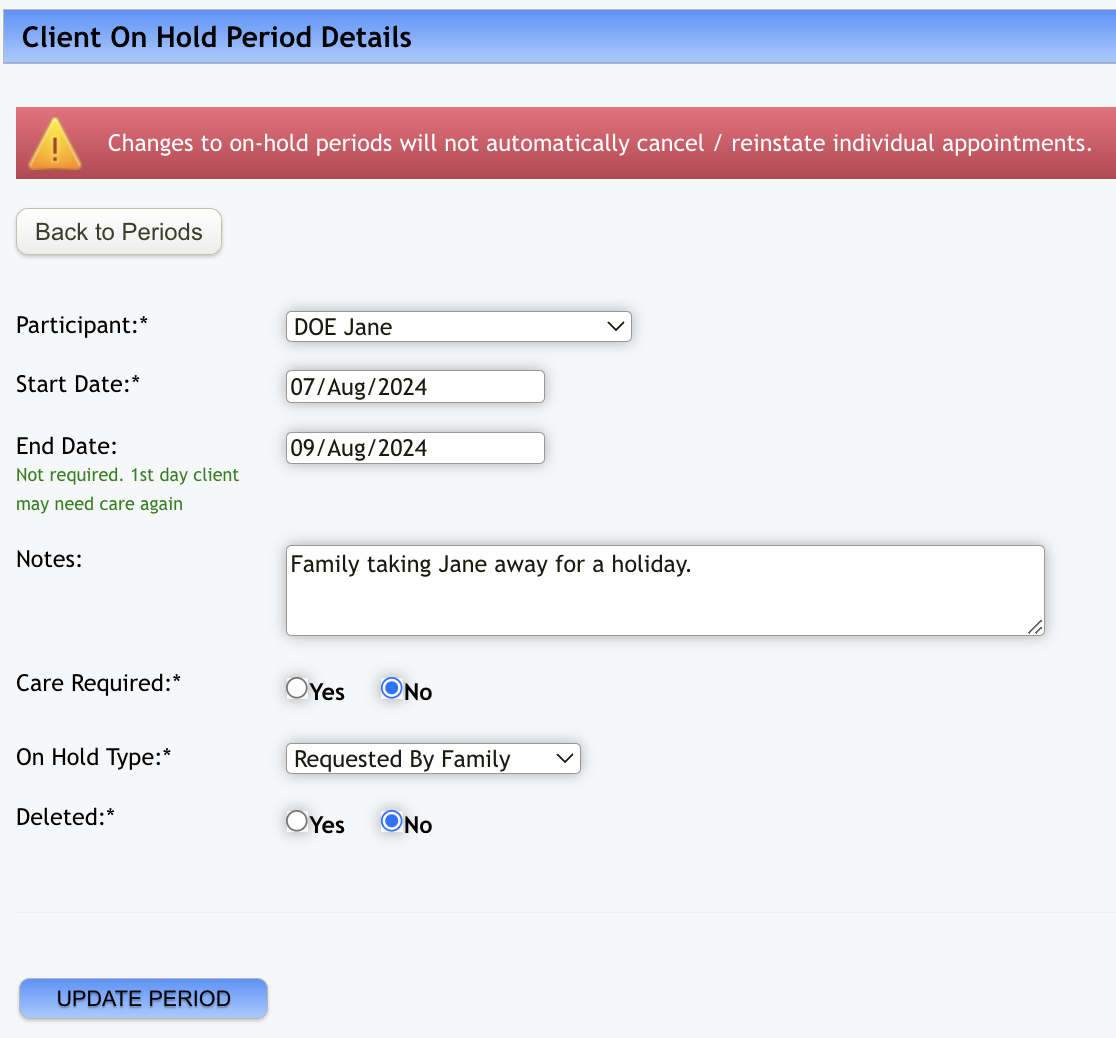
Ending the Client On Hold Period
Ending a clients on hold period will now reinstate any future appointments for scheduling purposes if they have not already been specifically cancelled (ie appointments that were left out by the system due to the Client being On Hold before the roster was published). To reinstate the client immediately, change the current On Hold status to Deleted or update the On Hold Period date to the current day's date. You may also wish to change the on hold period end date if it becomes known for a future date. This will then let the system manage when the scheduling window will open again for the client.
If you are finalising an On Hold period, you may need to cross check if there are any canceled appointments that need to be reinstated (ie appointments that had previously been rostered prior to the on hold period being added). To reinstate the appointment, simply click on the appointment and click create similar Appointment.
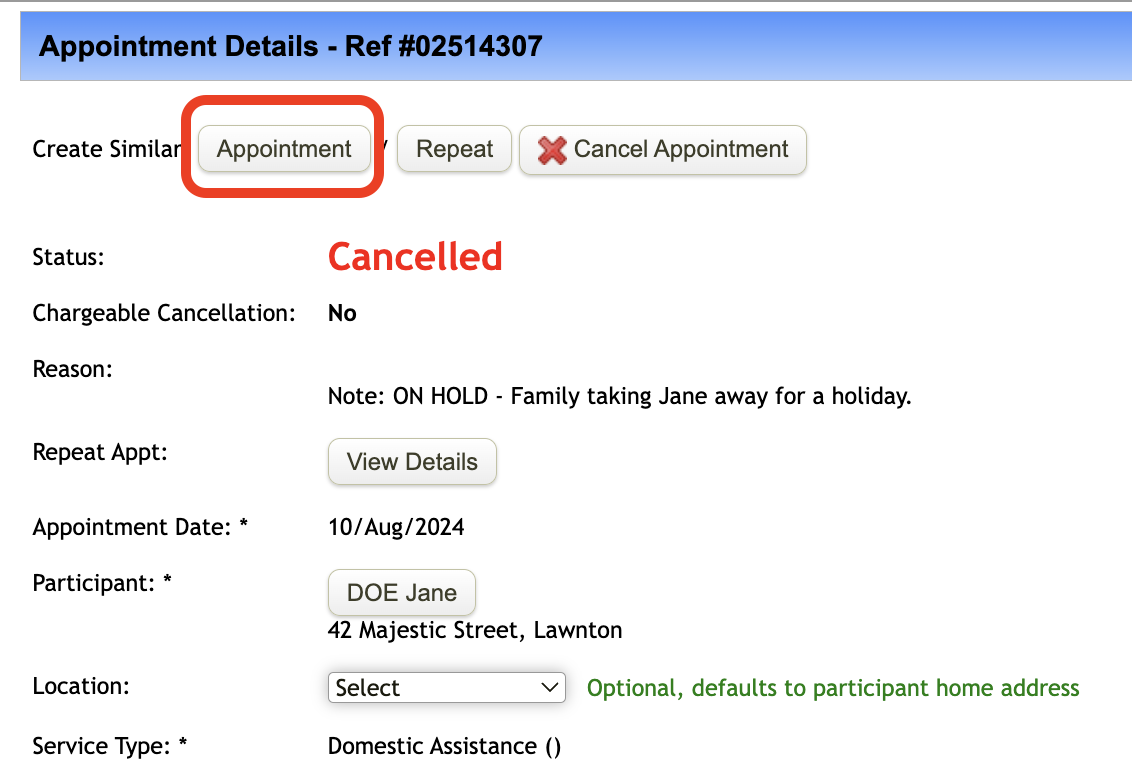
Once you have created this similar appointment, it will show up in the client calendar again.