Important to note that users are not able to edit anything once the form is successfully saved as an entry.
From the Eziplan Menu, go to Participants > Participants List.

Select any client from the list.

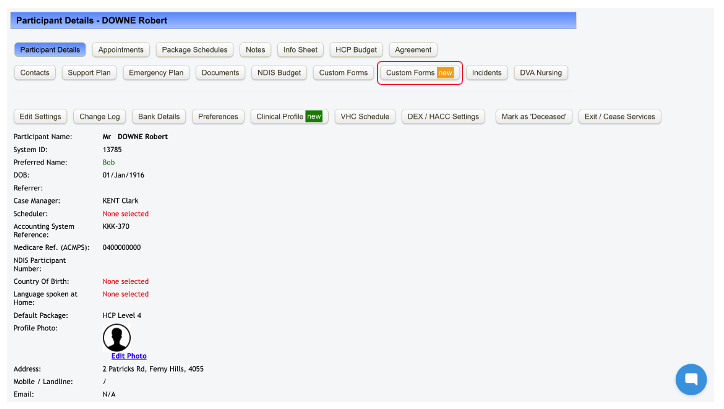
Within the Client's profile, select Custom Forms tab
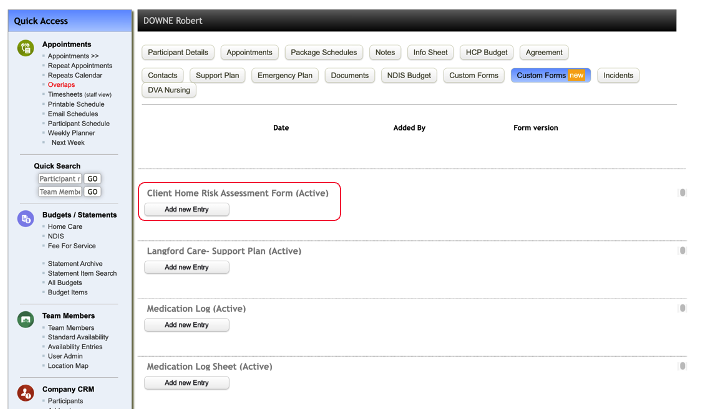
In the Custom Forms tab, you’ll find a list of all active forms. Select the desired form.
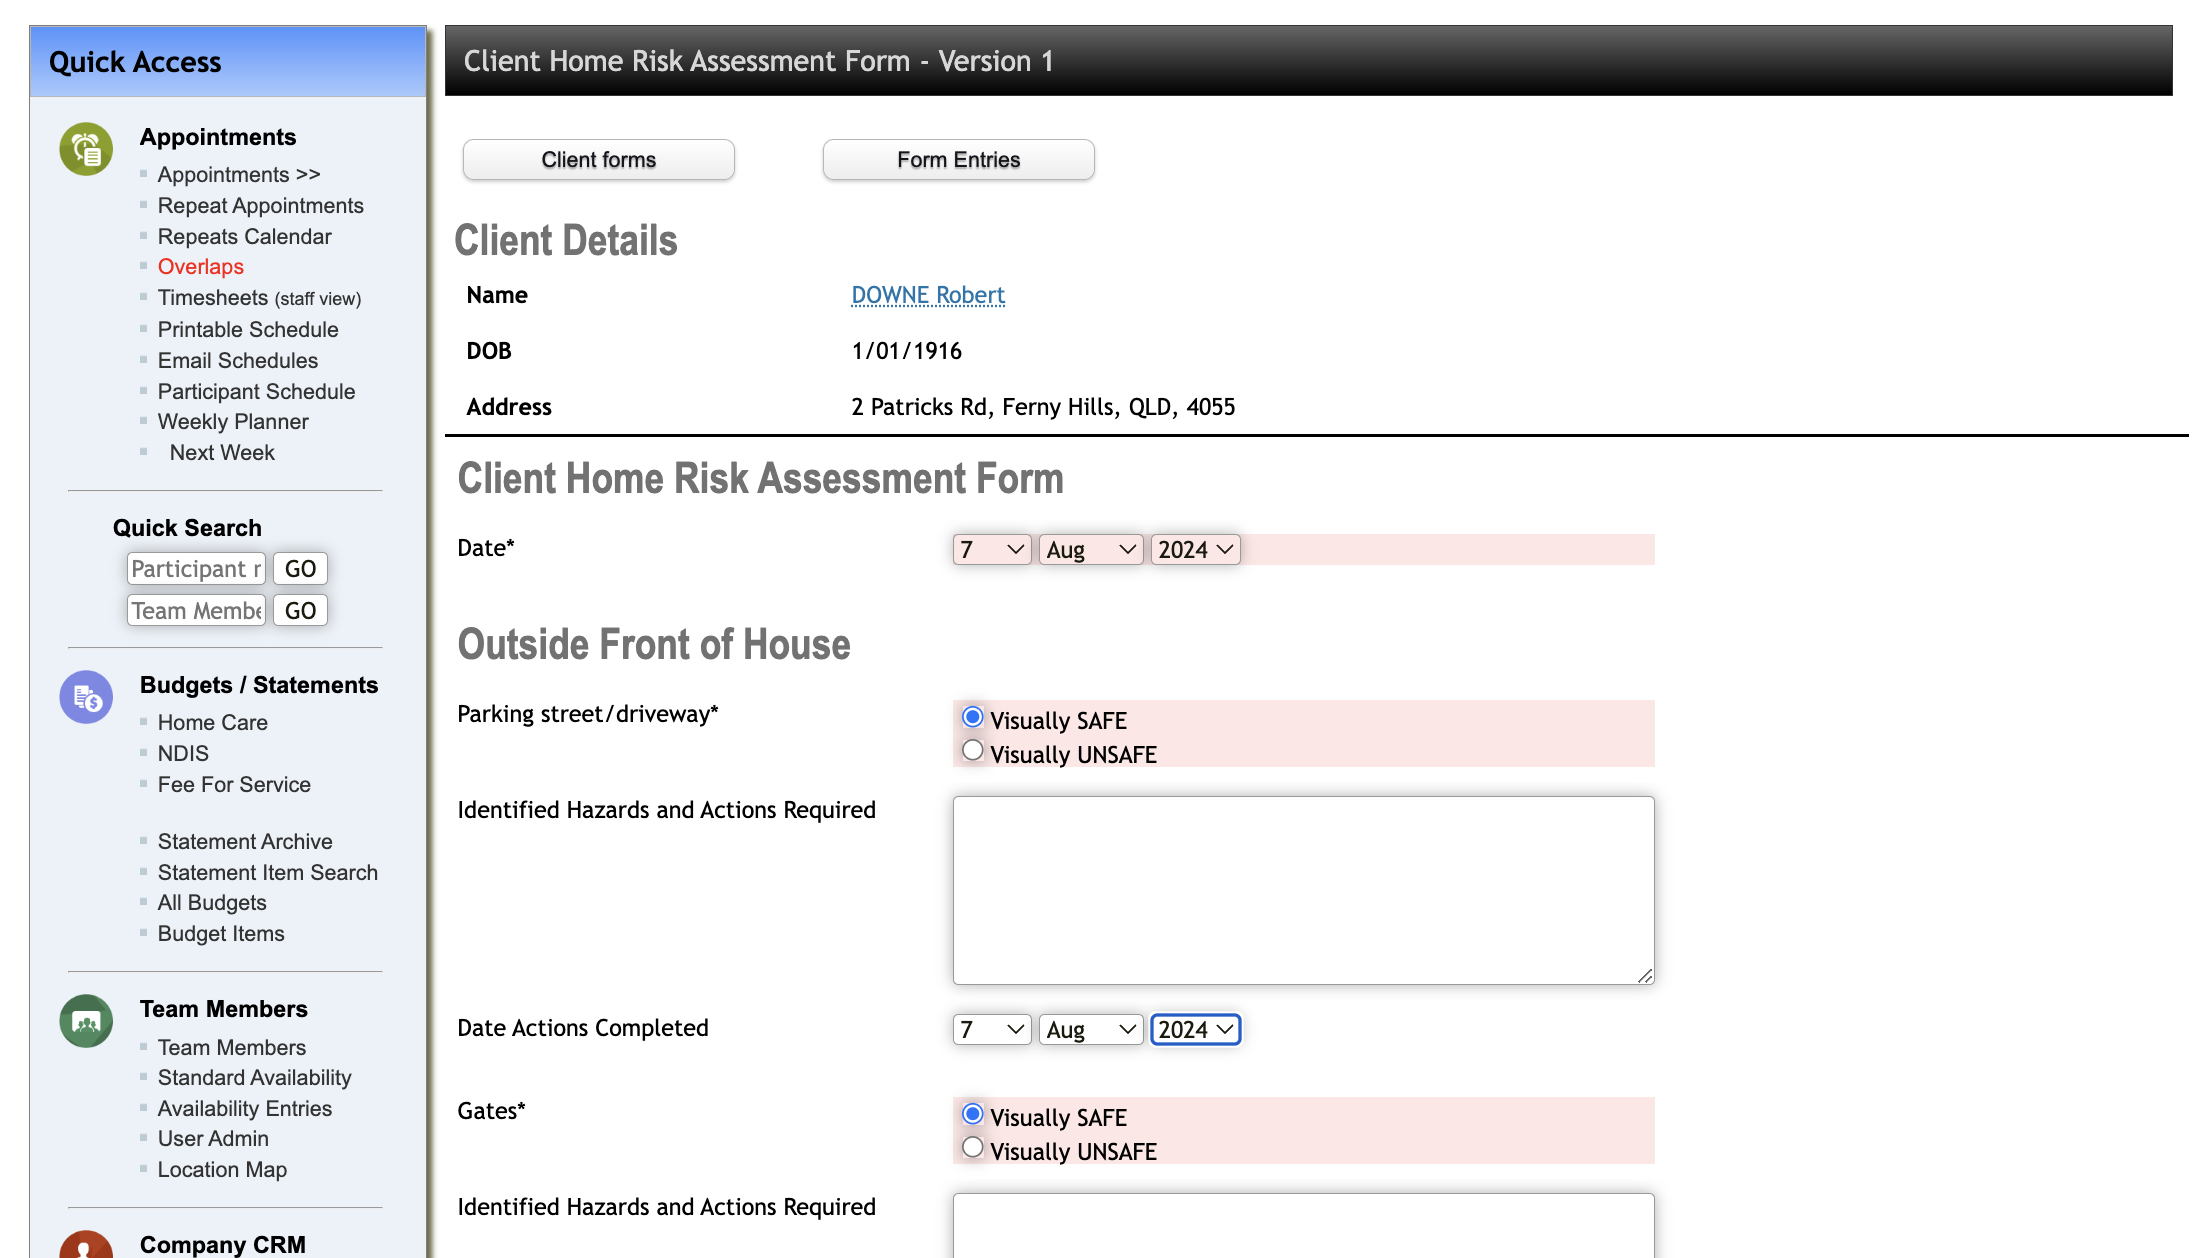
then start fill out necessary information. Once done, click Save as Entry
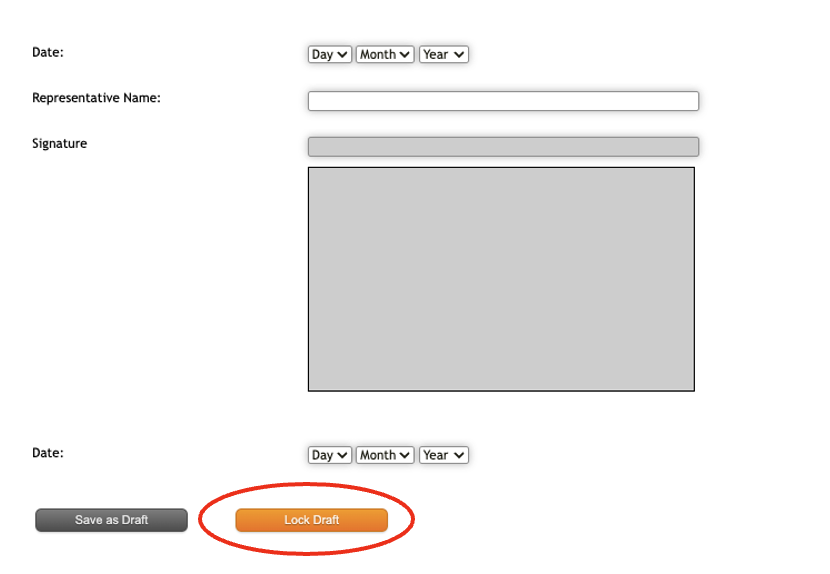
For forms with Signature/s, same process follows - fill out information needed and then click Lock Draft at the bottom.
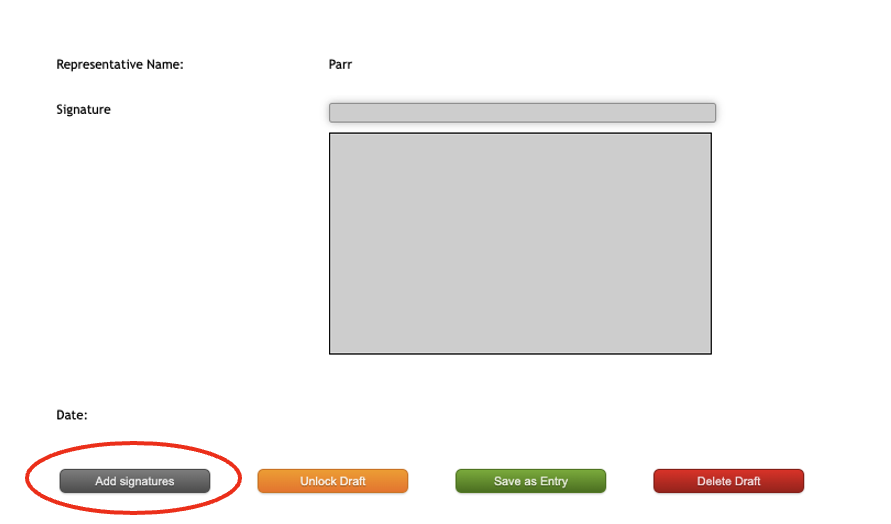
Once draft is locked, you may now add signature within Eziplan. Scroll down at the bottom and click Add Signatures tab.
If signatures are not required in Eziplan, click Lock Draft and then choose Save as Entry.
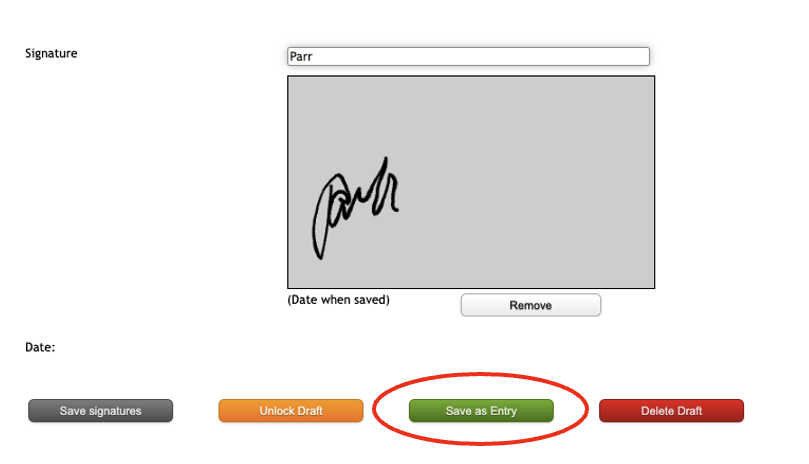
And now you have the ability to add signatures. Once signatures are added, click Set Signatures.

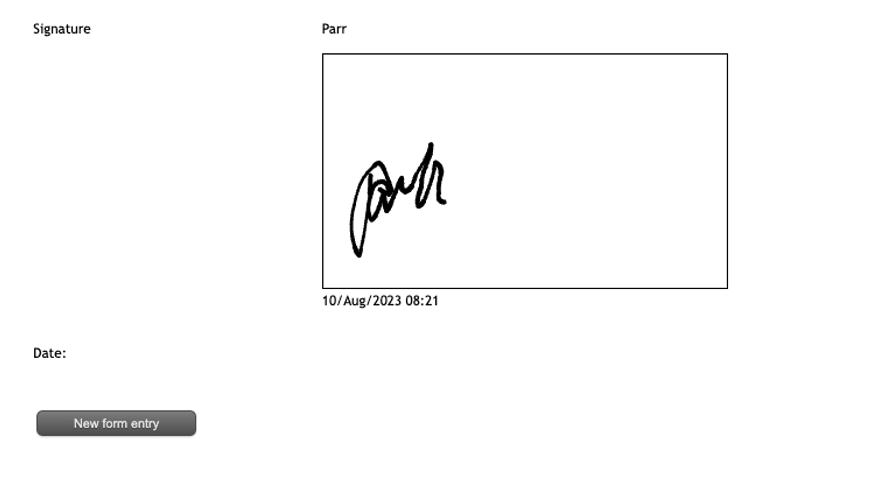
Once signatures are set, click Save Entry and you're done.
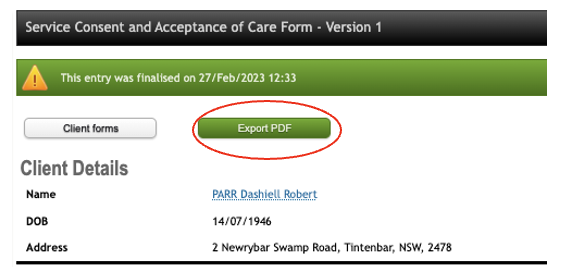
If you want a printed copy of the saved entry, scroll all the way up and click Export PDF.