From the Eziplan Menu
Billing & Claiming - Invoice Export
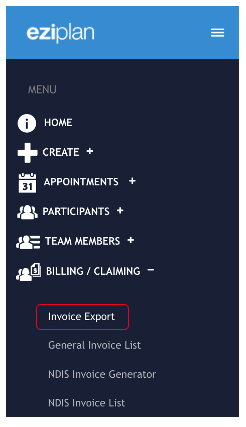
Select the data range you wish to generate invoices for and you may also filter the options by package (if you wish to choose more than one hit Expand then choose multiple options while holding the Command or Control buttons on your keyboard) and click the PREVIEW button.
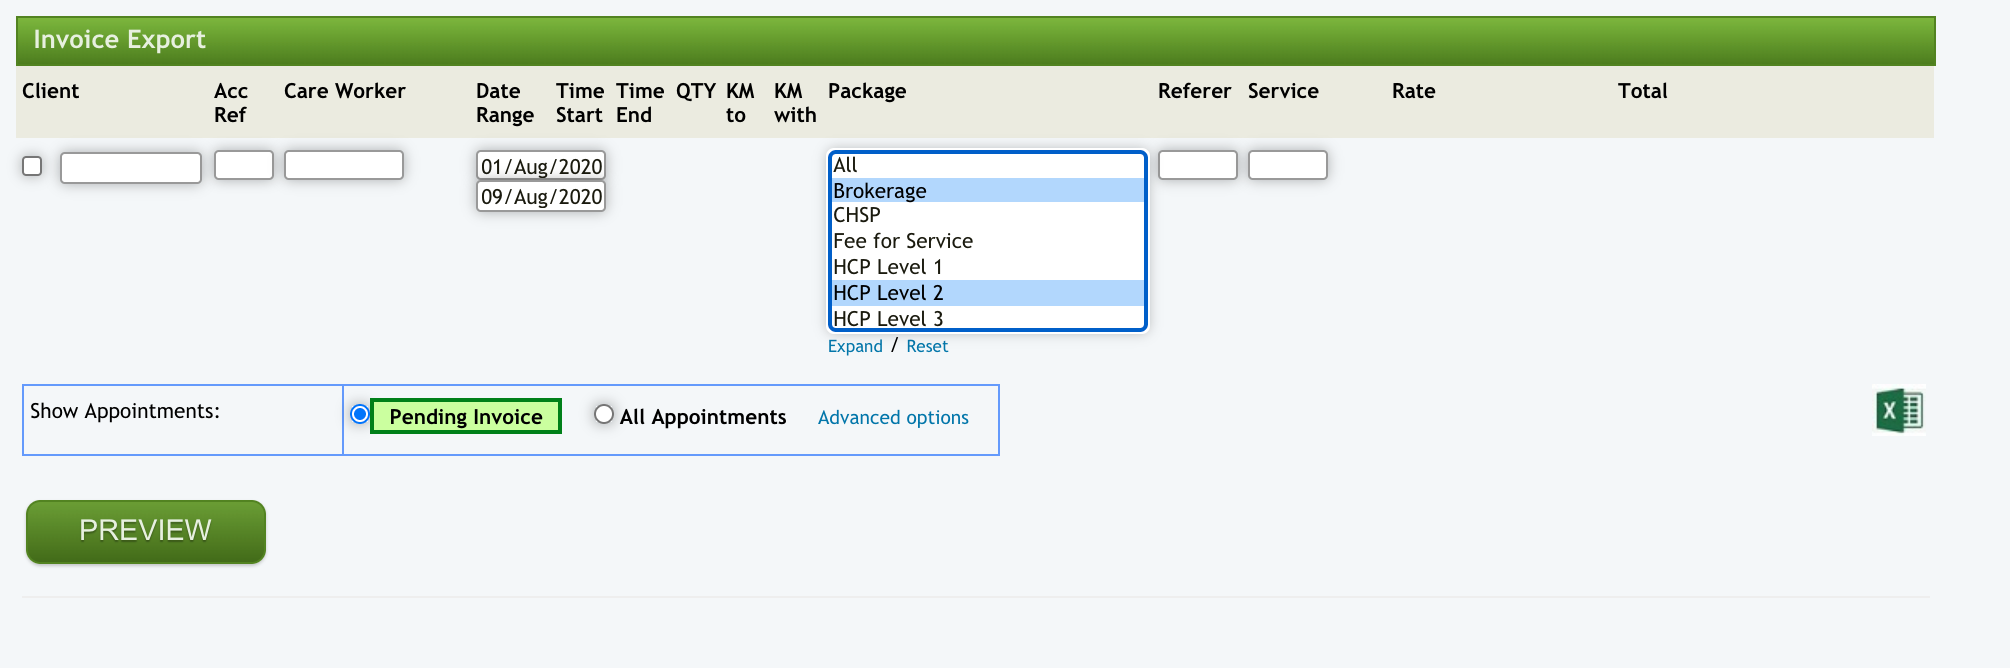
Check off the services you wish to invoice for (you can mark the check box next to the Client Search Text Box at the top to choose all services).
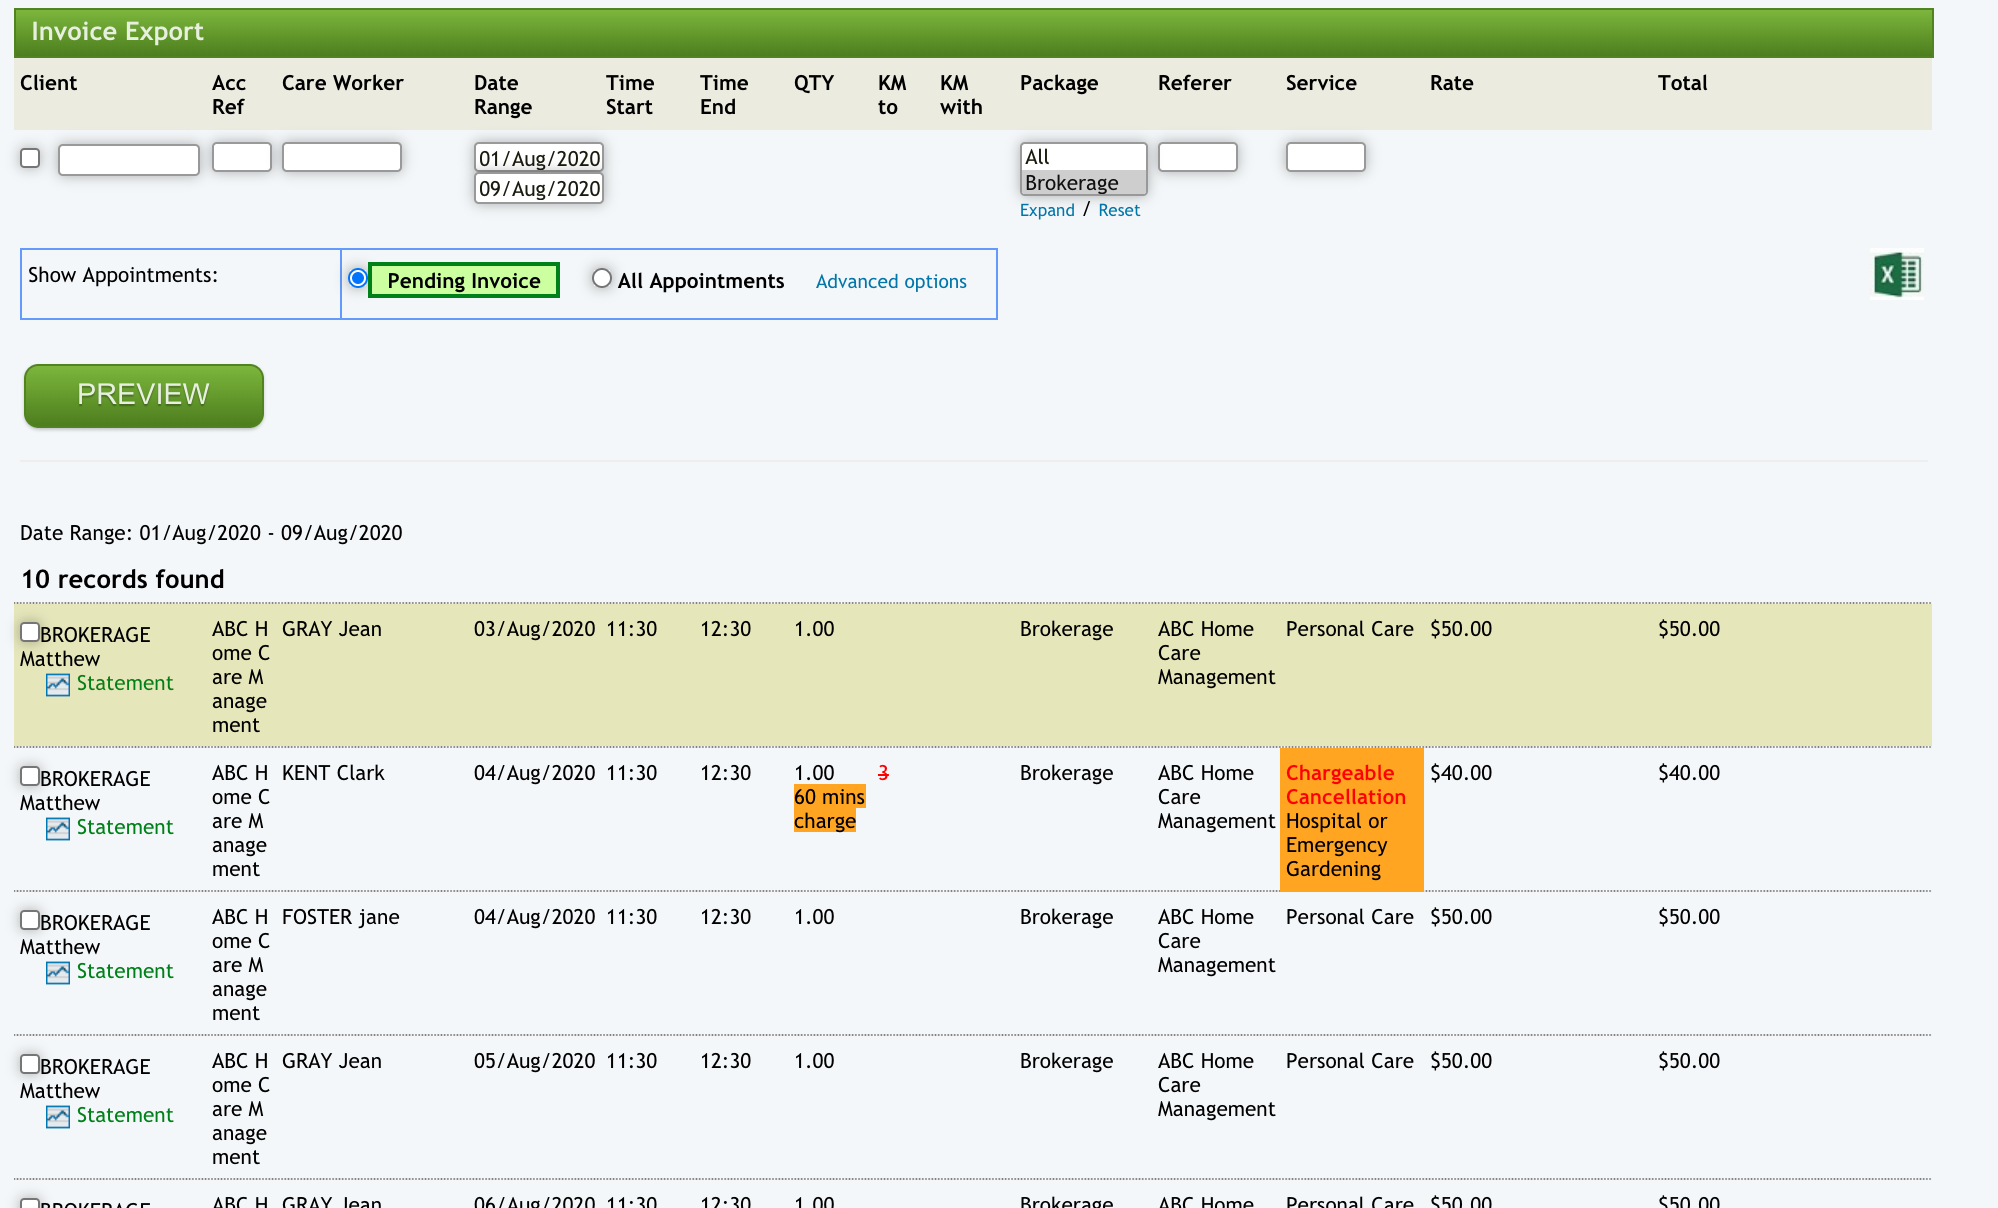
Go to the bottom of the page and check the 'Mark selected as Invoiced' option. You may also choose the Populate Statement option if you want these items sent to the HCP Statement. Then click the DOWNLOAD INVOICE FILE button.
This will generate the appropriate file to import into your Finance Software and save it to your computer for you to import when you are ready.
Important to Note
If there are any issues with your invoice import into your accounting system, or there is any modifications needed to the invoices that you have produced, you are able to export invoices again. To do this:
Do not select Pending Invoices
Select the invoices needed by using the Filter option and check All Appointments
Select the invoices needed and download the invoice file. A new invoice number will be generated against the invoice, as it does not yet exist in your accounting system
If you have previously marked POPULATE STATMENTS, then you will MANUALLY need to remove the duplicated items.
You may repeat this process as many times as needed (remembering 4 above)