Important to note that generated Invoices cannot be undone.
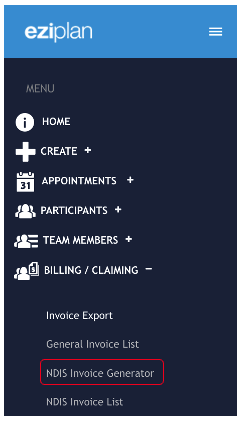
From the Eziplan Menu
Billing & Claiming - NDIS Invoice Generator
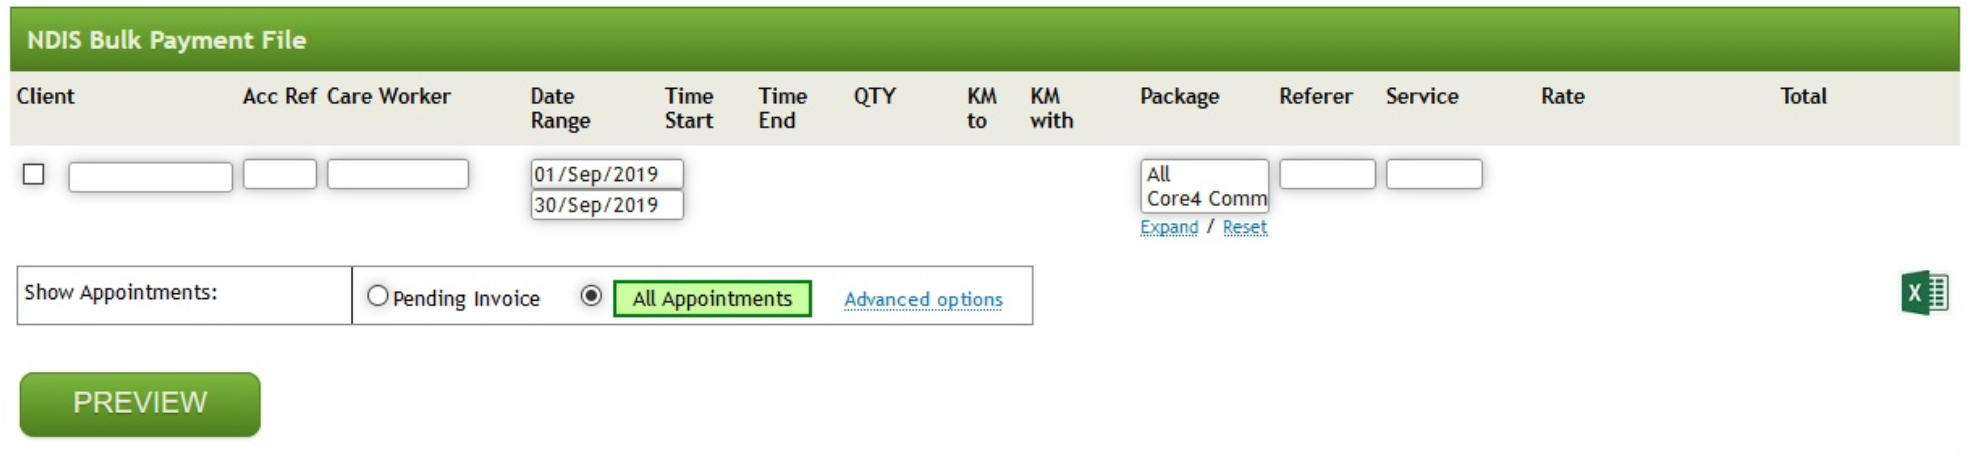
Select the data range you wish to generate invoices for and click PREVIEW.
Check off the services you wish to invoice for (you can mark the check box next to the Client Search Text Box at the top to choose all services).
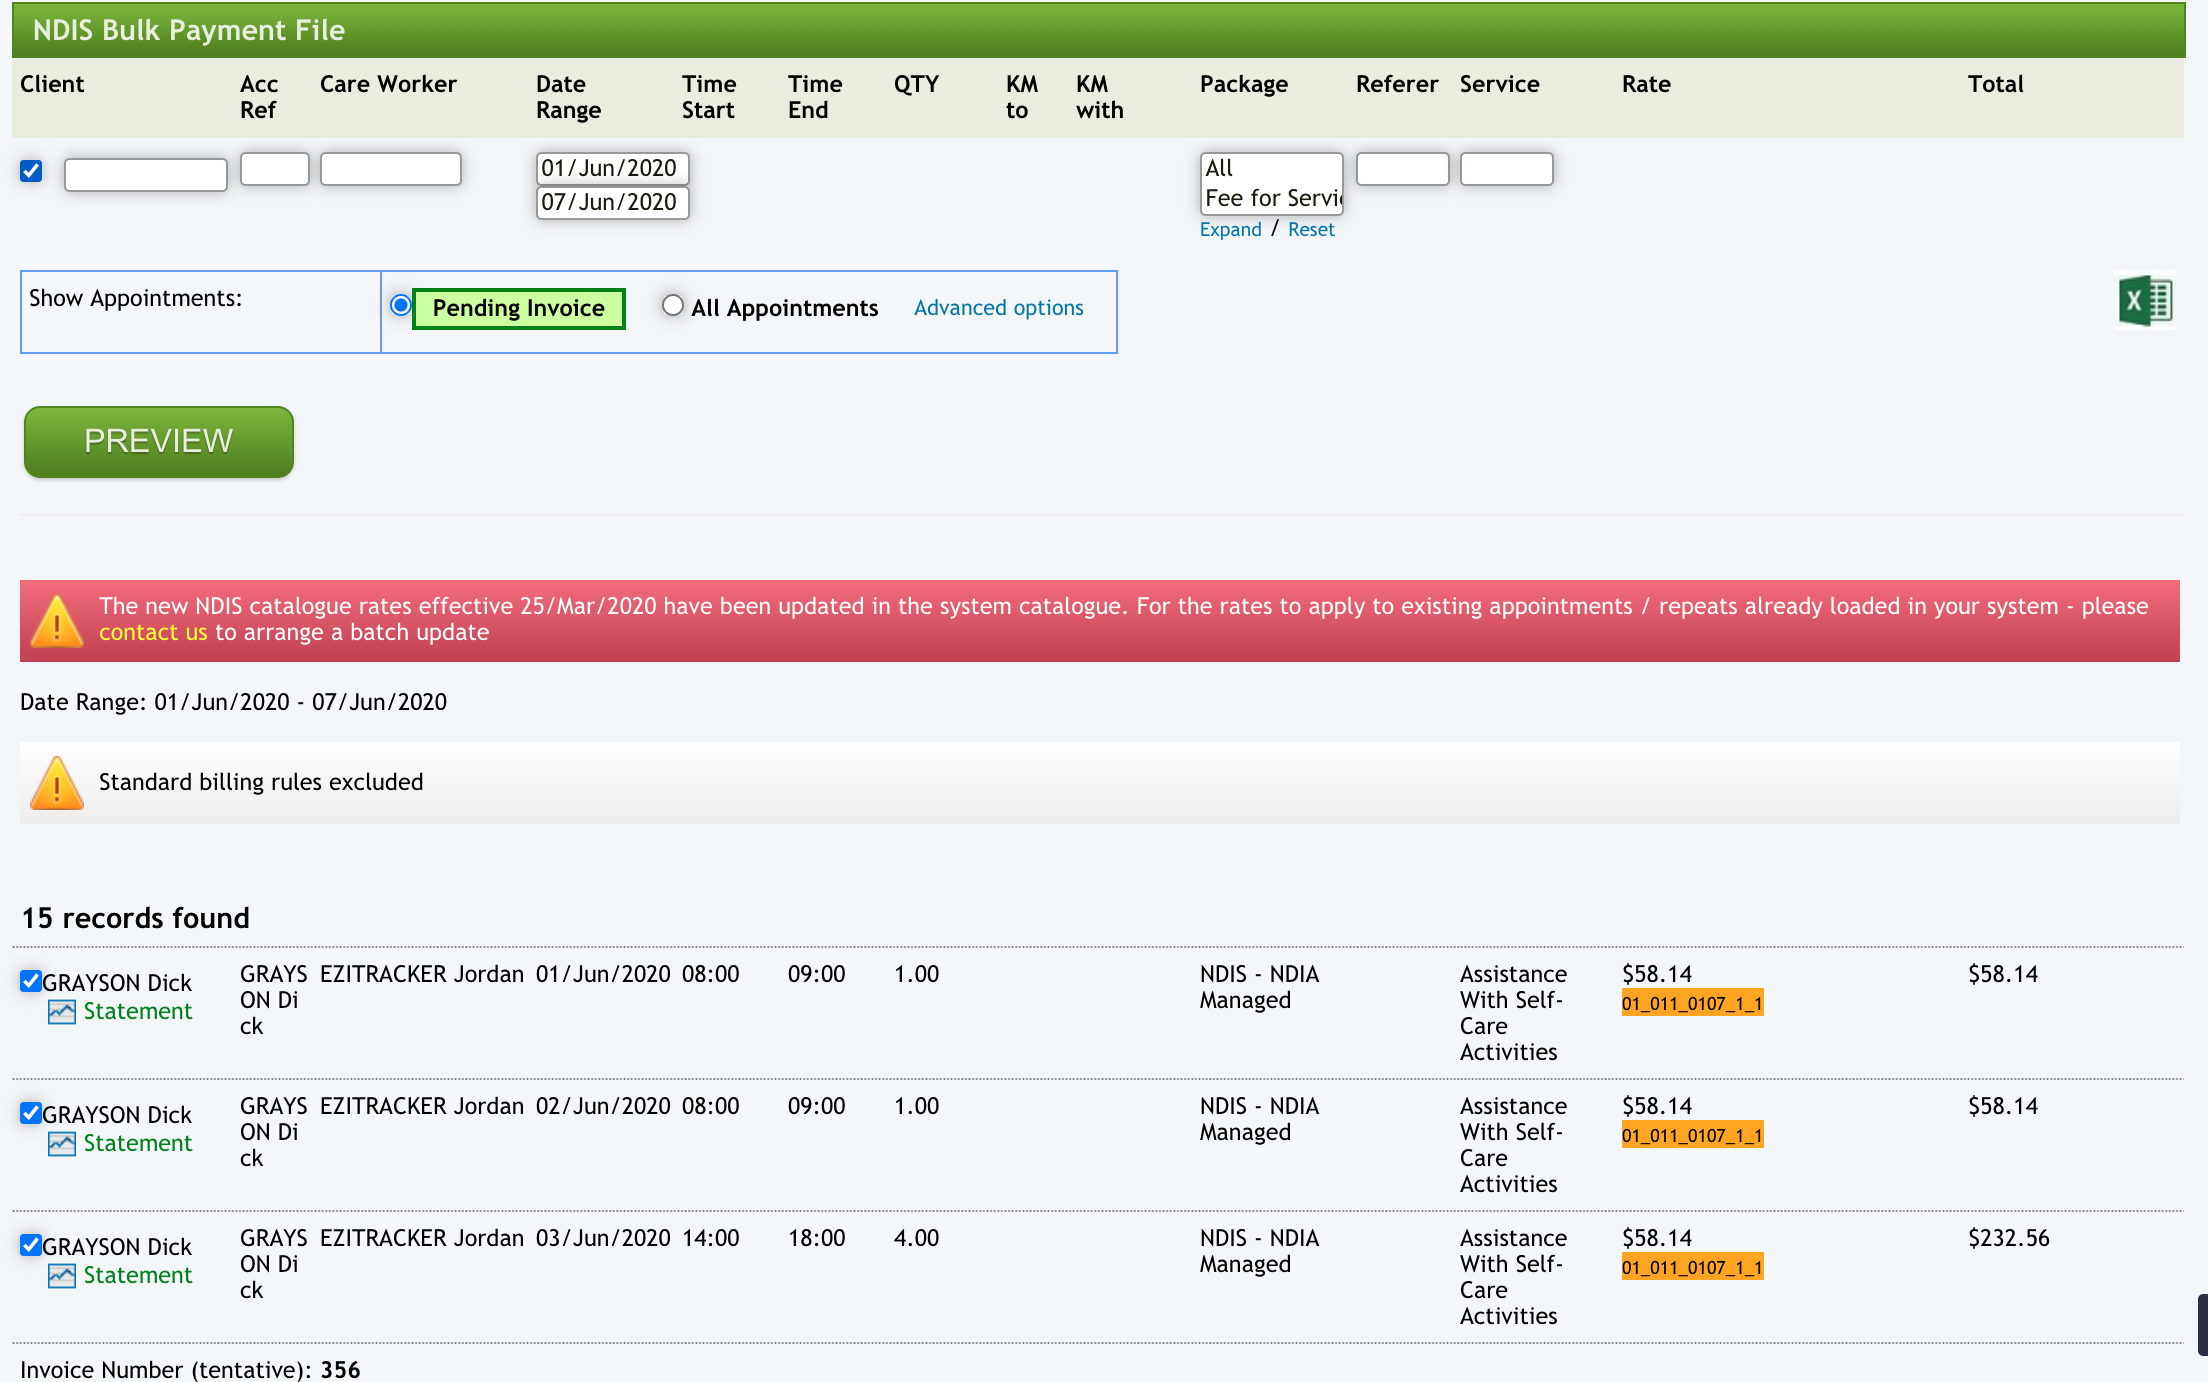
Go to the bottom of the page and check the 'Mark selected as Invoiced' option and click GENERATE INVOICES button.

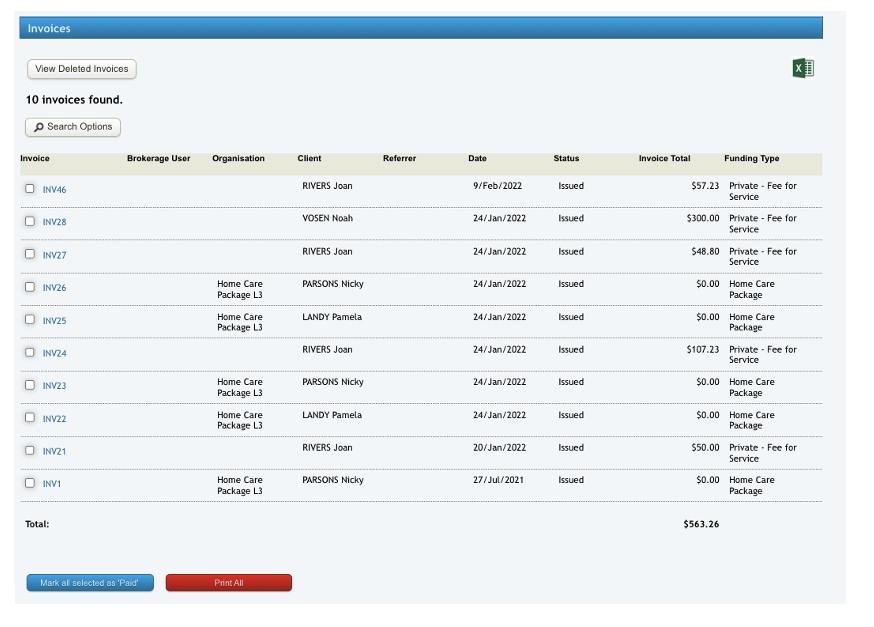
Your invoices can now be found on the NDIS Invoice List.
To delete an Invoice:
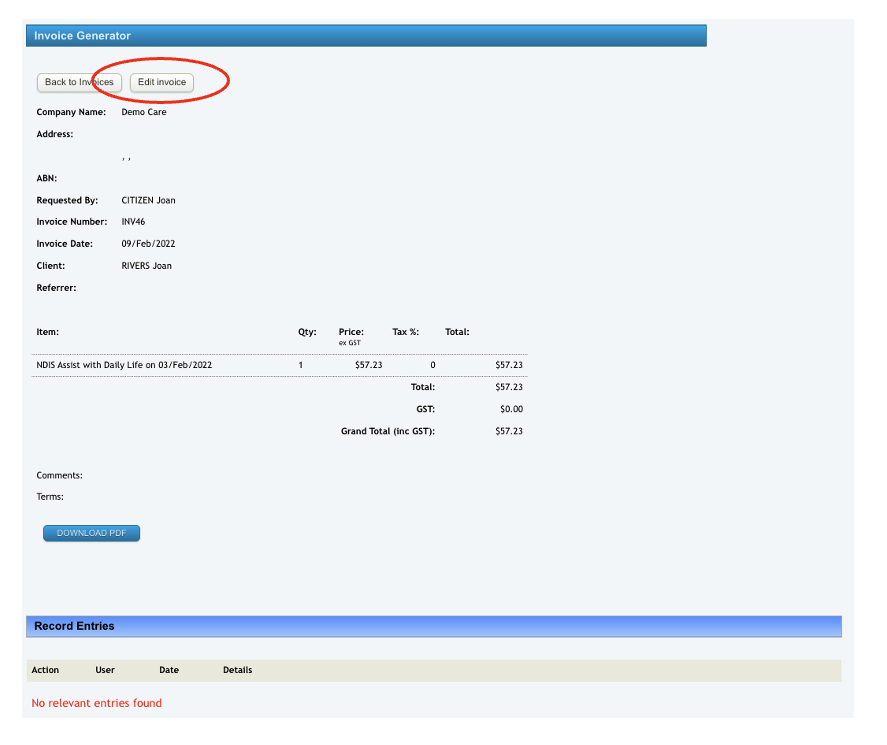
From the Eziplan Menu, go to Billing / Claiming > choose General Invoice List or NDIS Invoice List (whichever is applicable) then choose a specific invoice
Once in there, click Edit Invoice
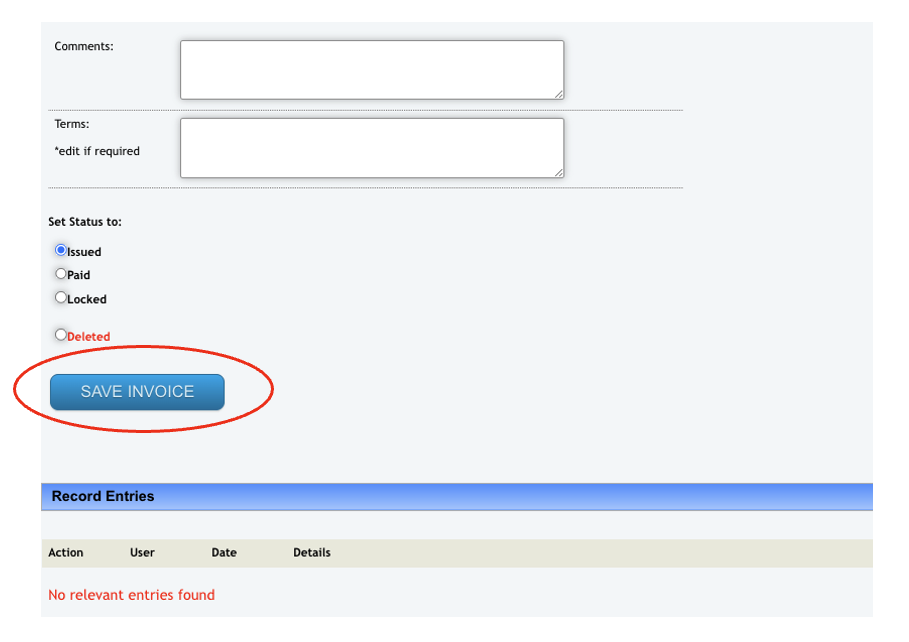
Scroll to the bottom, choose 'Delete' and then 'Save Invoice'
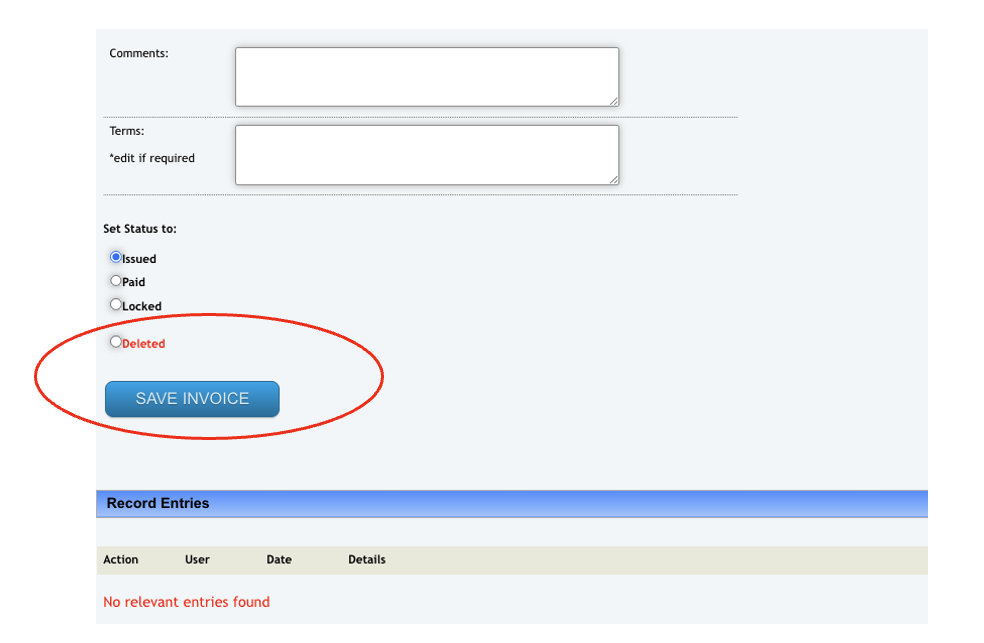
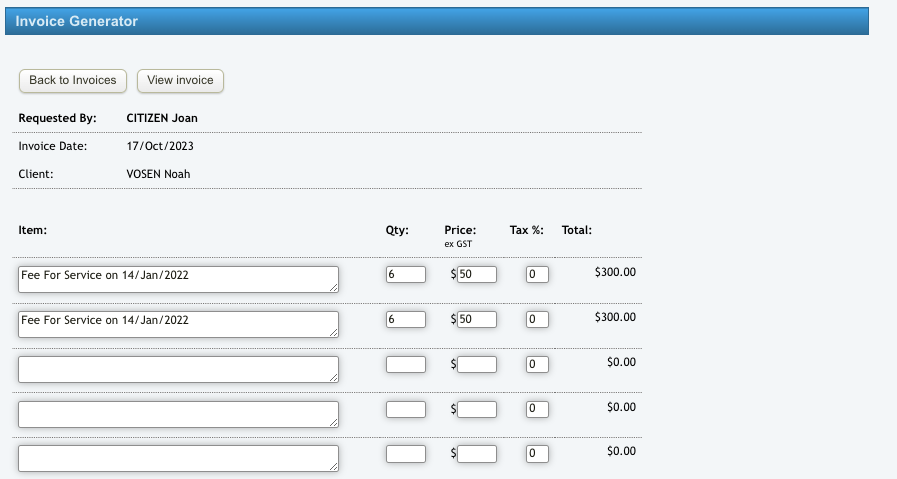
As a company admin user with Accounts access, you have the ability to change the status of an invoice from Paid to Locked, and remove or add items. Follow the same process as above and once in that specific invoice, you will be directed in this page.
Once changes are applied, scroll to the bottom and then click Save Invoice
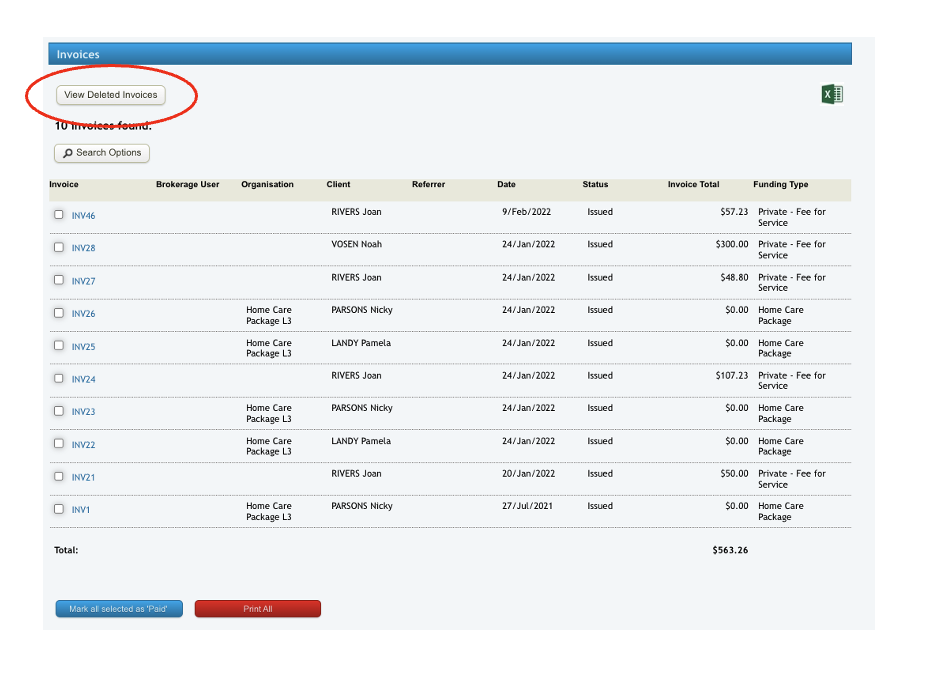
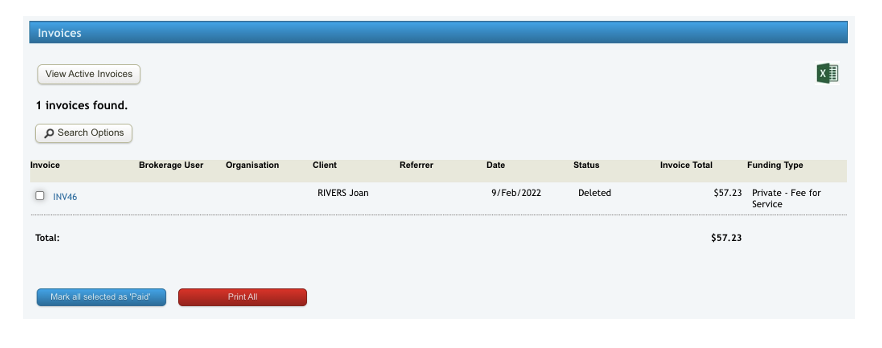
To retrieve deleted invoices, click View Deleted Invoices
And it will direct you to the page of invoices that have been deleted.
An audit trail is available to keep track of the changes and the person who made the changes to an Invoice.
