Weekly Planner Basics
The default view for a schedule update in progress is shown below:
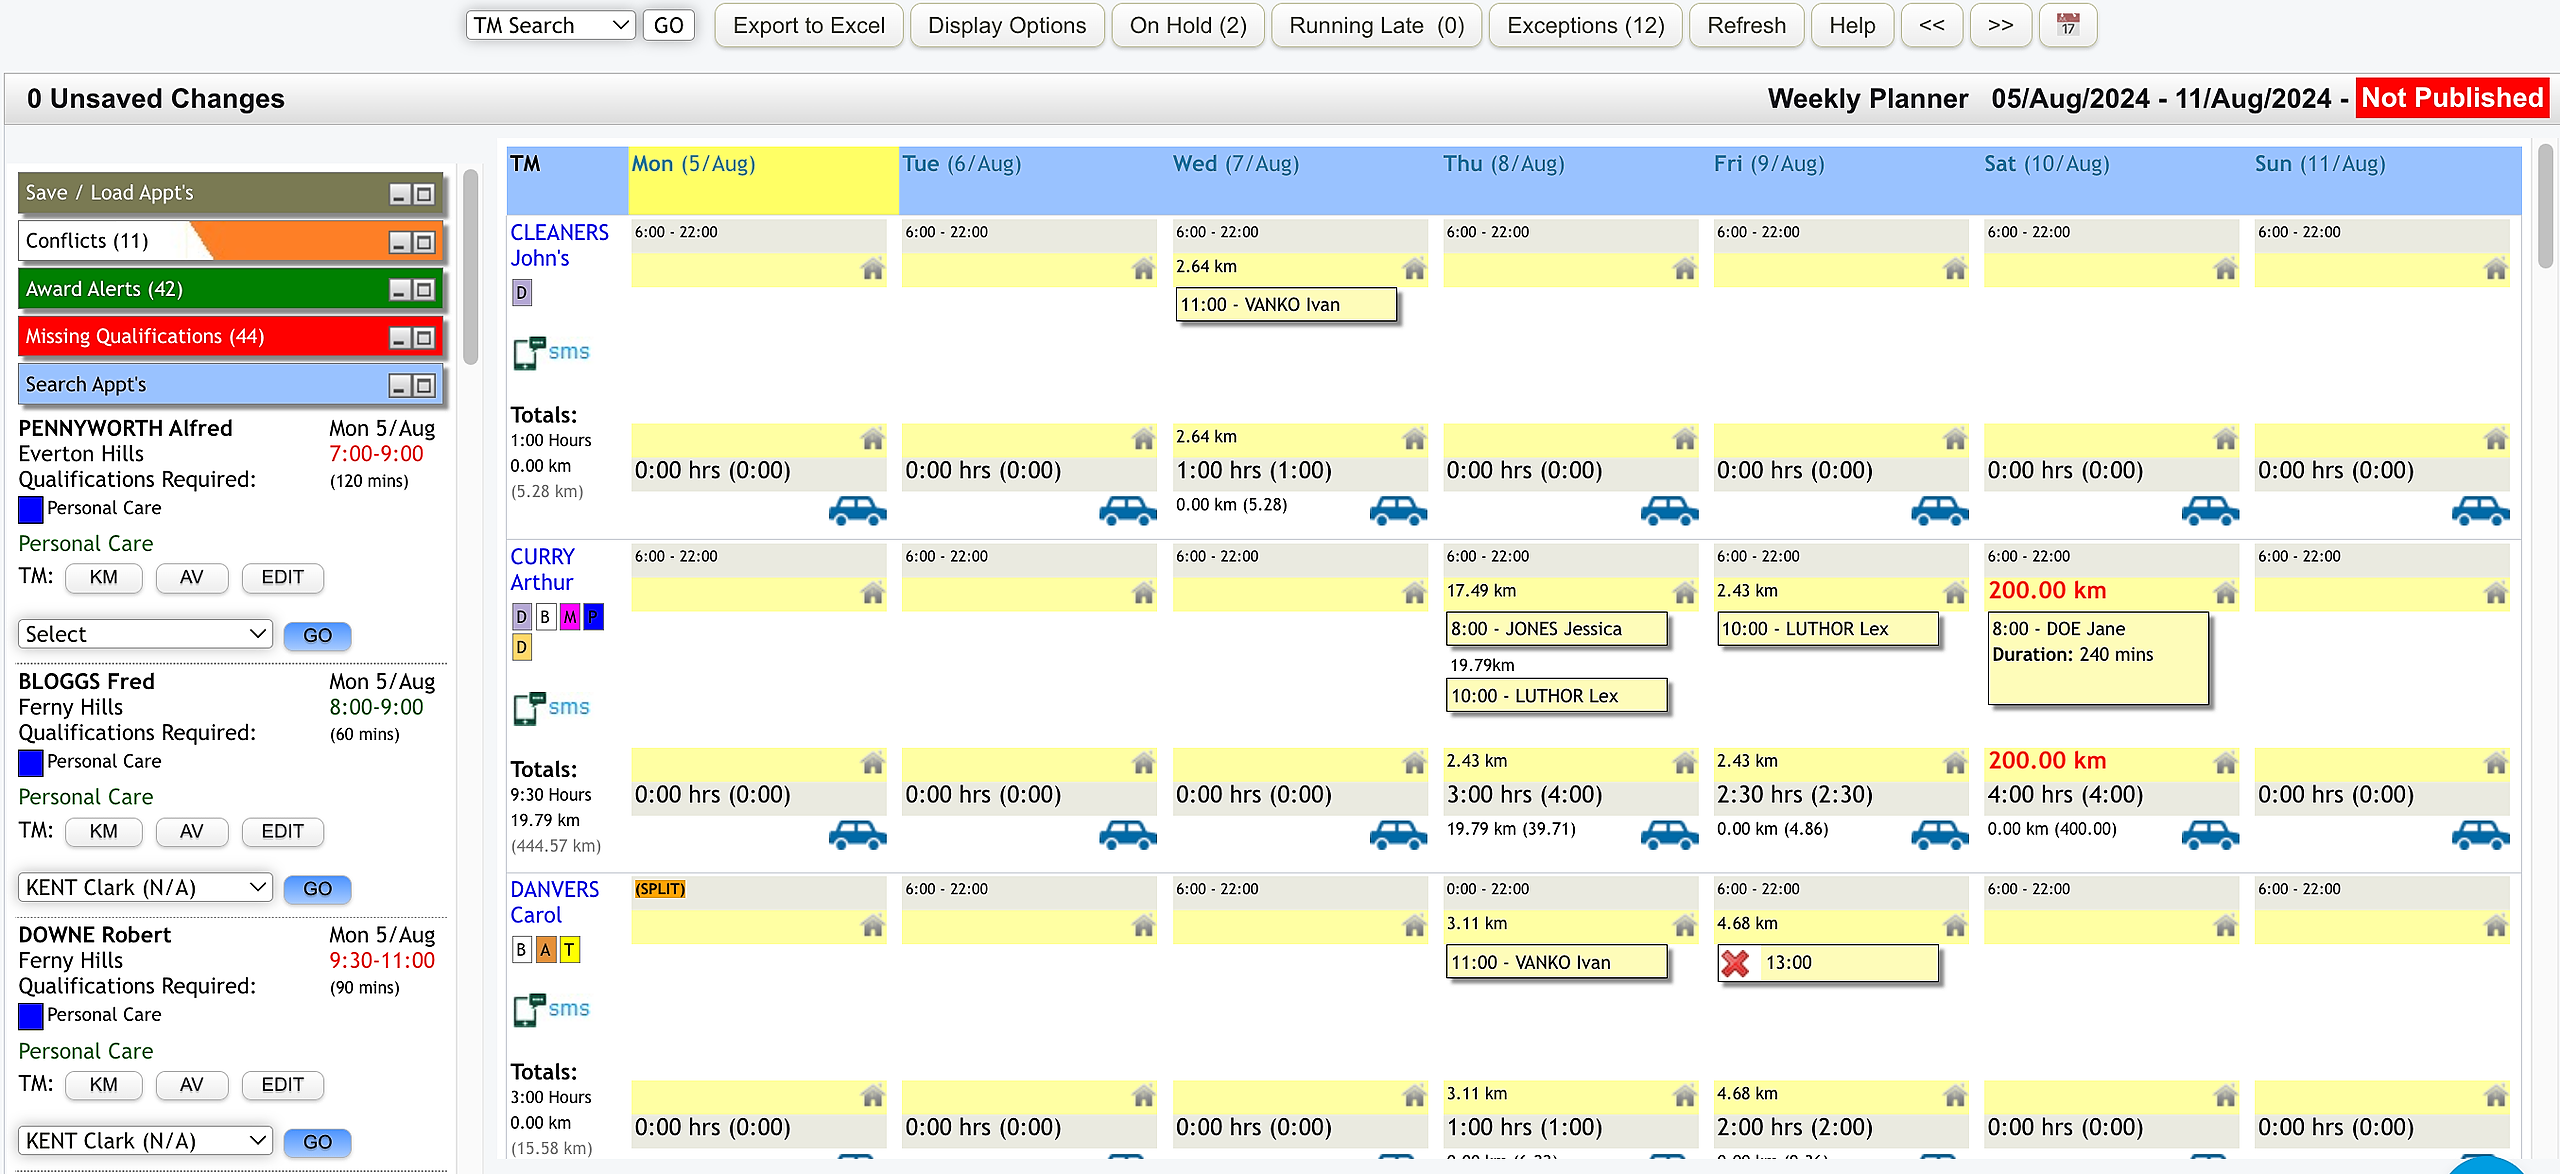
Control over updates to the weekly planner is facilitated by several vertical tabs in the side panel.
Appointments yet to be allocated to a Care Worker are listed under the 'Search Appt's' tab.
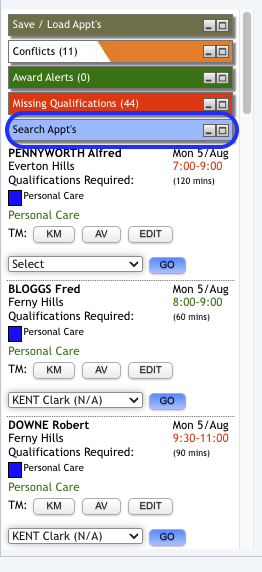
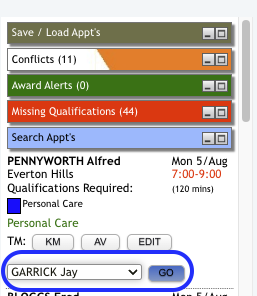
To resolve these appointments, allocation to a staff member can be done in a number of ways:
1. Selecting a worker from the drop down list and clicking on 'Go'
2. Looking at which workers are located close to the appointment by clicking on the 'KM' button
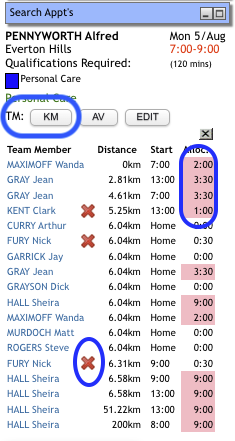
Workers with a red cross do not match the client preferences. The list shows the distance the workers will have to travel to get to the appointment, available time and their allocated hours that day already. If the “allocated hours” is pink, then the care worker already has an overlapping appointment. They are included in case there is a preferable, more efficient option to move an appointment to accommodate this new one.
3. Looking at a list of which workers are available at the time of the appointment by clicking on the 'AV' button
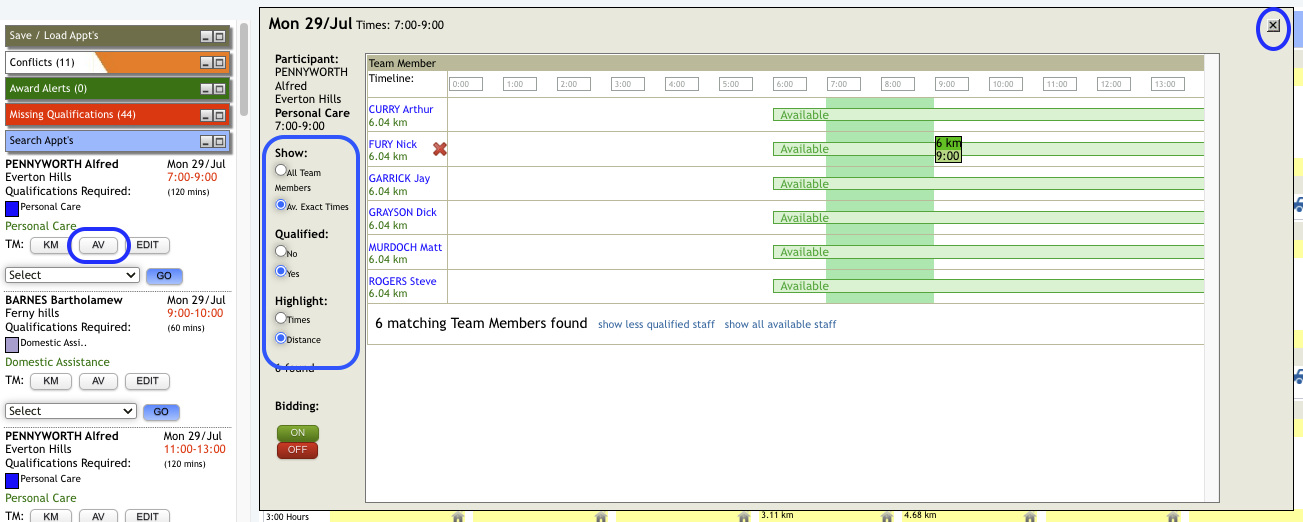
This selection changes the main view to show all Care Workers and their availability on an expanded daily view. Again, the red cross indicates workers who do not meet the client's preferences. The travel distance is shown under each worker's name. There are also several options to filter and adjust the view, showing all care workers, qualified only, and times rather than distance. To allocate from this screen, hover over the worker's name you wish to allocate to, a window will pop up and then you can click on allocate.
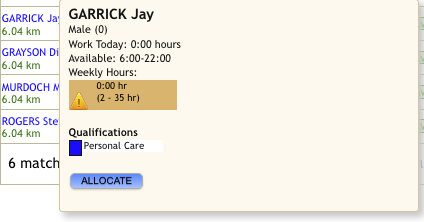
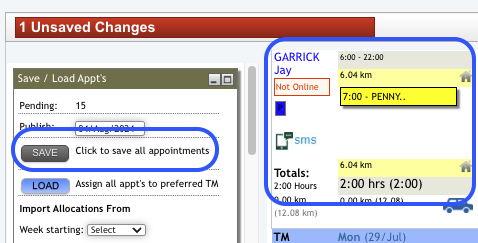
This will move the appointment into the roster for that worker, remember to click on 'Save' to save this change.
Move on to Rostering Basics 2: Save/Load Appointments to learn how to add the Repeat appointments that have Preferred Staff Allocated, in bulk and save your roster.