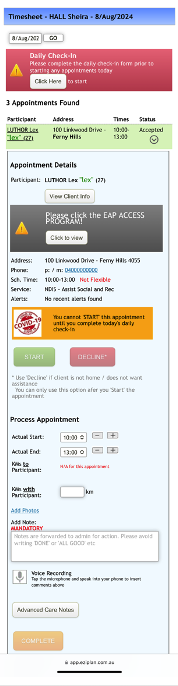
You can upload photos relevant to your appointment - such as receipts - using the Eziplan Mobile Web App. To do this, you will need to go to your Timesheet ('Daily Timesheets') in the top menu bar:
From here, you will see a list of appointments that make up your Timesheet:
If Daily Check-in is enabled for your organisation, this needs to be filled out before commencing on your shifts.

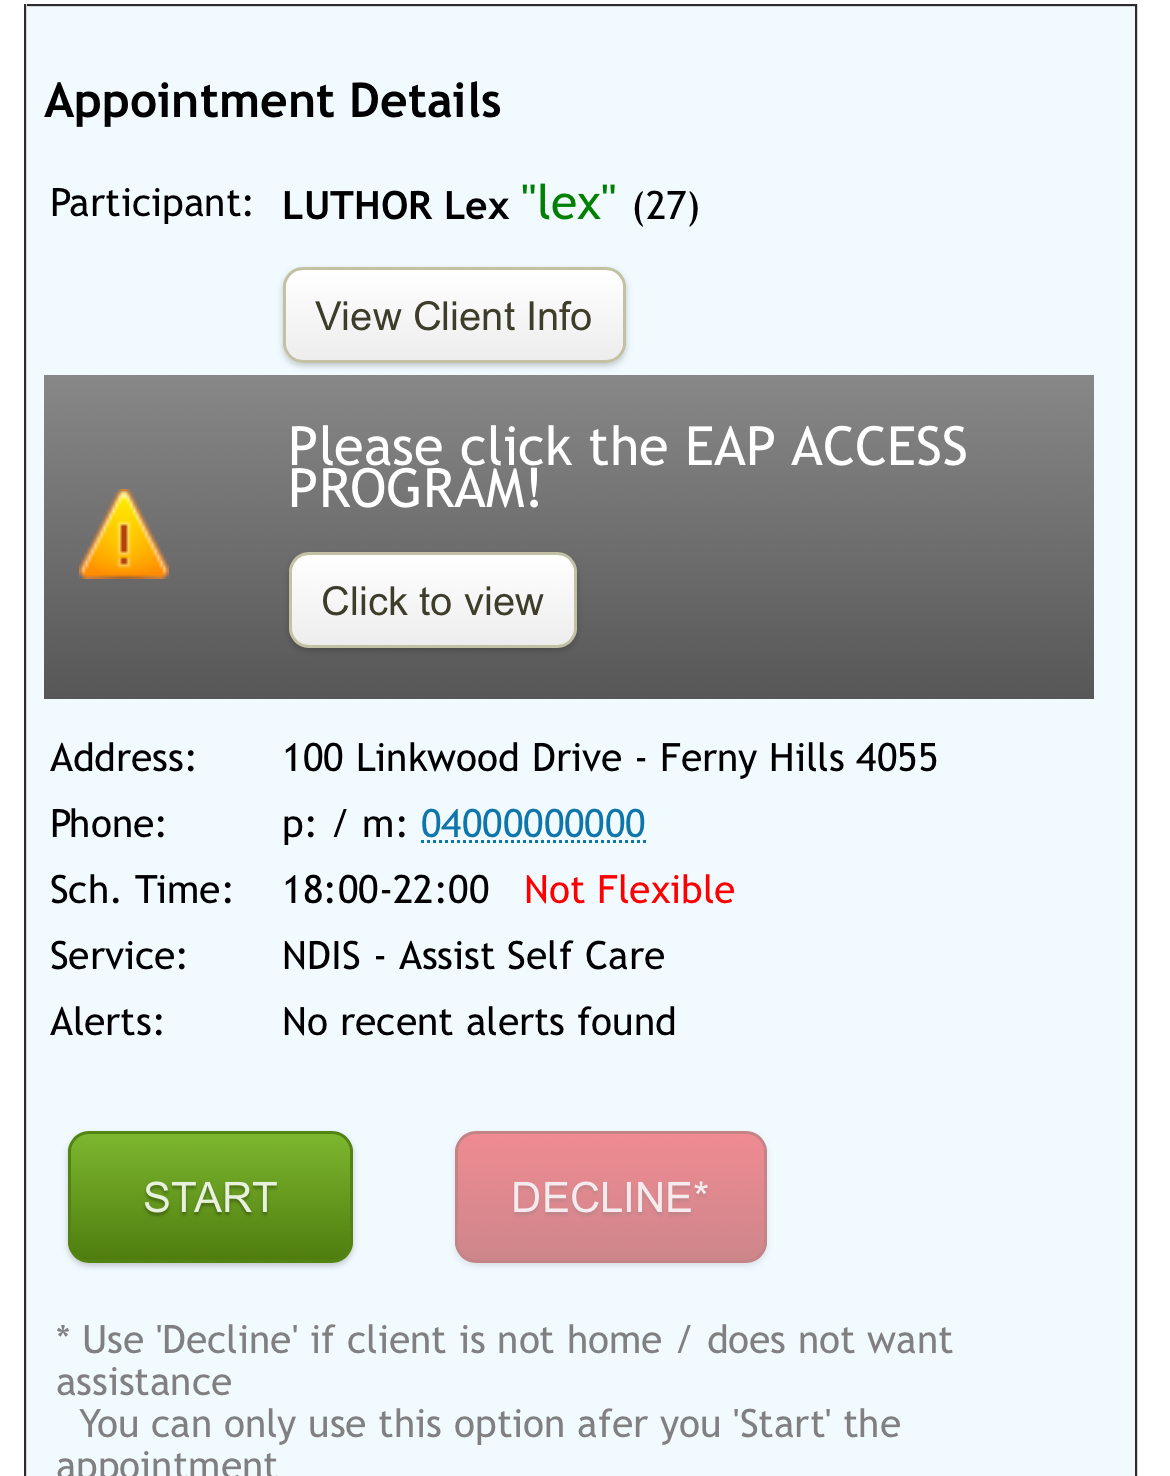
To be able to see more information about this appointment and action it, you need to click the arrow under Status to expand and display the appointment details.
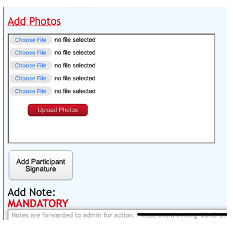
Tap the Add Photos link
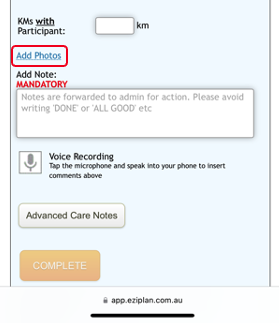
then tap Choose File. Take a photo directly from your device and then tap Upload Photos.
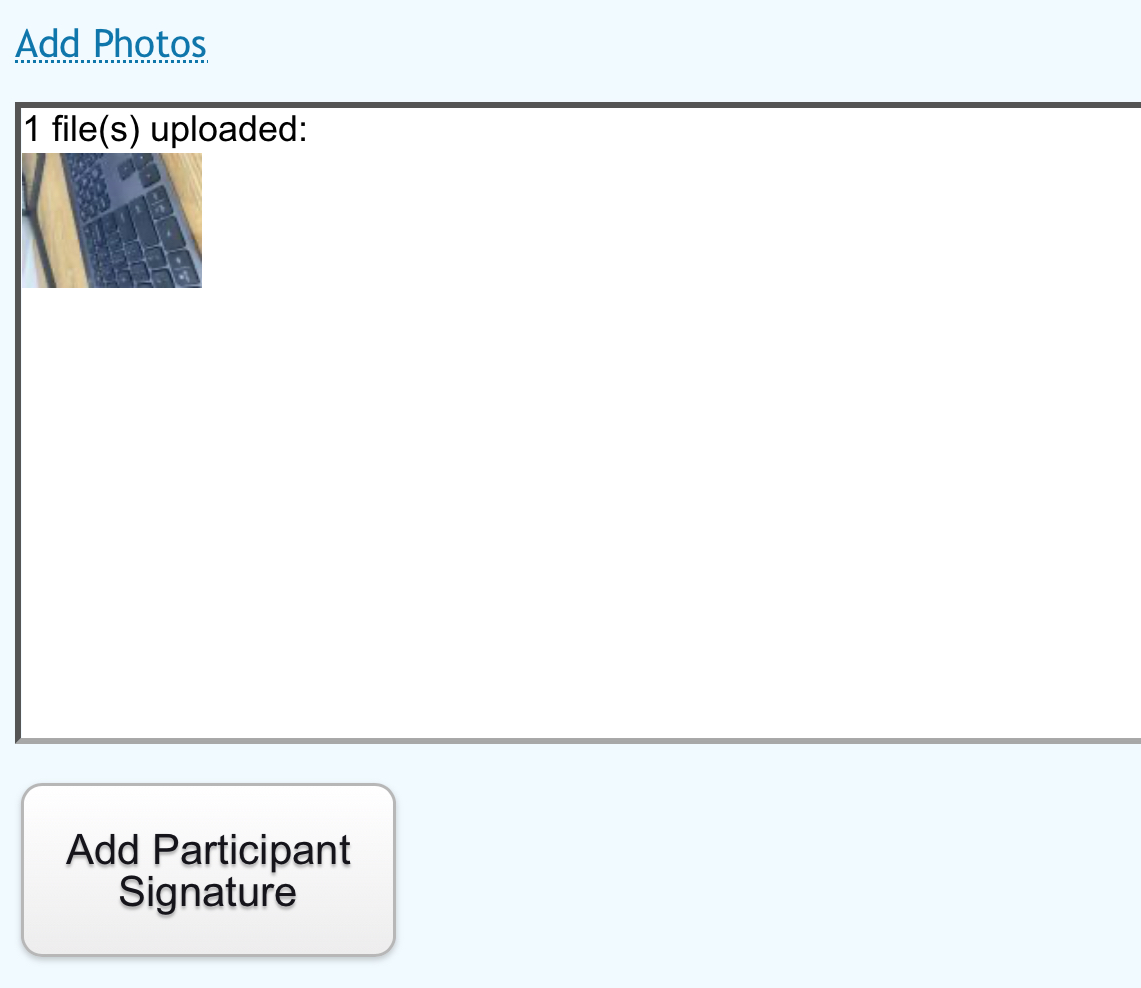
The uploaded photo will then appear in the box under Add Photos, and you'll receive a confirmation message indicating “[number] file(s) uploaded.”
Only once you hit the Complete button at the bottom of the Timesheet will the photo be uploaded in the Eziplan system permanently for System Admin users to view:
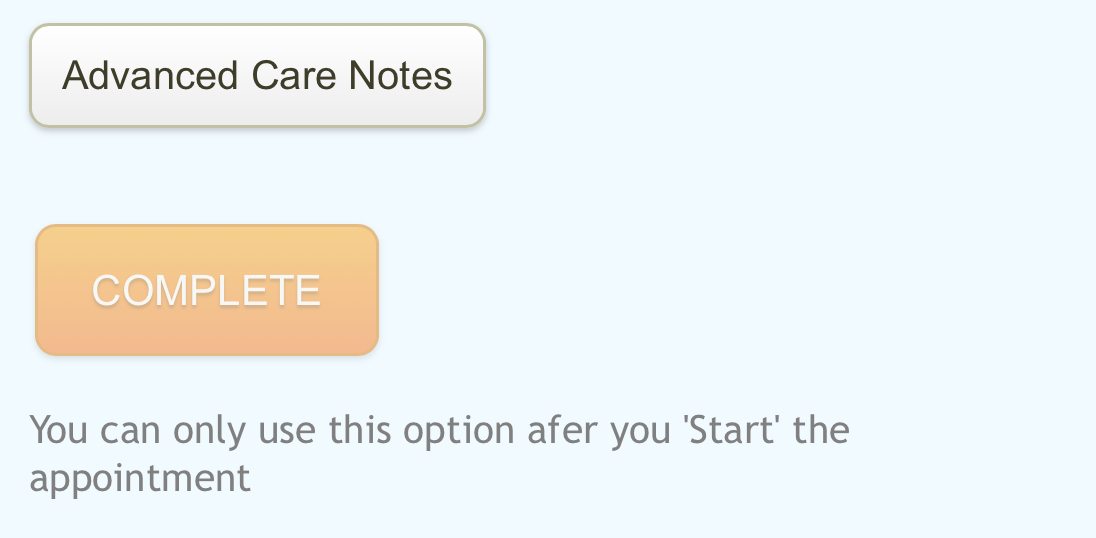
Note that the Complete button is only accessible if you have commenced your appointment by clicking Start under Appointment Details