Once an incident report is started, whether by a Mobile Staff member or an administrator, there is a process in Eziplan to receive, review and resolve the incident.
Case Managers - Admin staff that are marked as the client's Case Manager in their Client Profile.
Authorised Staff - Administrators that are given the permissions to Resolve Incidents. To grant this authorisation you need to contact the Ezihealth Support Team through the Help Desk with the list of appropriate staff.
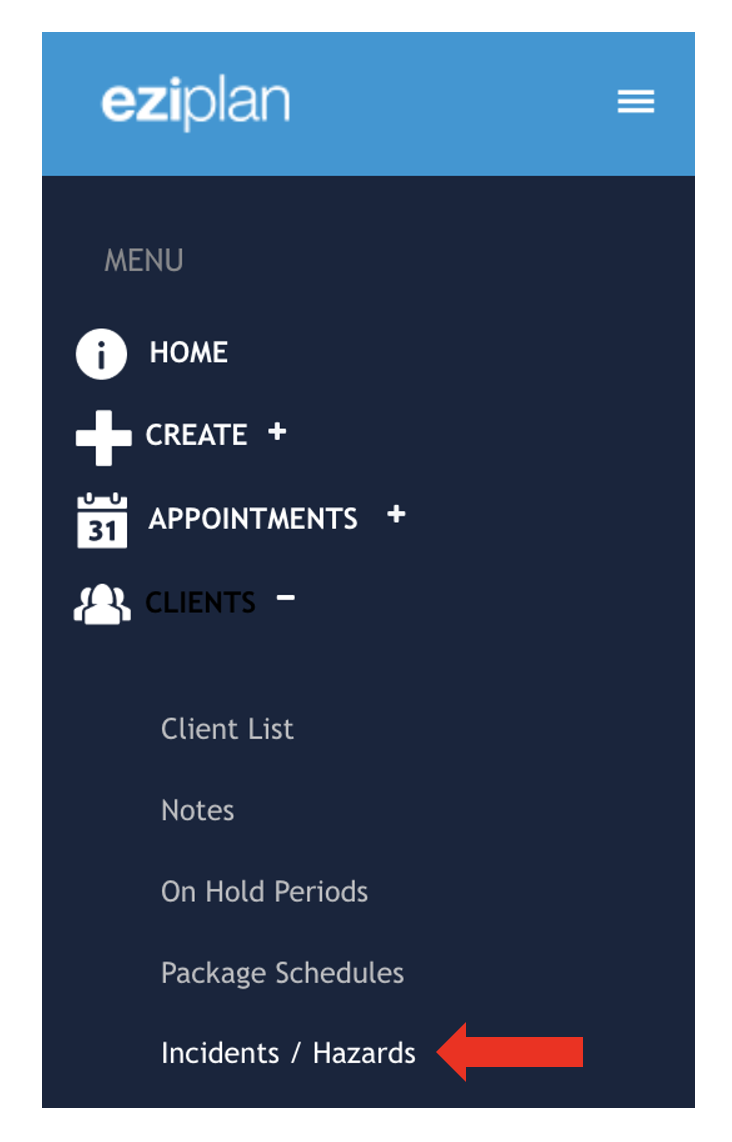
Receiving an Incident Report
After an incident is added, all authorised staff and the client's Case Manager will be notified by email of an incident form having been started. The incident Status at this stage is 'Added' and Mobile Staff can still make changes to the initial report.
Reviewing an Incident
Once the incident is received, Authorised staff or Case Managers can access the Report from the link in the email or by going to the Incident/Hazard list in the Eziplan Online Portal.
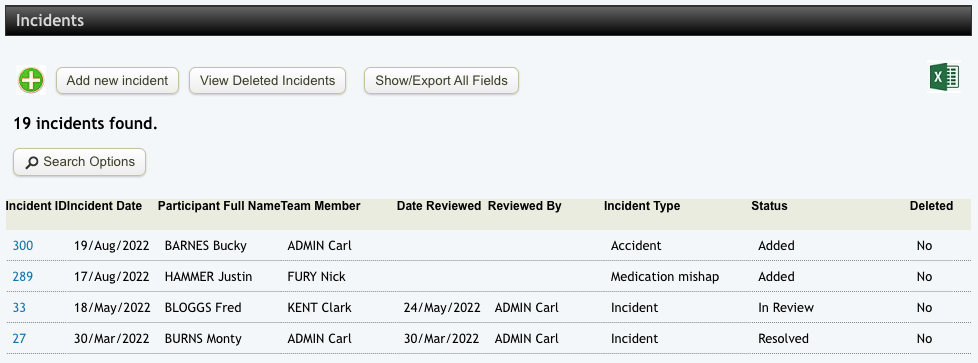
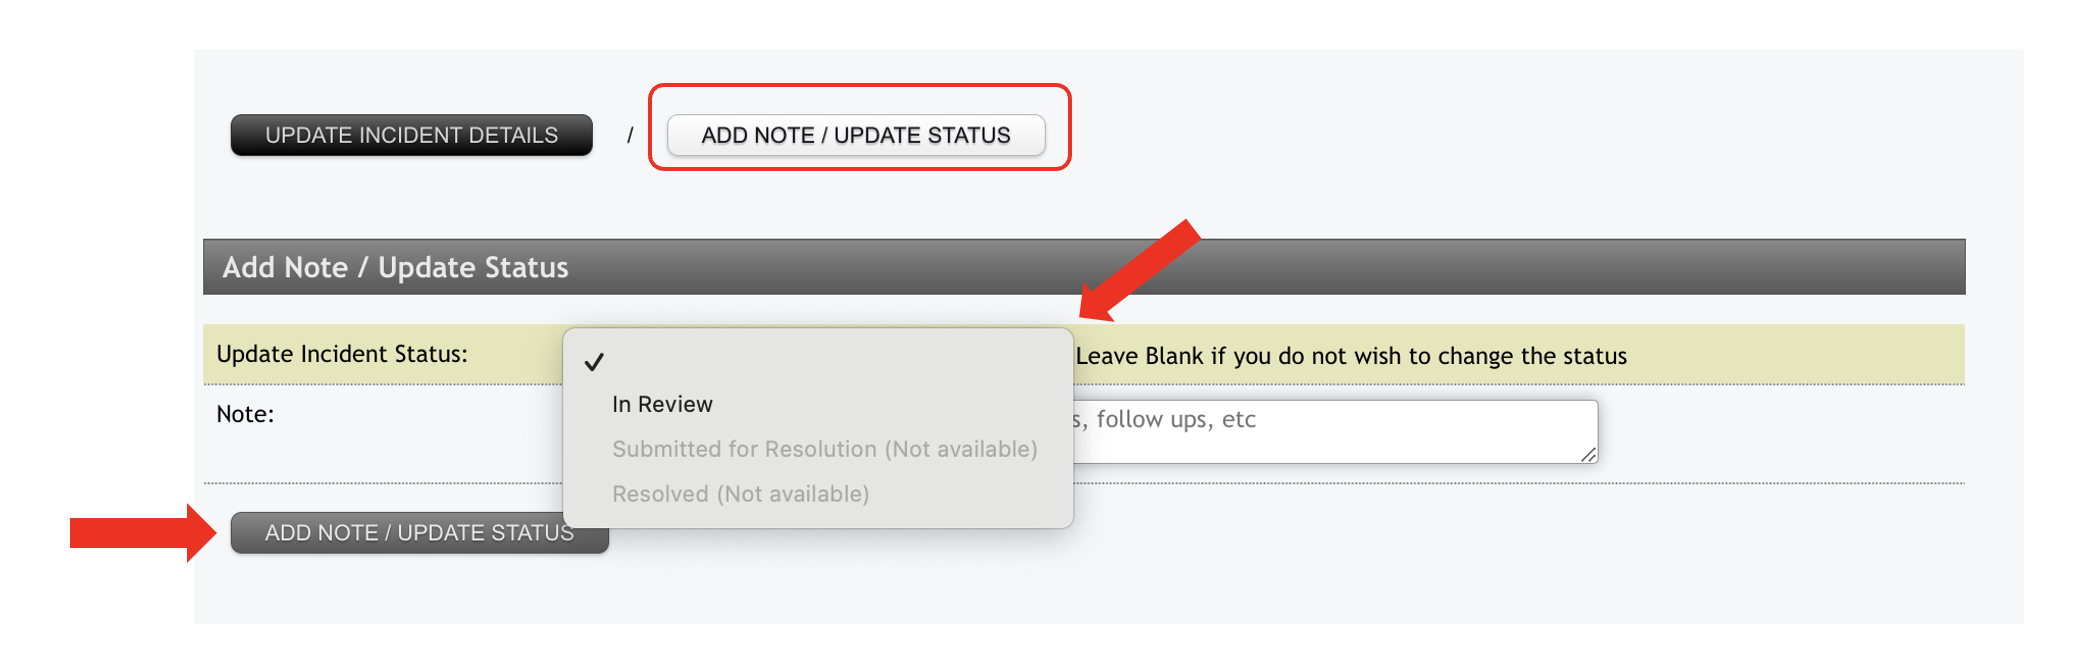
The Report can be opened by clicking on the blue link that is the Incident Report ID number. The first step is to place the Incident Report into the 'Review' phase so that the investigation can begin and the Mobile Staff can no longer edit the Incident Report. To do this, go to the bottom of the page and find the 'Add Note/Update Status' button. Open the 'Update Incident Status"' field and select "In Review". You can add notes here and then hit the 'Add Note/Update Status' button below to make the change.
You can now continue to fill out all of the required details for the incident as well as the review/investigation and outcomes. Each time you make a change to the Incident Report you need to hit the Update Incident Details button at the bottom to save the changes.
Submit the Incident for Resolution
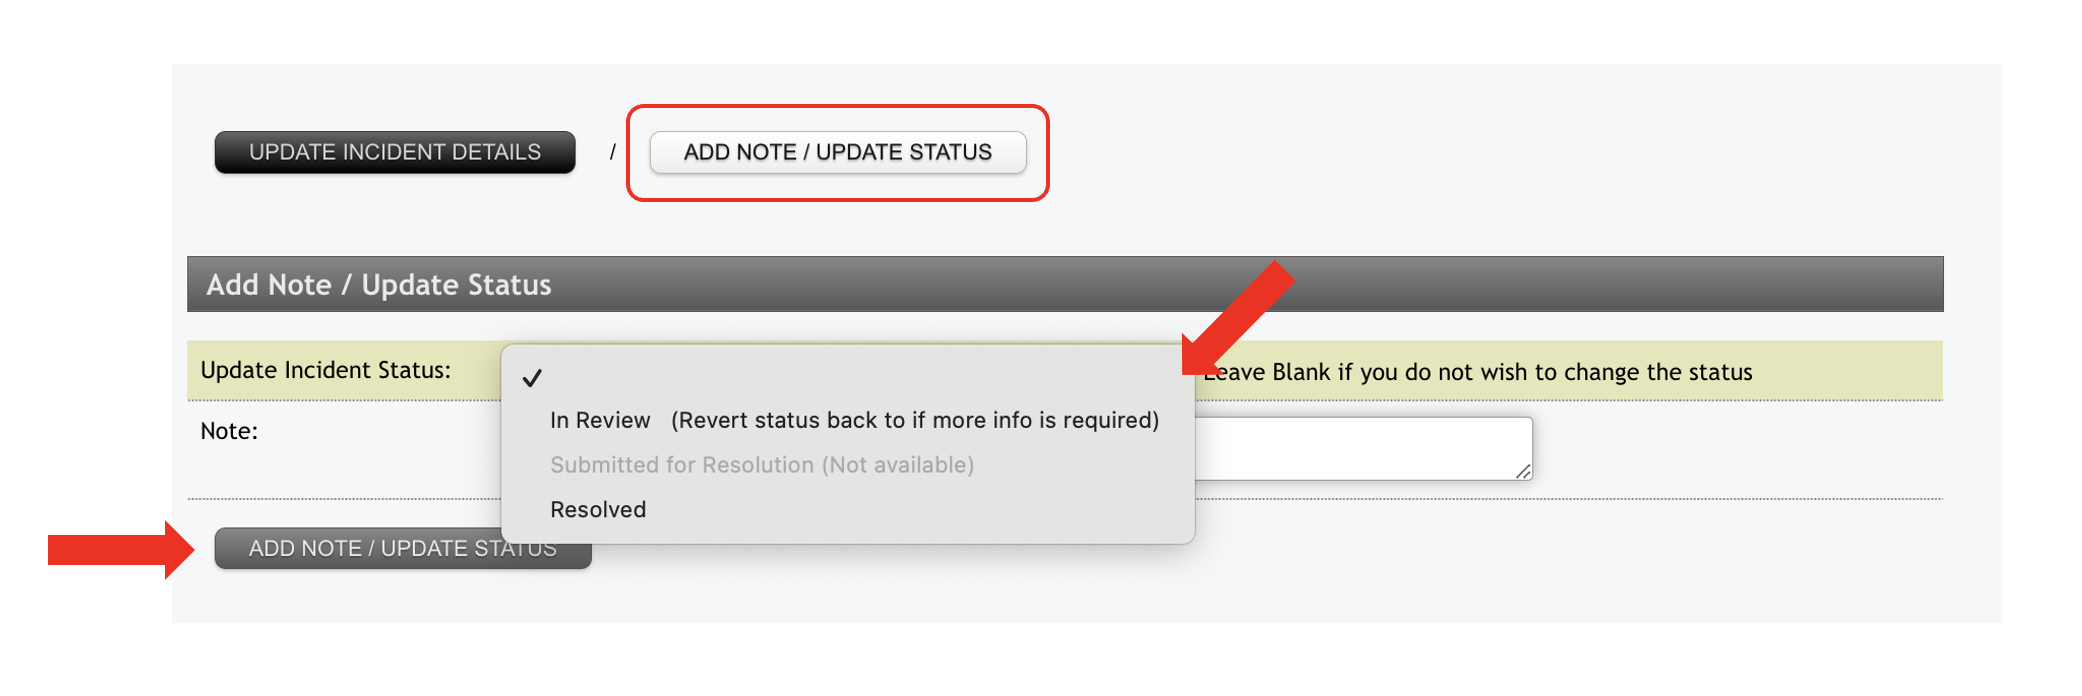
When you are ready to pass the incident on to Authorised Staff to complete the Resolution you go to the Add Note/Update Status button at the bottom of the page again. Open the Update Incident Status field and select Submitted for Resolution. You can add notes here and then hit the Add Note/Update Status button below to make the change.

Authorised staff will now receive an email notifying them that they have and Incident Report to Resolve.
Resolve the Incident
When the email notification is received the incident can be accessed through the link in the email or by going to the Incident/Hazard list and opening the Report. If you are not happy with the information you can go to the Update Status at the bottom and choose the option to send it back for further review. If the Incident Report is completed to your satisfaction you can update the Incident to Resolved to close it.
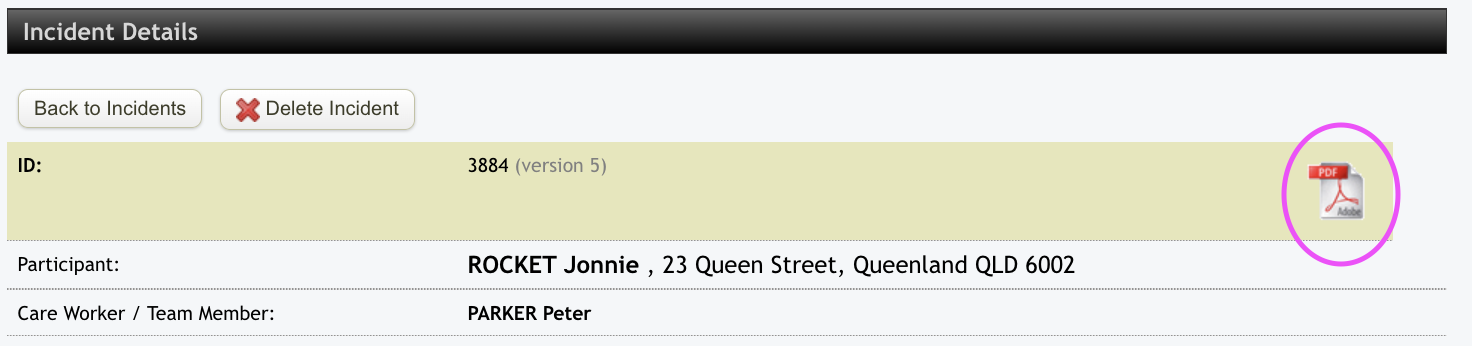
Exporting the Incidents
Individual incident reports containing all information entered can be exported to PDF by clicking on the blue ID number to open the report and then clicking on the PDF icon in the top right hand corner:

If you are wanting to export the excel file version of the incidents e.g. all incidents for a specific month, please reach out to the help desk to request and we can generate that for you.