This process ensures that NDIS and TAC invoicing are handled separately, even when TAC is linked to NDIS funding.
Important: For clients under TAC Packages, please ensure that the funding type is set to NDIS and the billing type is set to Charge to Package. This is essential for the client’s name to display correctly in the Quotes Builder and for the package to be accurately invoiced under NDIS or TAC funding. If these settings are not configured correctly, the client may not appear in the system for quoting and invoicing.
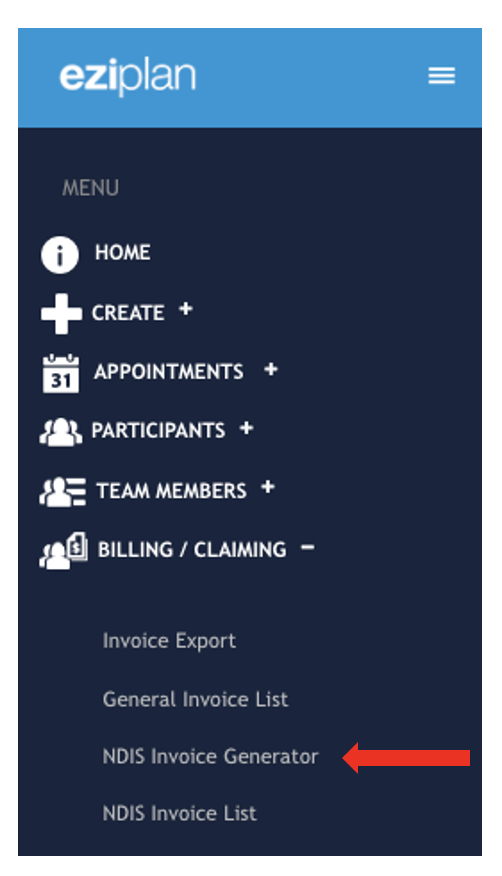
To generate Invoices, navigate to Eziplan Menu > Billing / Claiming > NDIS Invoice Generator
For NDIS Invoices:
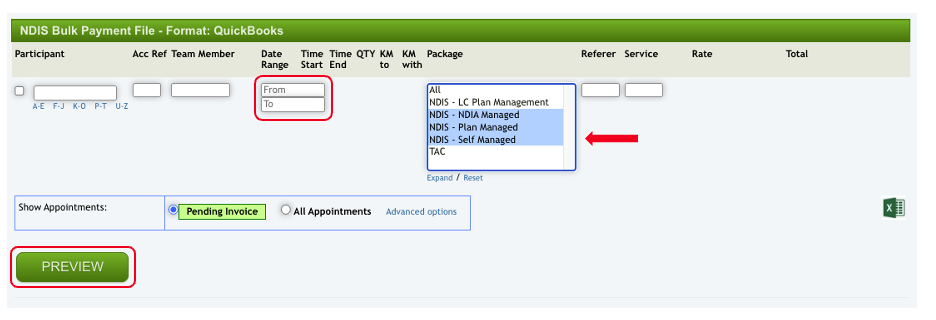
Expand the invoicing box and then use the Command-Select to choose the relevant package and funding details.
Input the correct dates for the invoicing period.
Then hit Preview
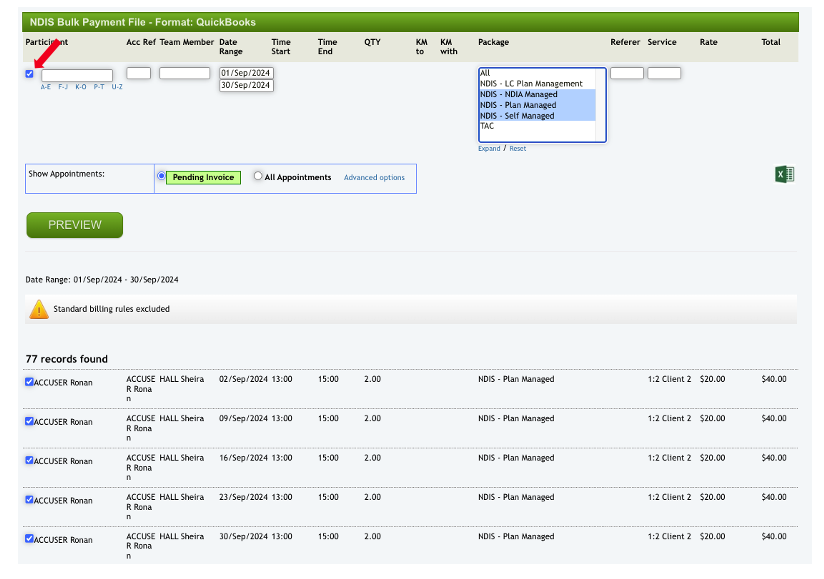
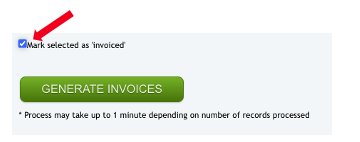
The system will now generate invoices for clients under NDIS. To create invoices for all clients, tick the small box in the upper left corner, scroll down to the bottom, and ensure that the Mark selected as invoiced box is checked. Finally, click on Generate Invoices.
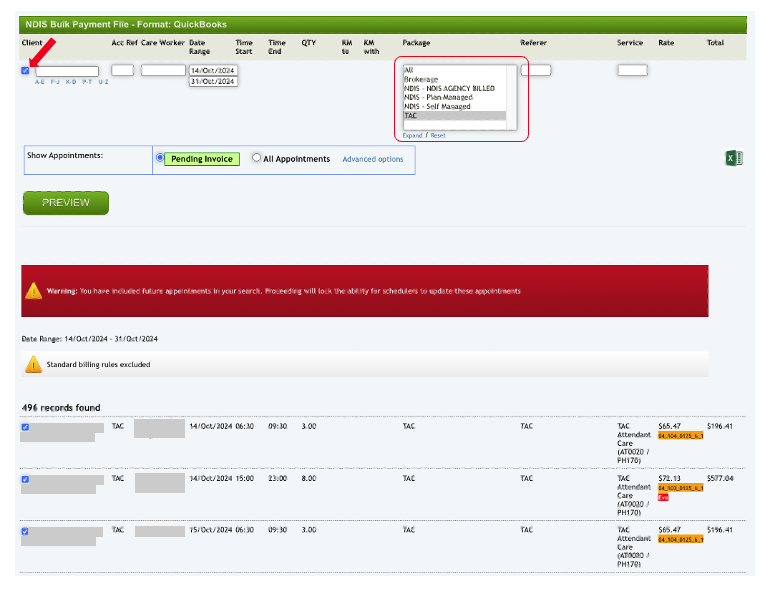
For TAC Invoices, you basically follow the same process as above:
Expand the invoicing box using the Command-Select to choose the relevant package
Input the correct dates for the invoicing period.
Then hit Preview
The system will now generate invoices for clients under TAC. If your selection includes future appointments, a warning sign will appear, as illustrated below.
To generate the invoice, tick the small box on the upper left corner and scroll all the way down and make sure the Mark selected as invoiced box is selected. Then hit Generate Invoices.

To process the generated TAC and NDIS Invoices, navigate to Eziplan Menu > Billing / Claiming > NDIS Invoice List
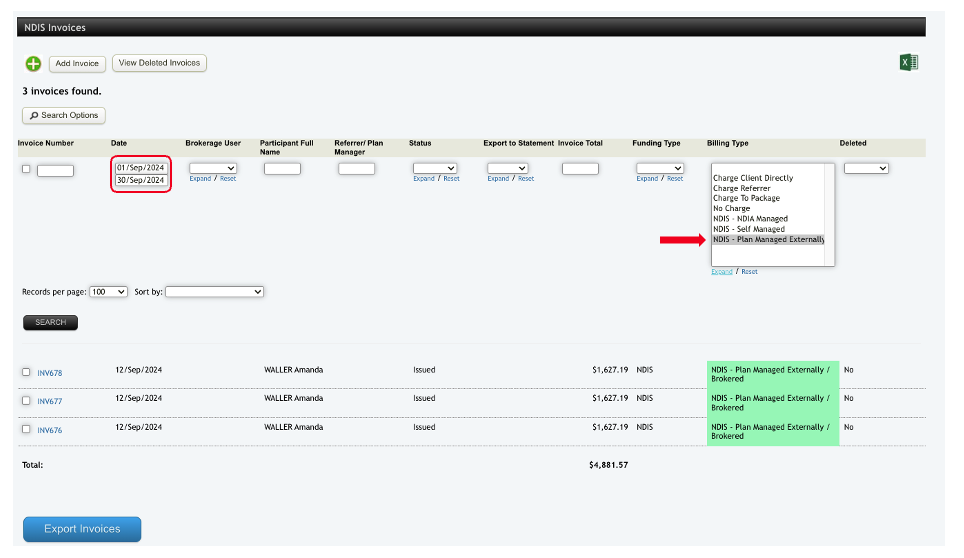
For NDIS:
Hit the Search option button to view all filtering options
Enter the date range of the invoice list
Expand the Billing Type box and select appropriate NDIS package, whether it's NDIS - NDIA Managed, NDIS - Self Managed or NDIS - Plan Managed Externally
The system will then display the invoice list corresponding to your selected options.
For TAC, simply follow the same process outlined above, but be sure to select Charge to Package under the Billing Type box to display all TAC-related charges.
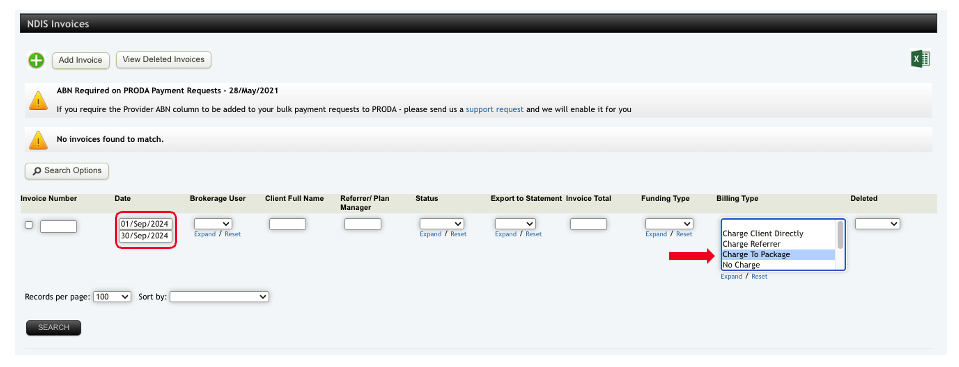
The system will then show the invoice list based on your selected options and you may now proceed with the invoicing process as you normally would.
Check out the our NDIS Quotes - Input and Export article for more detailed information on how to manage your NDIS quotes effectively.