There may be times where you are looking to set up appointments for your clients/participants that will be at a location that is not their home e.g. community centre. If this is the case, ezihealth can enable the location feature for your appointments for you to be able to do this.
Setting Up Locations
To create your list of locations, head to the left hand menu panel and click on 'Transport' and then select 'Trip Points' from the options that open up:
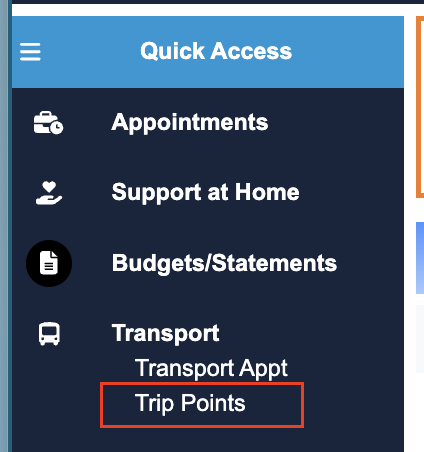
Note: If the Transport option is not visible in your Quick Access menu, please contact the Service Desk and request to have it enabled.
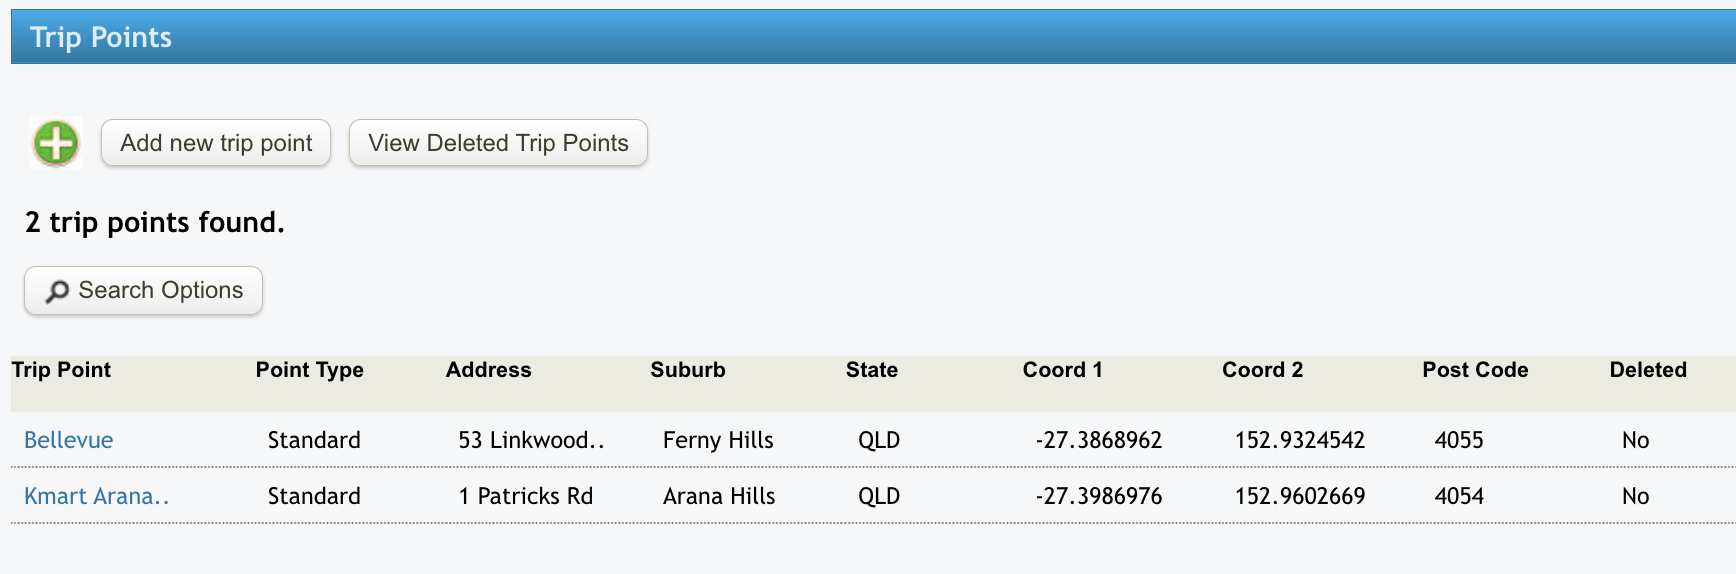
The trip point screen will then open up. If this is the first time you are adding in locations the screen will be blank with your option buttons across the top. If you are adding in new locations, you will see a list of current locations below the option buttons.
Click on 'Add new trip point', you will then get a screen with fields for you to complete. You have four options for the point type - standard, medical centre, work site and other.
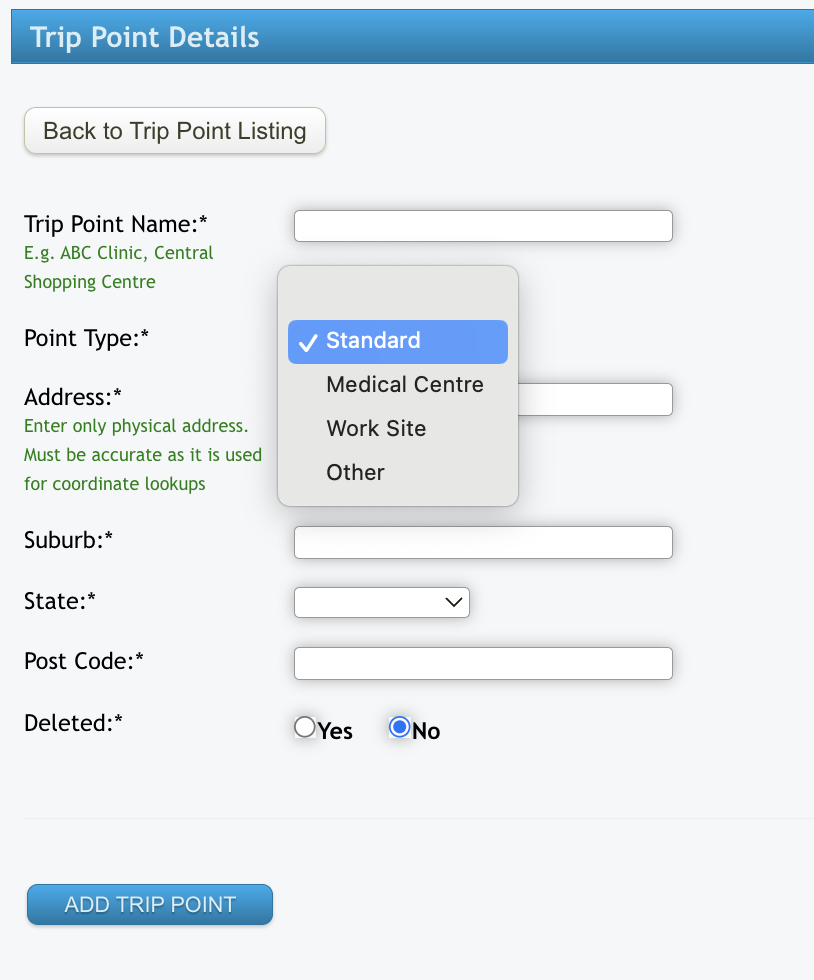
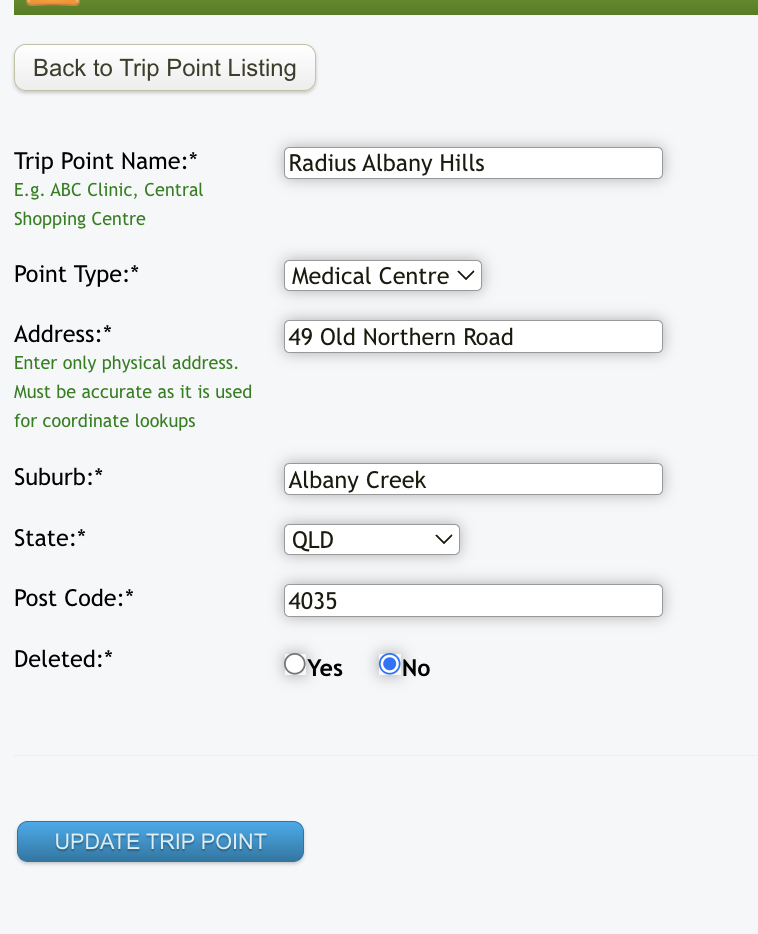
Fill in the details for your trip point and then click on 'Add Trip Point'. N.B. Ensure there is a street number for your location addresses if you are wanting to utilise the billable trip calculation discussed in the next section. You will see a summary of the saved information, click on 'Back to Trip Point Listing' to return to the Trip Point main page.
Just repeat the above steps for each trip point location you want to add into the list.
Allocating Locations in an Appointment
Create an appointment as per the usual process for one-off or repeat appointments. When you first go into the appointment screen, you will see a 'Location' field towards the top of your screen:
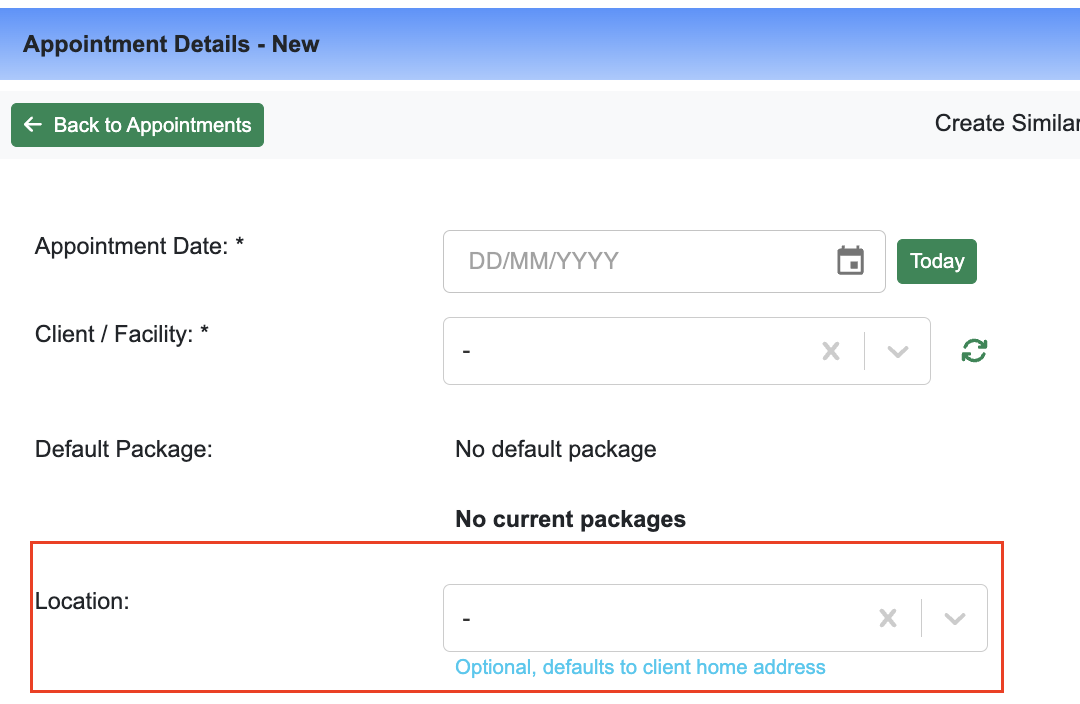
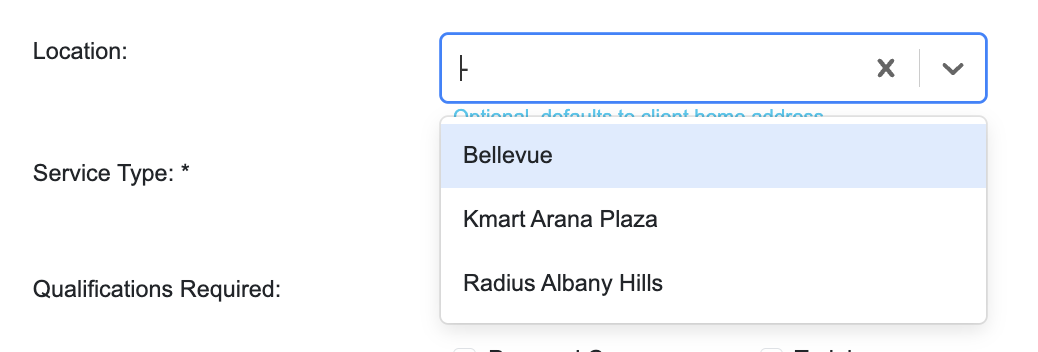
Click on the drop-down arrow at the right of the field and select the location you are wanting the appointment to be allocated to and complete the rest of the appointment details as per normal.
This appointment will then show this as the location in the weekly planner as well as the care worker view.