What is this function?
If a care worker is unable to complete logging their timesheets whilst in the field, an Administrator can complete this task on behalf of this worker.
For instance, when in an area that has no cellular signal a worker may be unable to input their appointment details, this is when an admin level staff member can step in.
How can I access this feature?
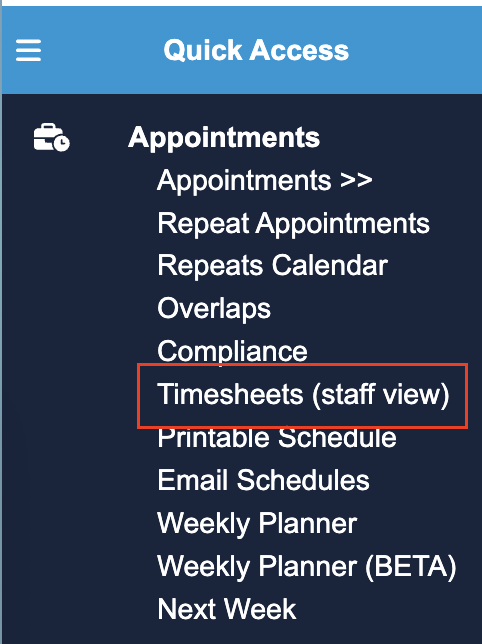
As highlighted above, you can complete appointments for a carer after clicking ‘Timesheets Menu (staff view)’, located in the Quick Access Menu under Appointments.
How can I use this feature?
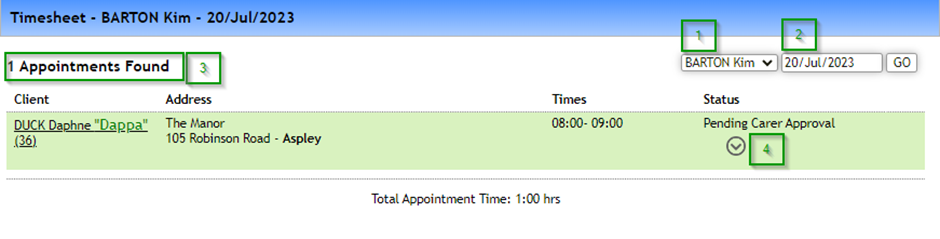
You can first filter to the specific Worker’s Timesheet you want to view.
You can then filter to a specific day’s worth of Timesheets using the Date Filter.
After clicking ‘GO’ in the top right corner of the image above you can then see the selected workers timesheets for the specific date selected. The base timesheet displays each appointment, client and address as well as the status of an appointment.
Note: Completed Timesheets can not be altered on this screen – you will need to alter the Appointment directly.Once ready to process this appointment as an Administrator, you can click the downwards-facing arrow under the ‘status’ section.
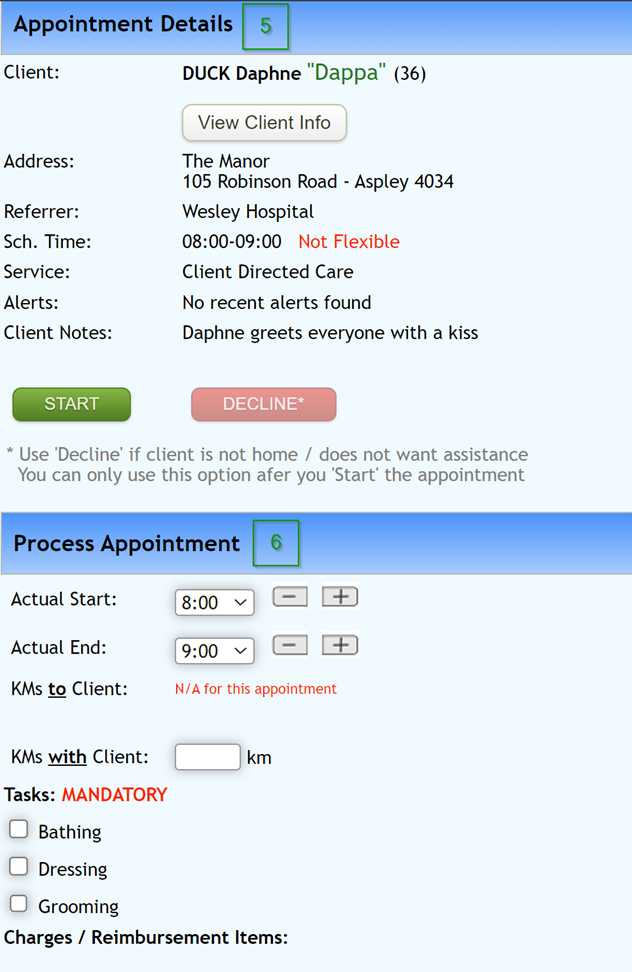
Under ‘Appointment Details’ you can see client information including basic contact details, client address, client notes and more (which can be explored in further detail under the ‘view client info’ button). You can also see the original scheduled shift time under ‘Sch. Time’. Click the green ‘start’ button to start the Shift.
Below ‘Process Appointment’, you are able to input:
Actual Start time – Refers to the actual time started by the worker (which may be different to the scheduled start time)
Actual End time – Refers to the actual time completed by the worker (which may be different to the scheduled end time)
KMs to Client – A space to record the KM taken by the worker to get to the clients location. This will be pre-filled with the expected number of KM’s but can be overridden.
KMs with Client – A space to record the number of KM spent driving with the client
Tasks – Ability to mark off mandatory tasks in this section, indicating they have been completed.
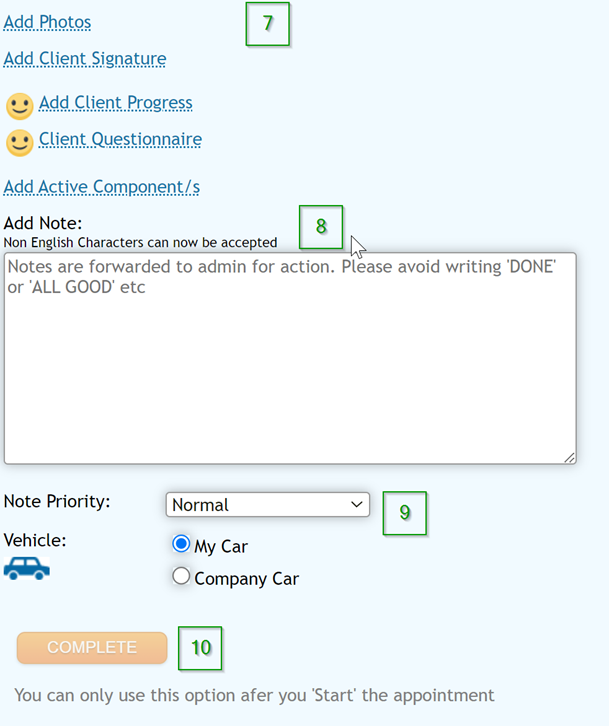
Next, ‘add photos’ or ‘add client signature’ for this appointment.
In this step, progress/timesheet notes can be added and entered as free text specifically relating to this appointment.
If enabled, elect whether a company or private car was used. This will affect payable KM as part of the payroll export process.
Lastly, you can press the orange ‘complete’ button to finalise this appointment within Eziplan. It is important to ensure all details are correct, encompassing appointment notes, as they cannot be modified passed this point.