Note: The functionality for setting up group appointments needs to be configured by your Eziplan Support Team. If you'd like to take advantage of this feature, email support@eziplan.com.au and request for the feature to be enabled for your organisation and provide any specifics on the group naming, especially if you are going to have multiples e.g. gardening group, cooking class group. The support team will then set up your system in the back end to configure the profiles you will need to create your appointments.
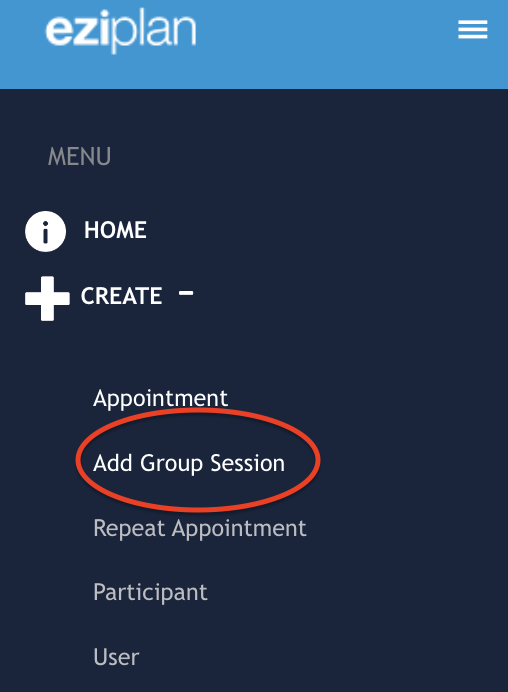
Once you have the group appointment feature enabled, you will find the link in the left hand menu panel - click on 'Create' and then select 'Add Group Session'
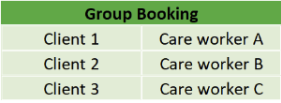
The way the group booking function works within the system is that the Group Appointment will sit as the parent appointment and then you will add clients and care worker/s to the appointment.
1. Add a Once-off Group Appointment
First step will be to create the parent group appointment by following the steps above to navigate to the 'Add Group Session' link, click on this. N.B. This is the only way to generate this group appointment, it can not be generated through any of the other menus e.g. Client/Participant, Care Worker
The following page will open up (by default, the client and care worker of this group appointment will be set to the Group Session Client and User Profiles that will have been set up by the Support Team).
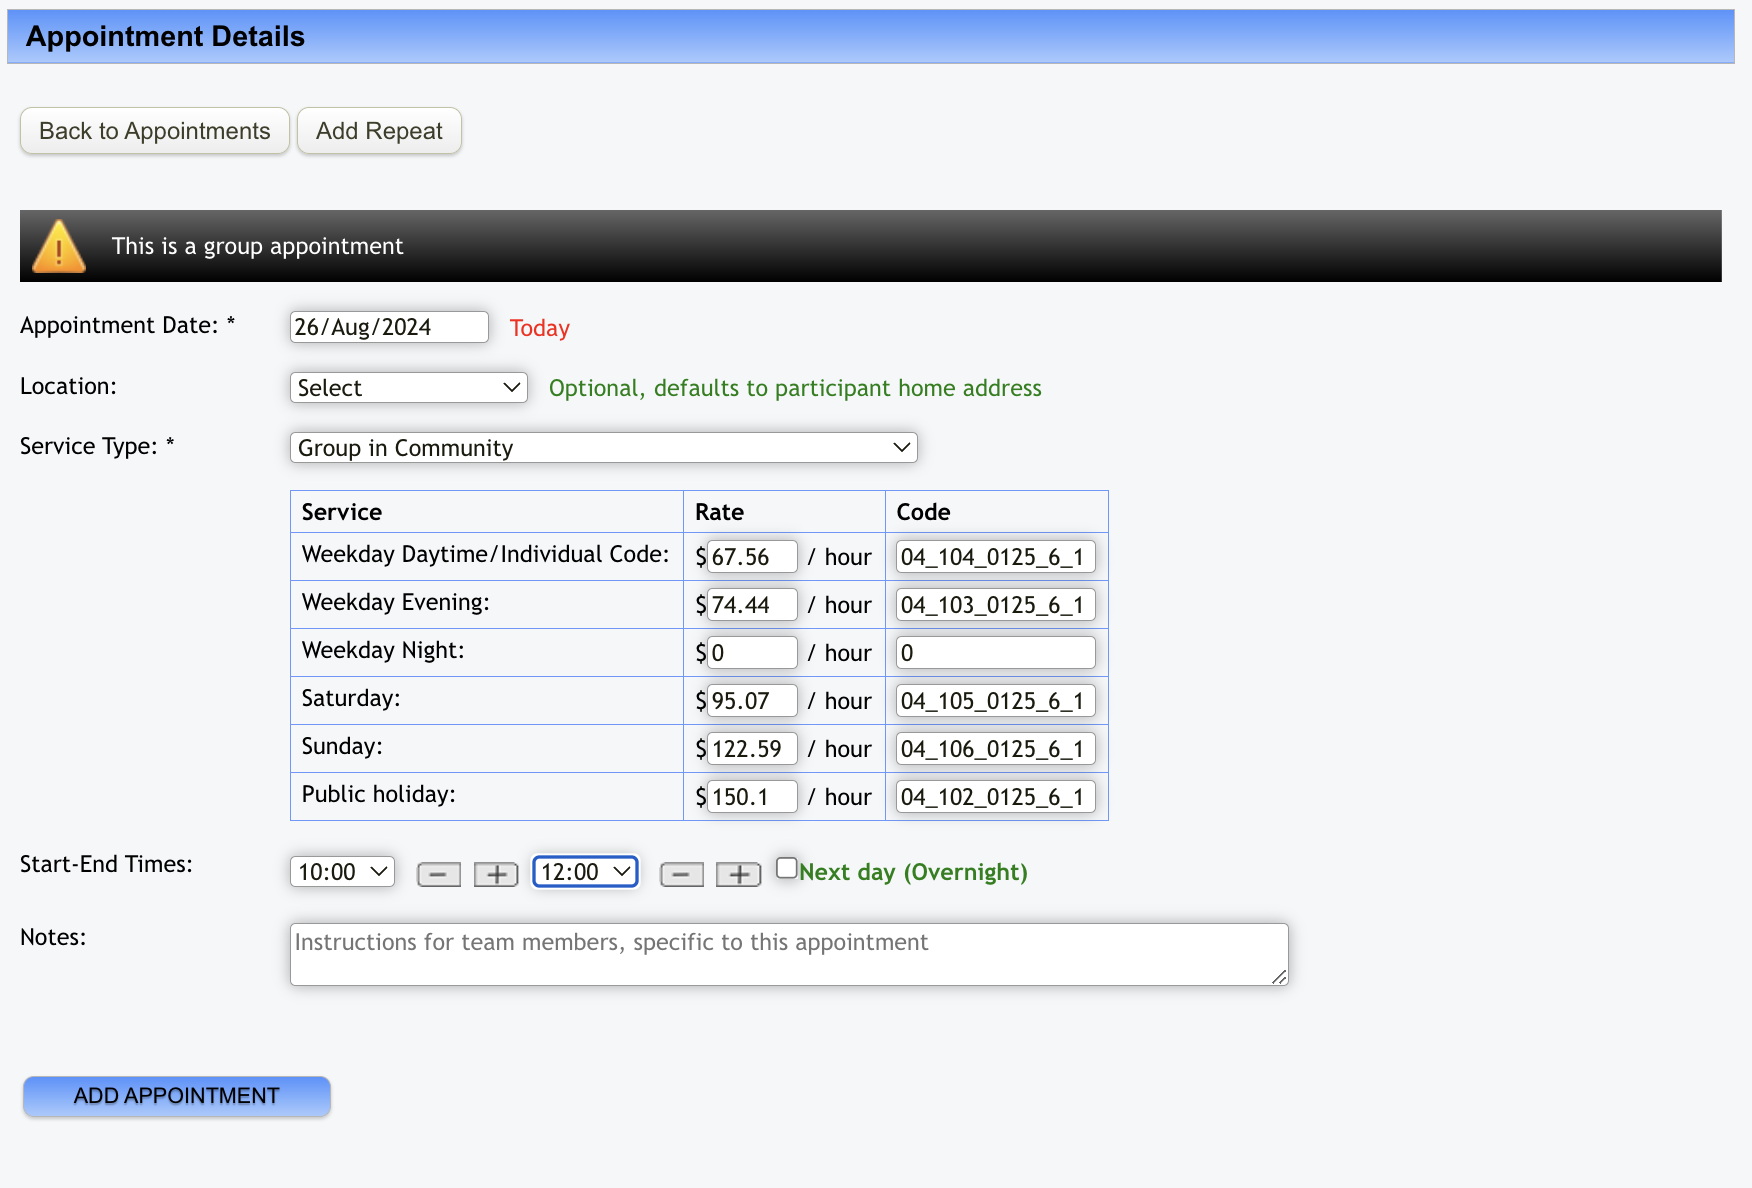
Add in the date, service type and time details and then click on 'Add Appointment'.
2. Add Clients/Participants and Care Worker/s to Group Appointment
Once you've added the appointment, the below screen will generate for you to then add your clients/participants.
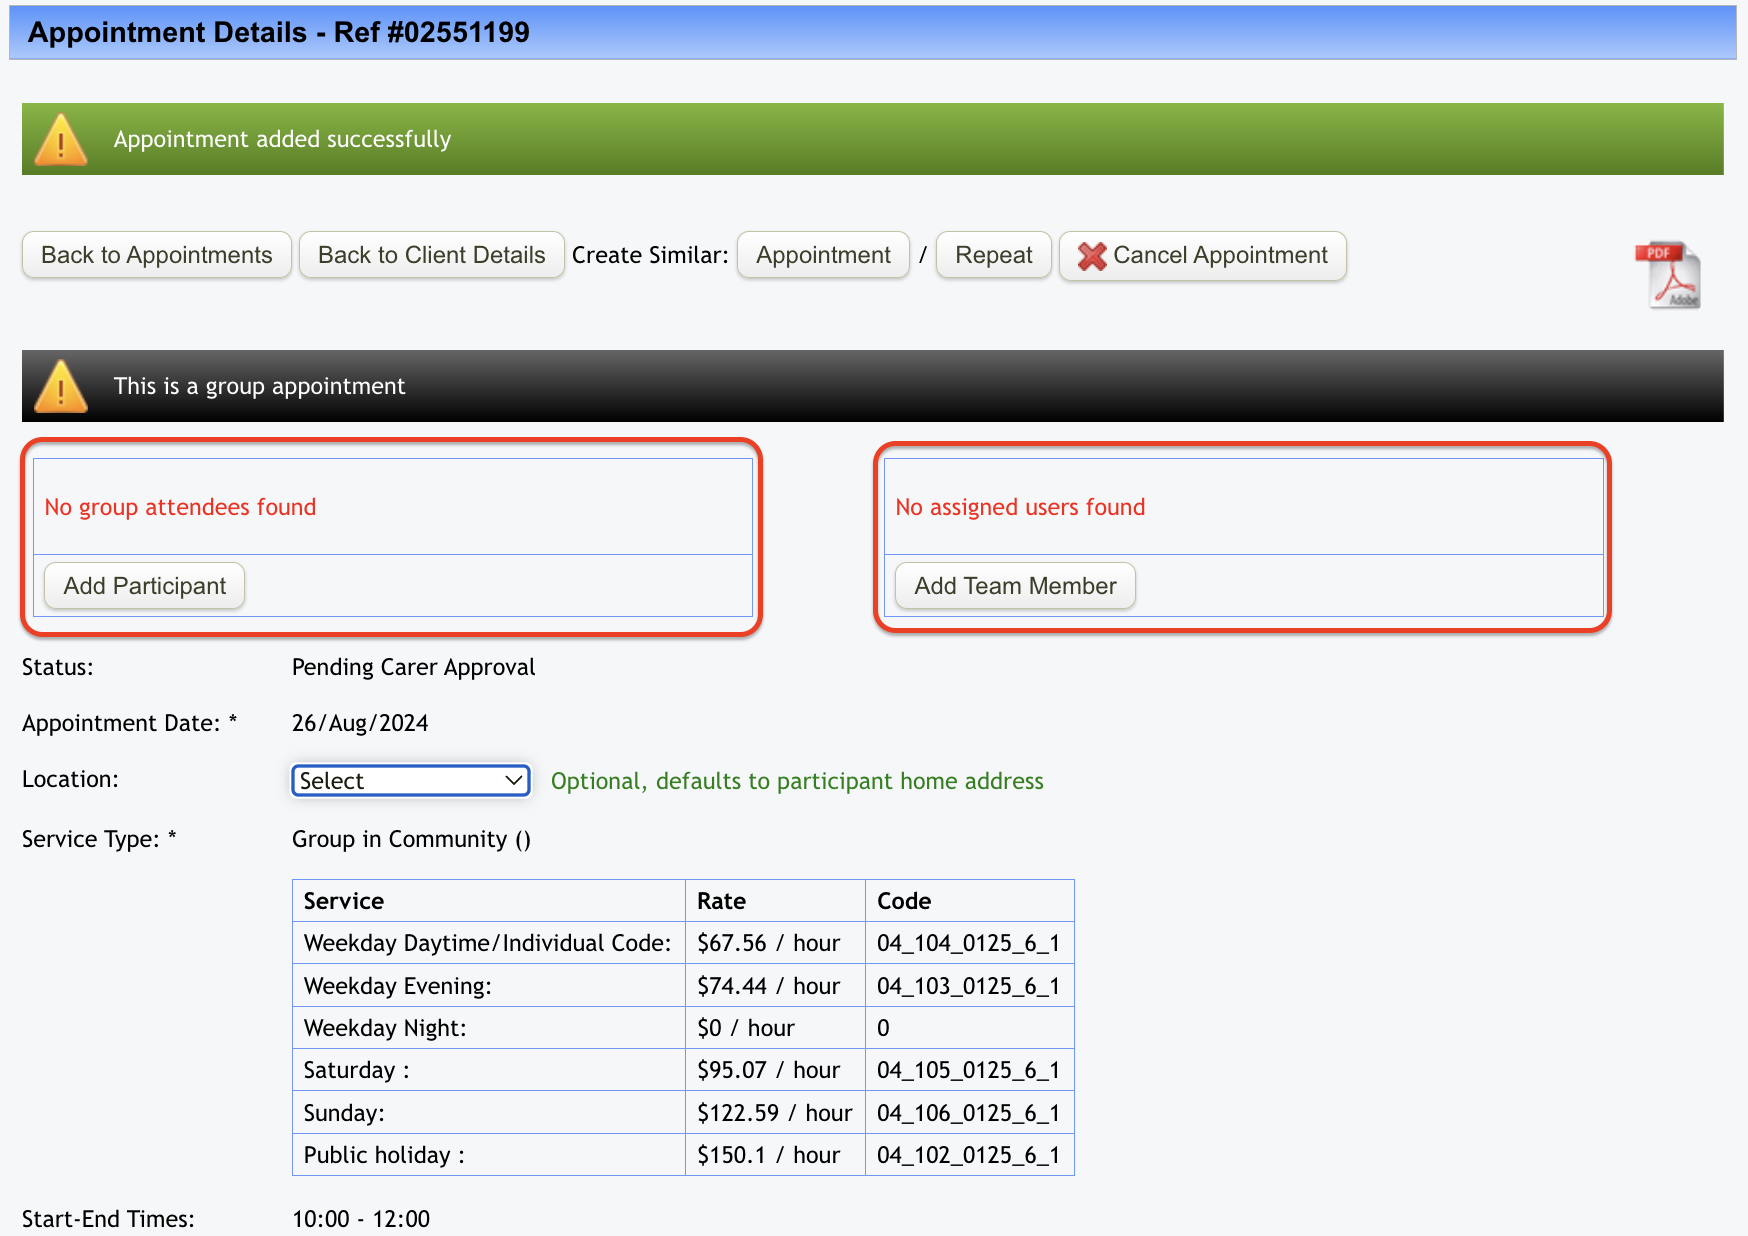
2.1 Add Client/Participant
Click on 'Add Client/Participant' which will populate the following screen:
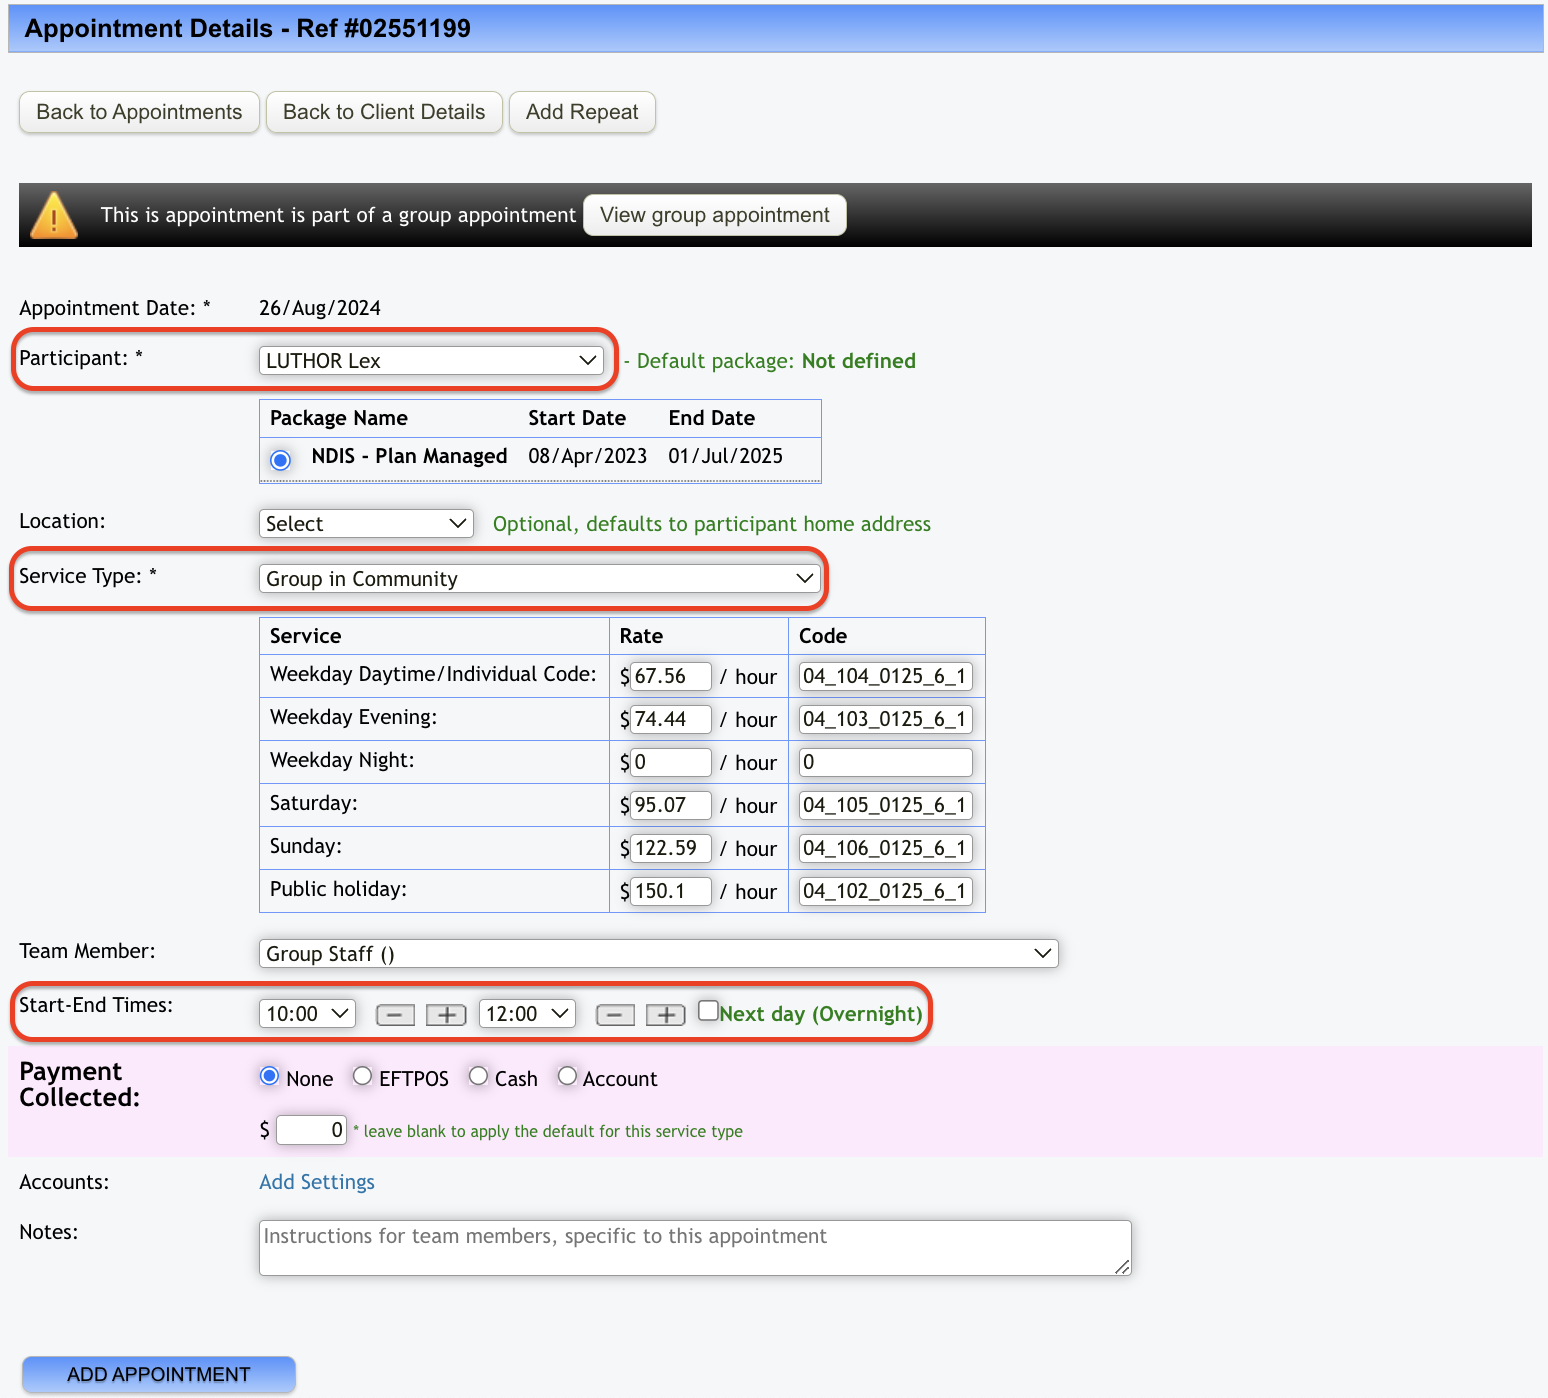
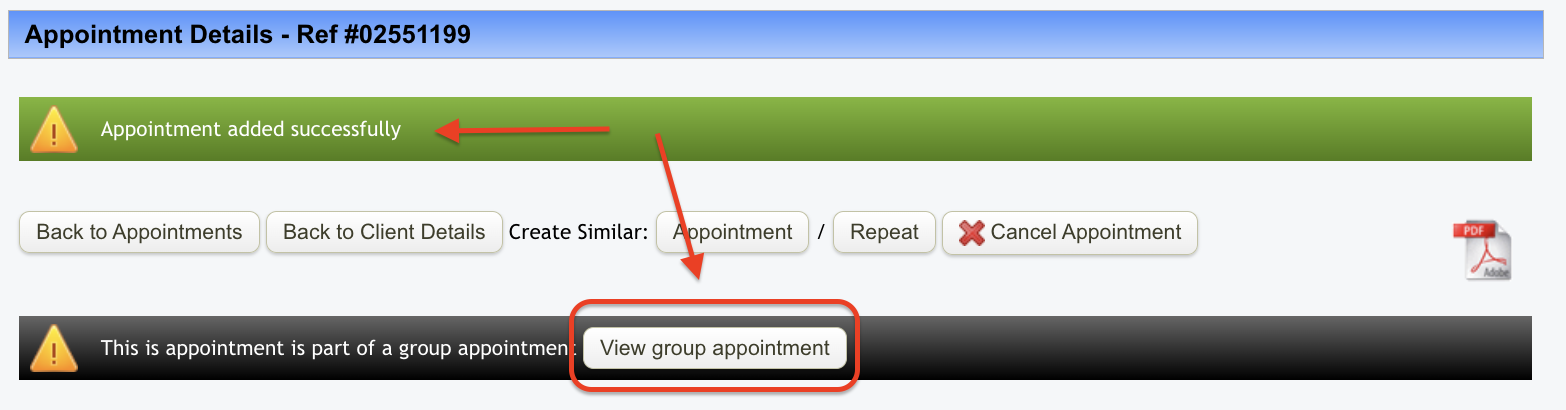
Select the client, update the service type and start/end times if needed N.B. DO NOT change the staff member at this point. Once you have updated these details, click on 'Add Appointment'. You will then get a message at the top of the screen to say the appointment has been added successfully. You can add additional clients/participants to the group appointment by clicking on the 'View group appointment' button.
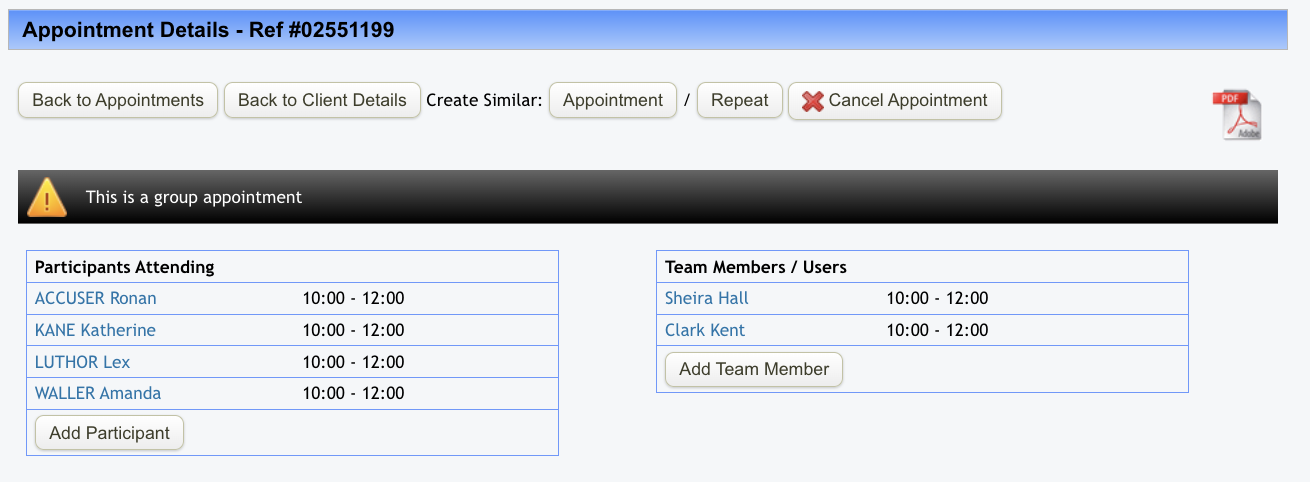
Repeat the above steps to add additional clients/participants to the group appointment. Once you have added all your clients/participants, the group appointment screen will look like this:
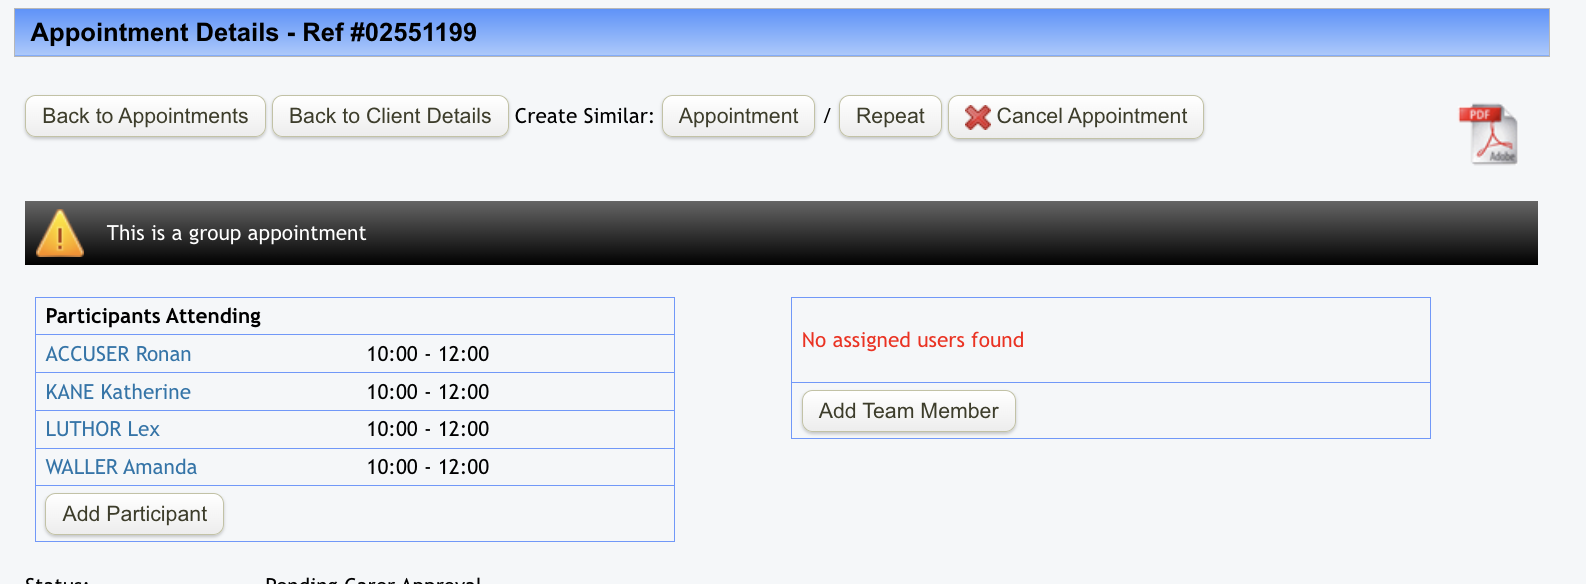
2.2 Adding Care Worker/s
Once you have entered all your clients/participants, it's time to add in your care worker/s. From the group appointment page, now click on 'Add Care Worker/Team Member' which will open the following screen:
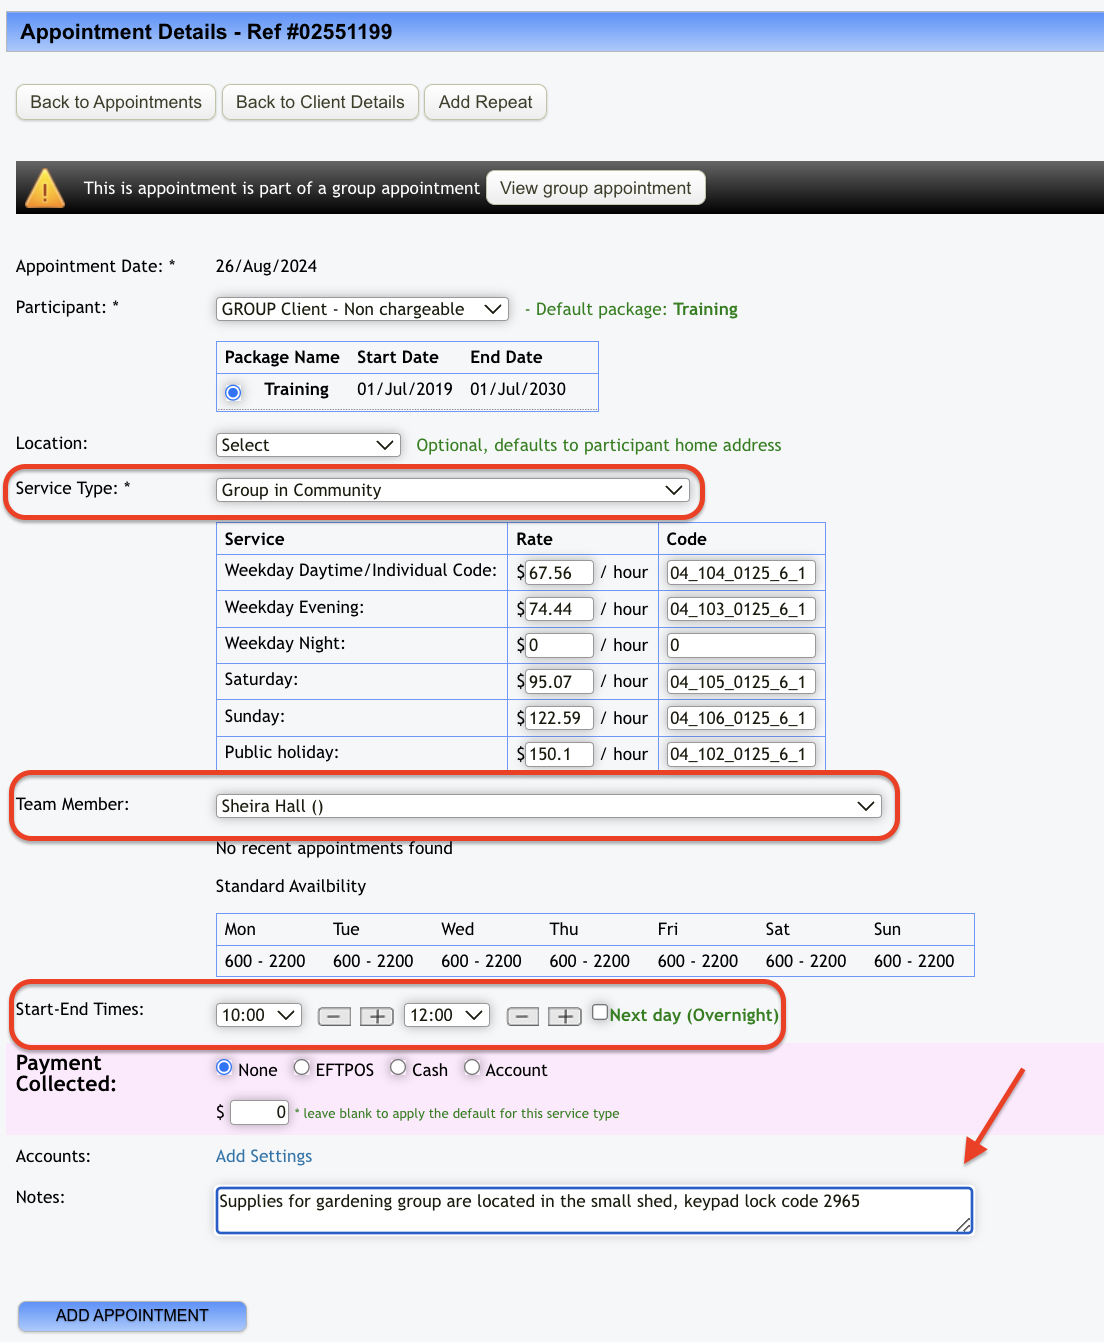
Select the care worker, you can also update the service type and times if needed. Any specific notes you want the staff to see for this appointment can be entered at the bottom and these will display on the staff's mobile view:
Once you have updated all the fields you need to click on 'Add Appointment'. Repeat the steps for any additional staff members you want to add to the group appointment. Once you have finished, the group appointment screen will look like this.
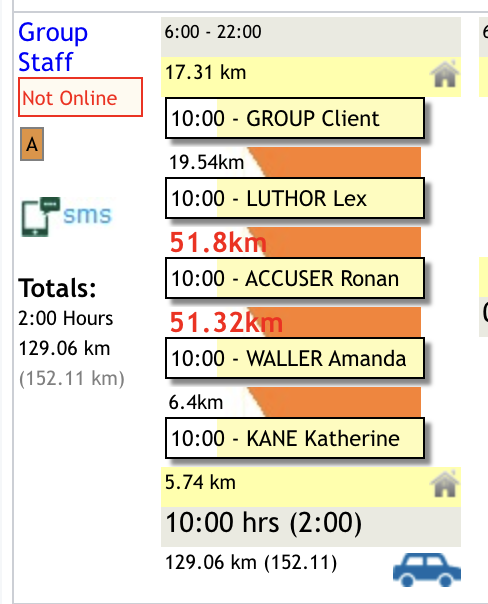
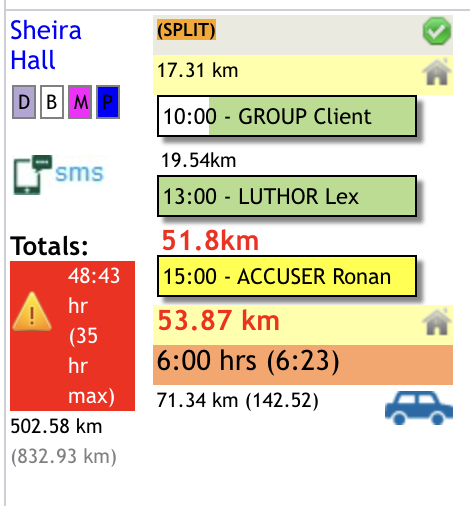
Now that the appointment has been created, this is how it will be reflected on the weekly planner against the group session user profile and then the staff member profile:
3. Processing the Appointment and Timesheet
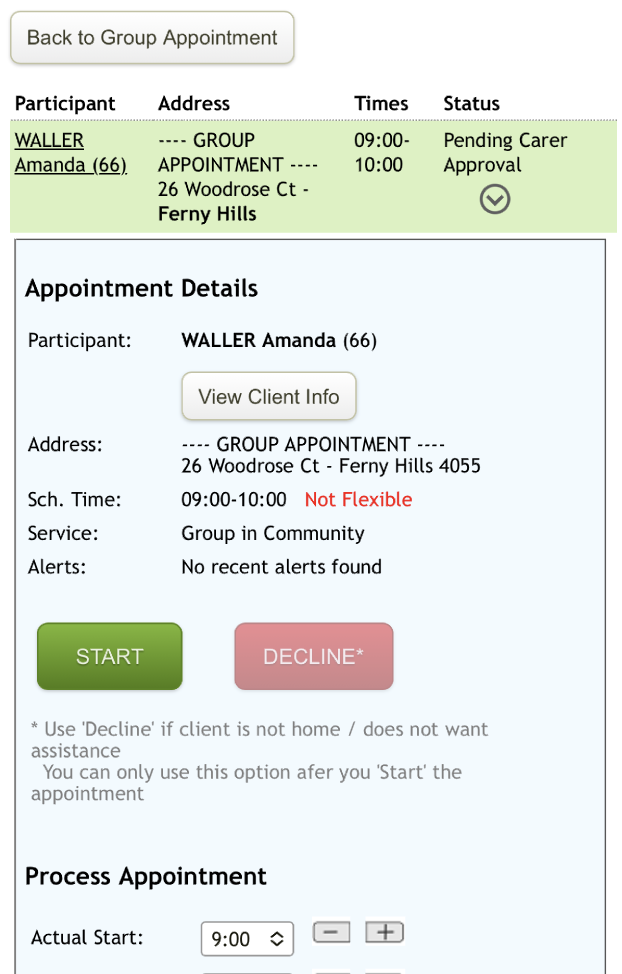
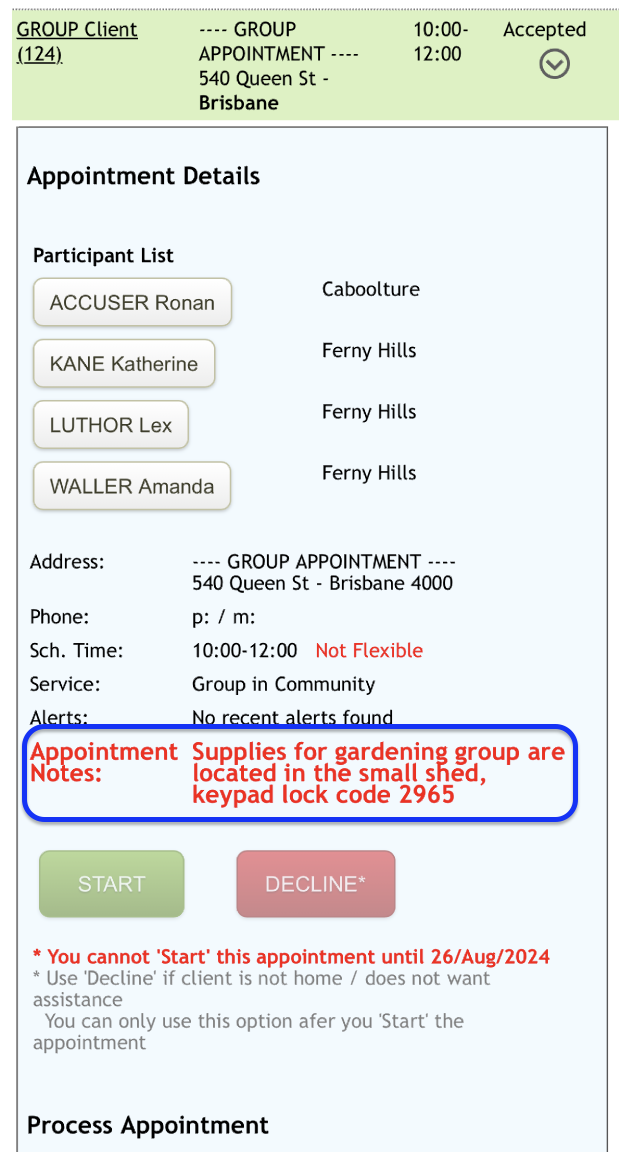
When one of the assigned staff members goes to their daily timesheet for the day of the group appointment, they will see the Group Appointment. Upon opening it, all the relevant details will be displayed.
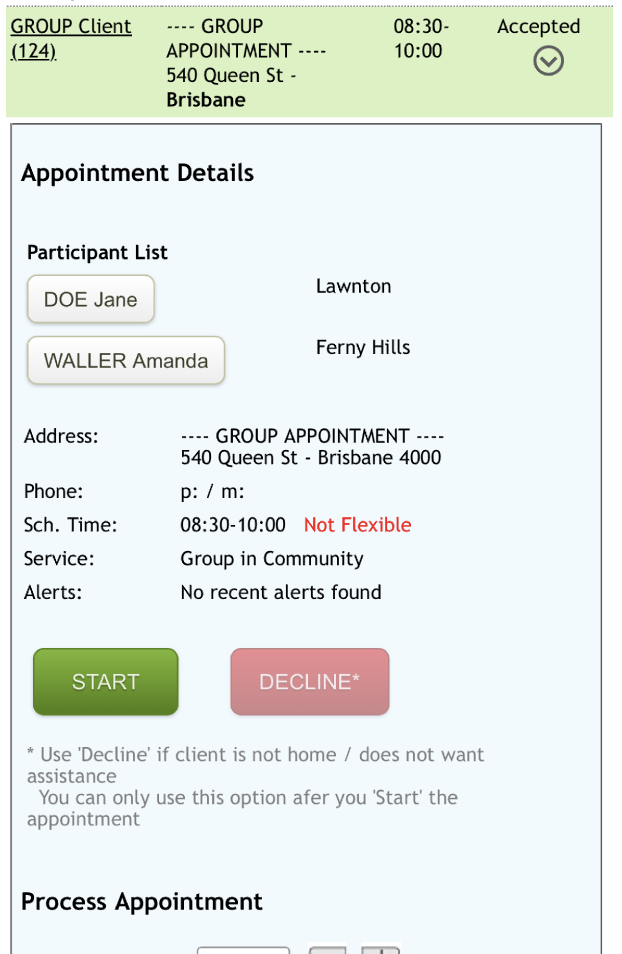
If there is only one assigned staff member, they can click Start and process the appointment following the usual steps.
While the group appointment generates a single timesheet for the assigned staff member, they must still open each client's record individually to complete the required notes and documentation for each participant.