After you export the NDIS invoice file (.csv) or General Invoices file (.csv) from Eziplan, you need to import it into your finance software to send to clients and reconcile.
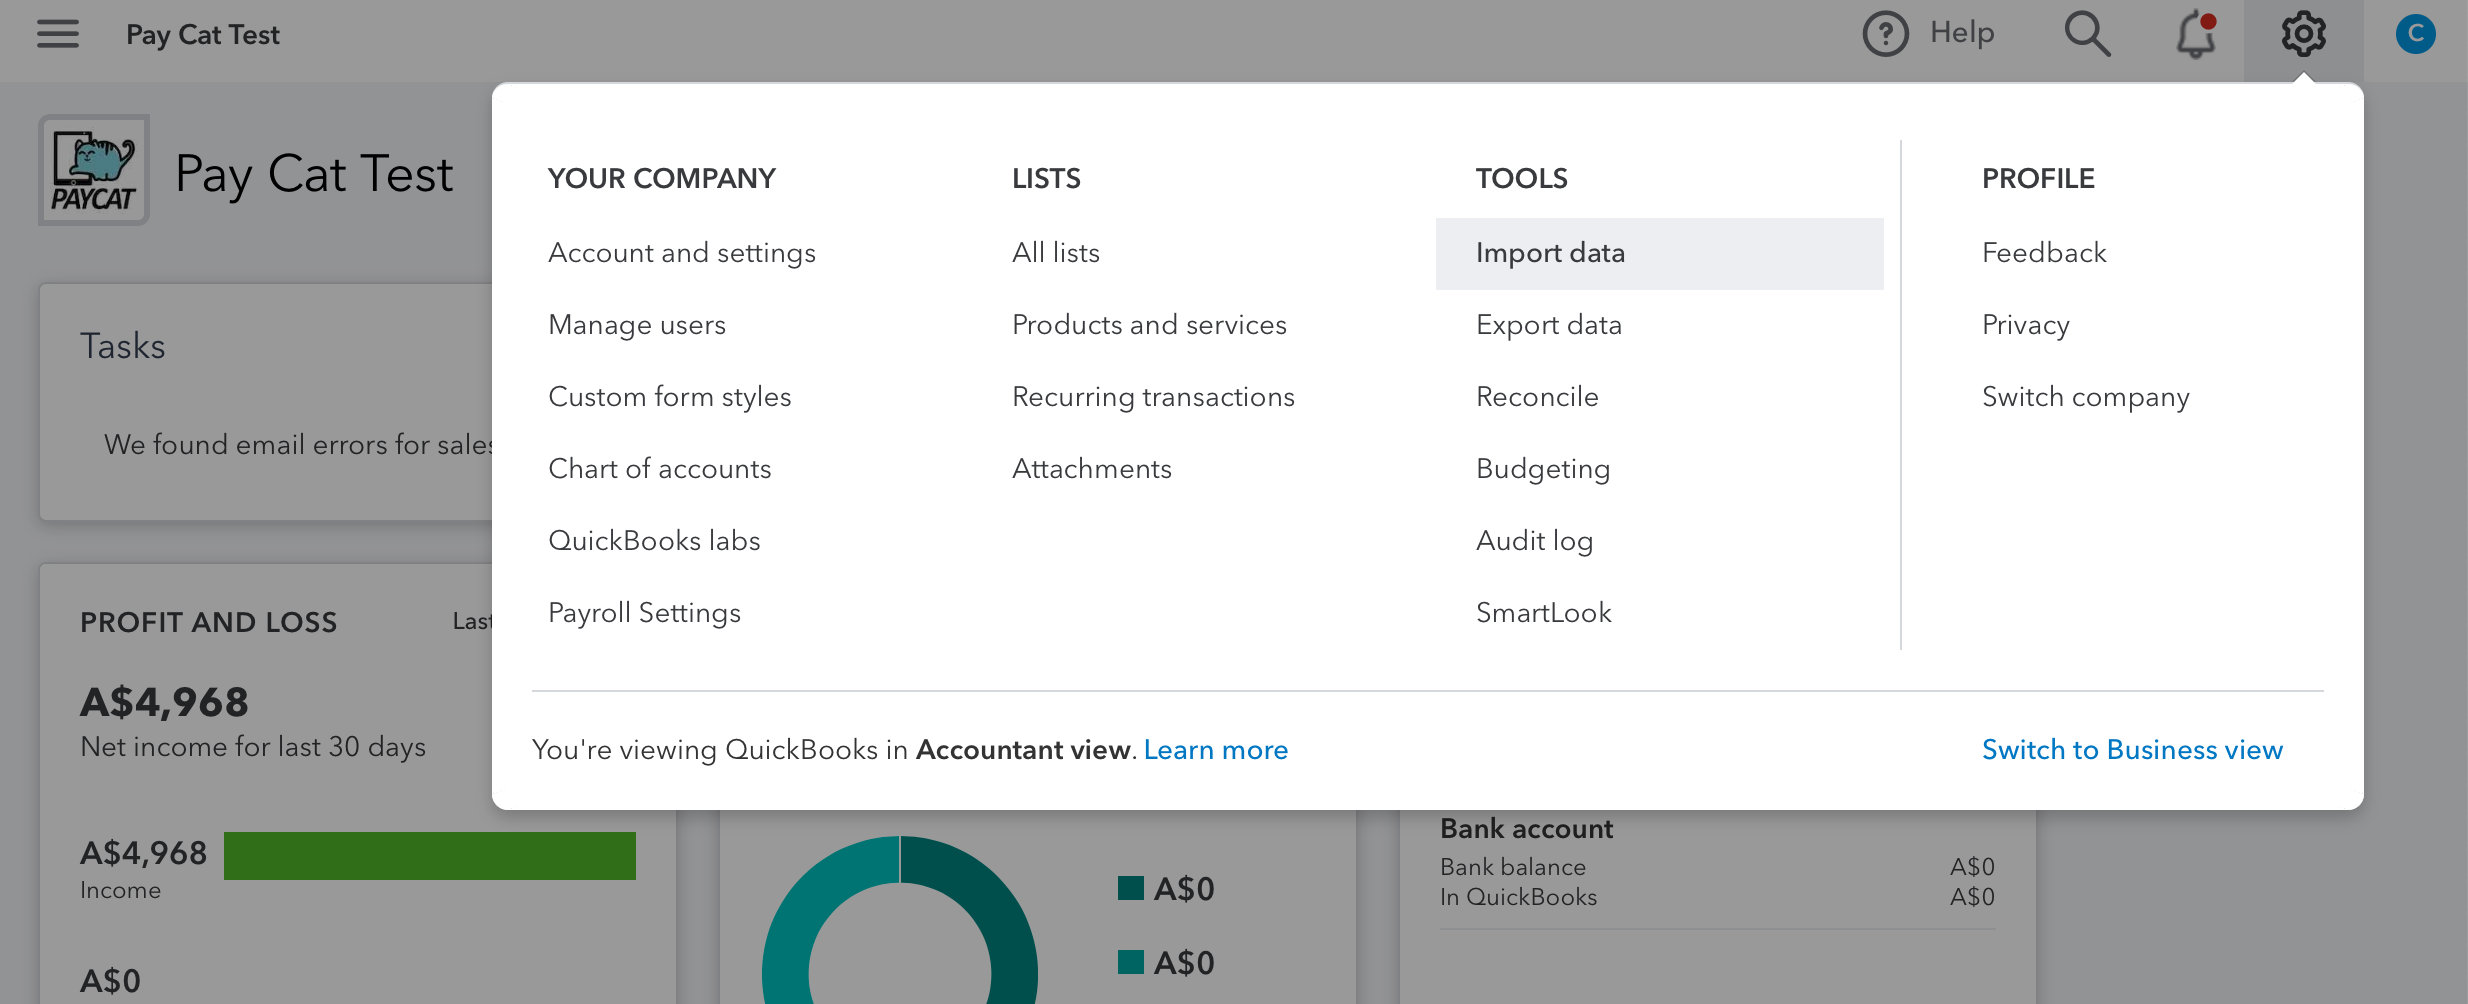
First, log in to QuickBooks and go to the Settings cog icon in the top right and choose import data.
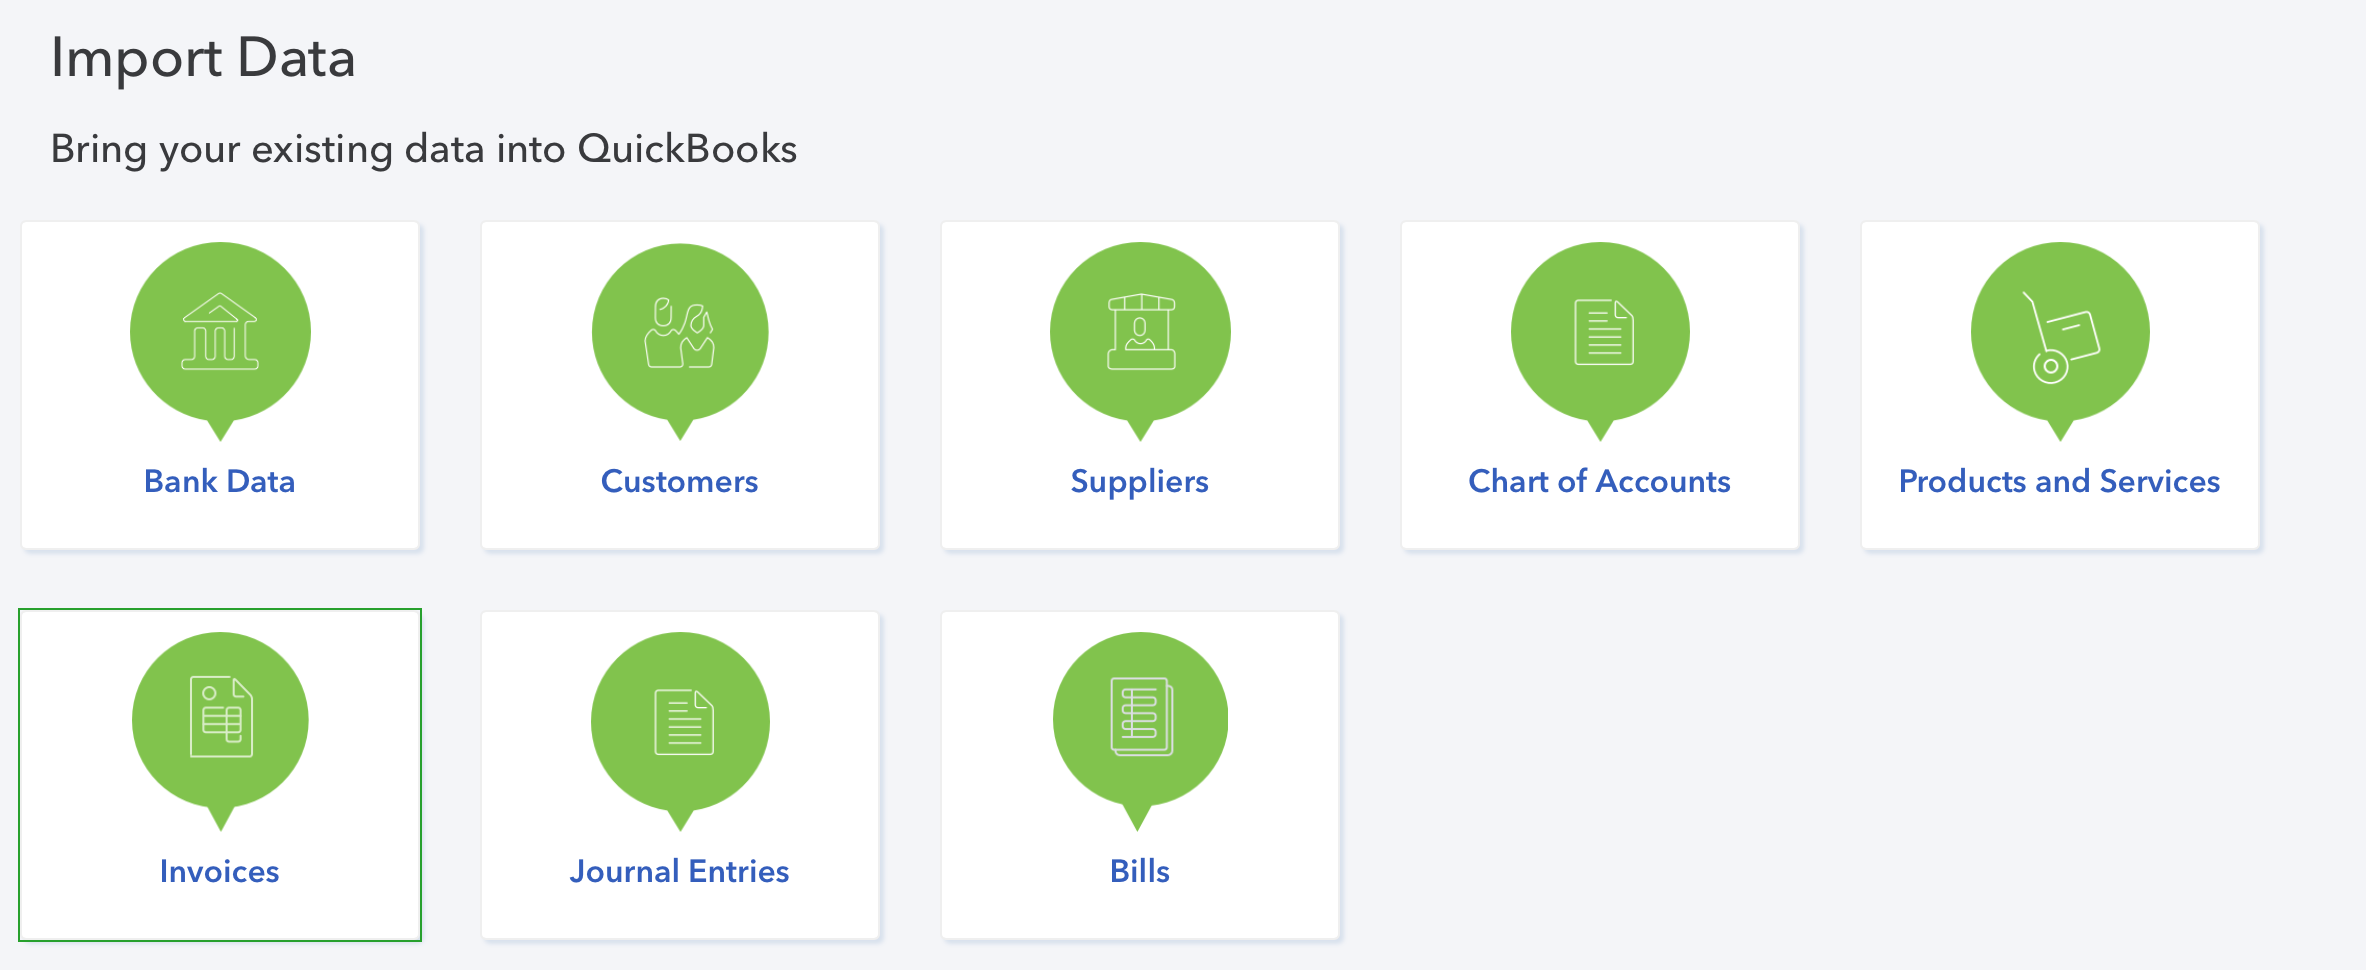
The Import page will open and you then select the Invoices tile.
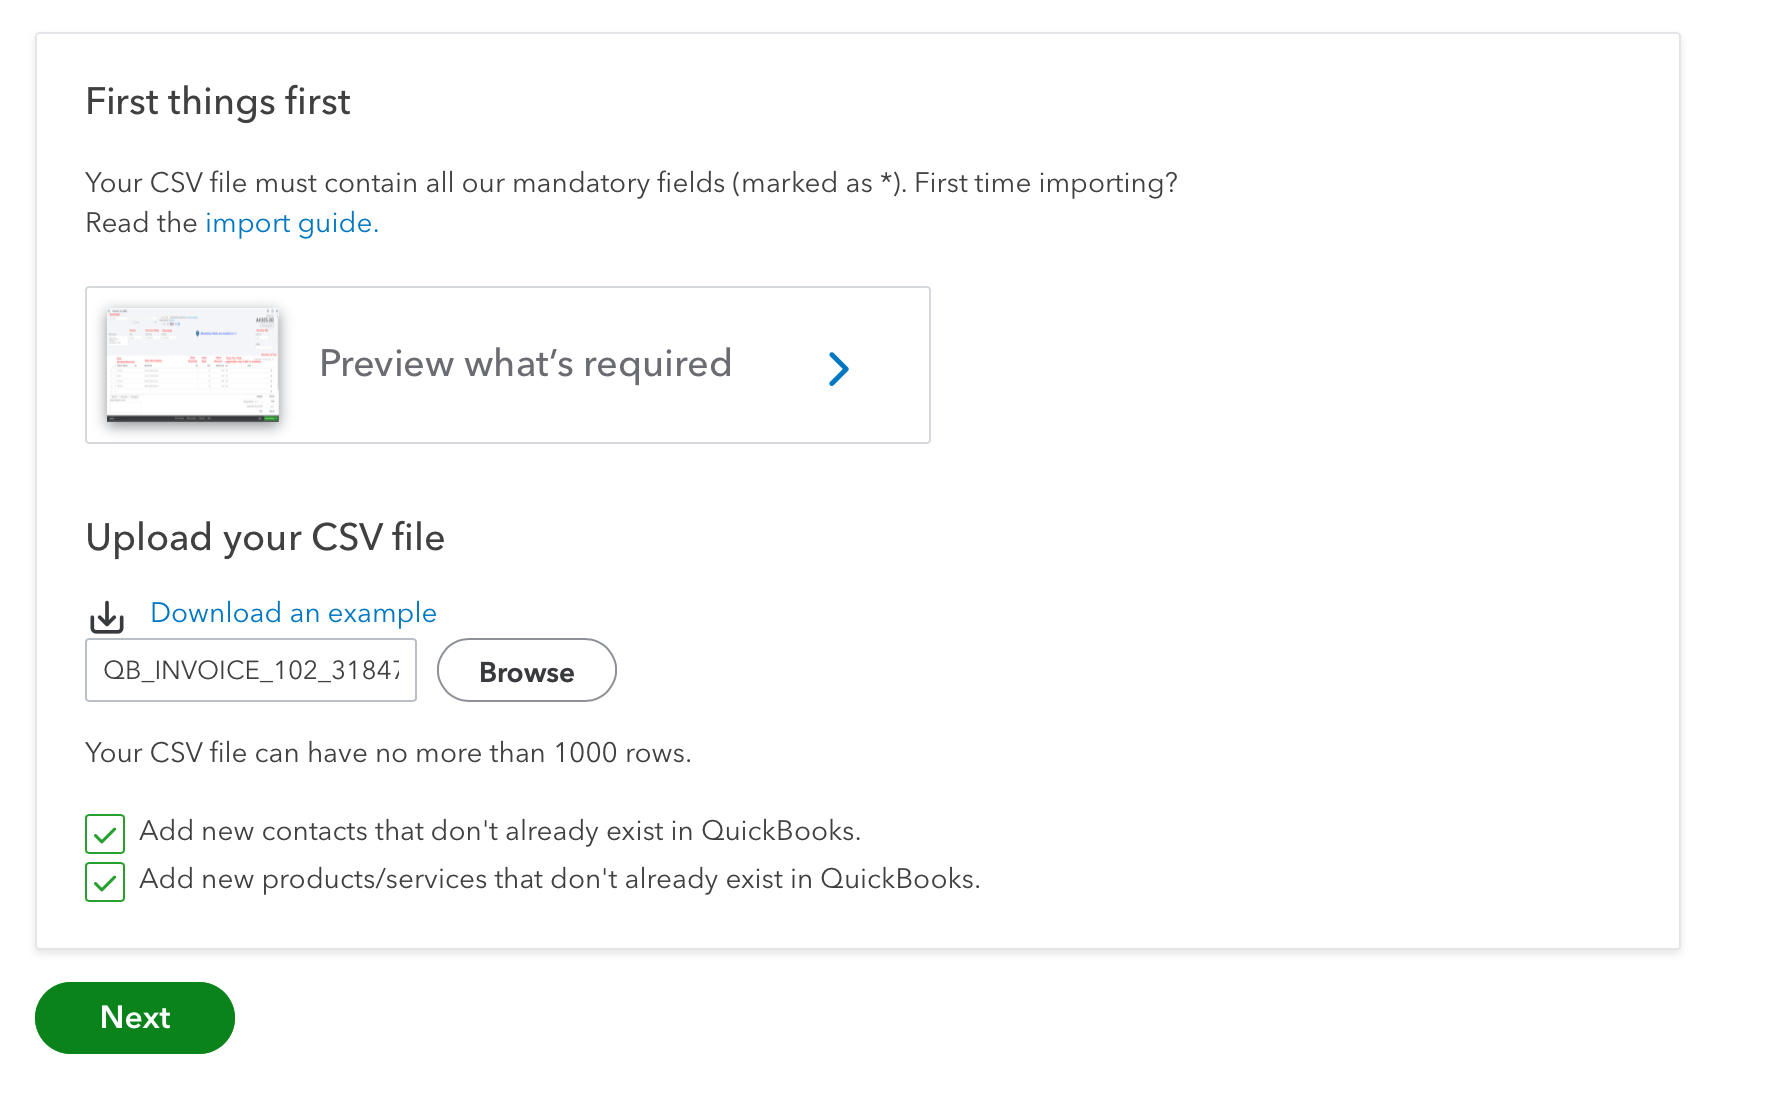
This will open a pop up. Select Browse and find the invoice export .csv from Eziplan that you have saved. You can choose the options for adding new contacts and products if you wish, then select the Next button.
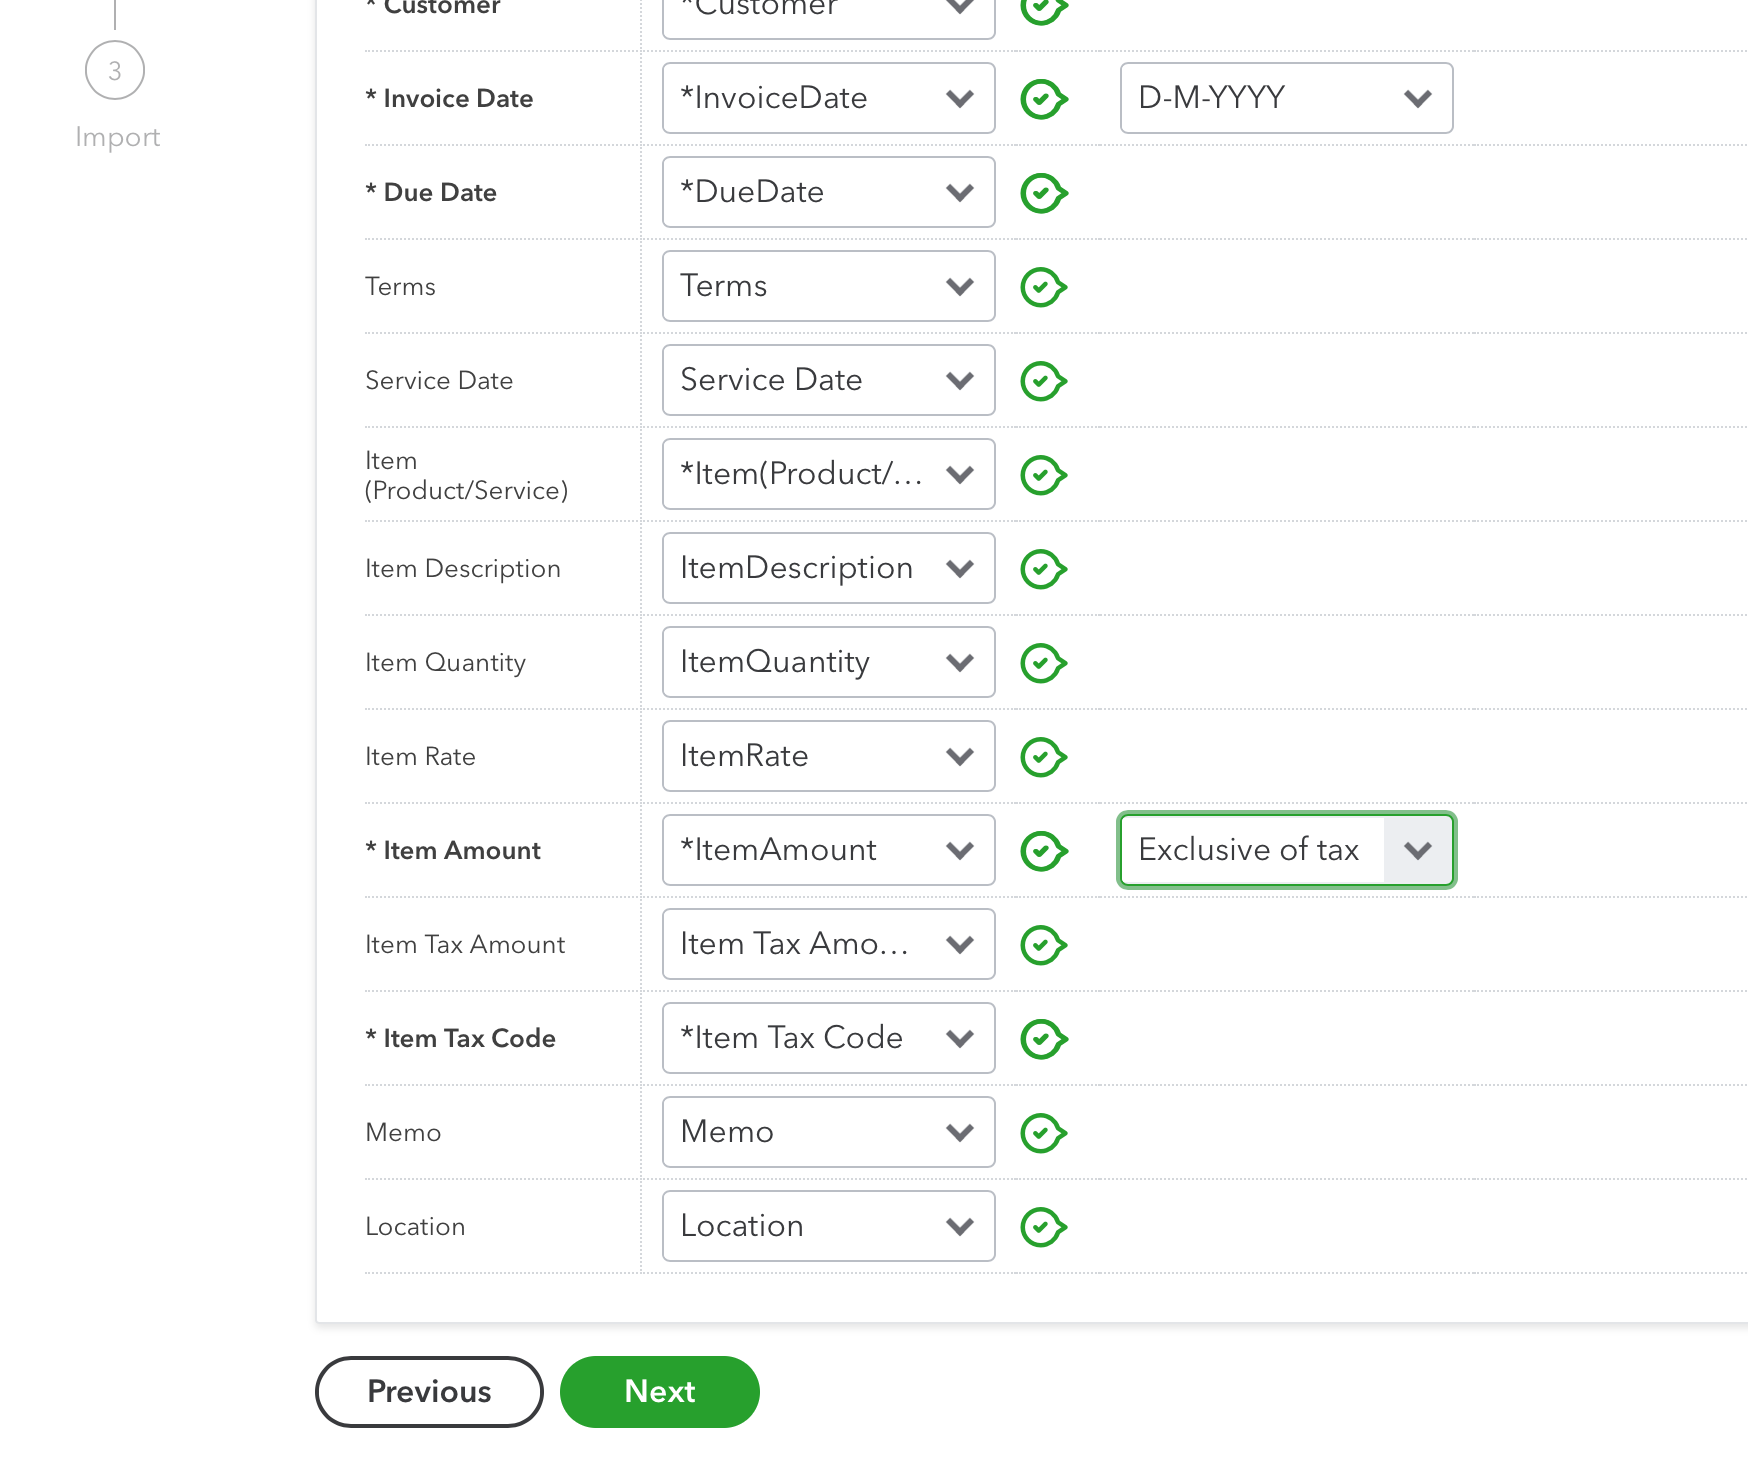
The invoice file will be loaded and you can then map the columns to the QuickBooks fields. This should already be set up (if not please contact your Account Manager). You will also need to select the correct date style and Tax type for the Items. Then select the Next button.
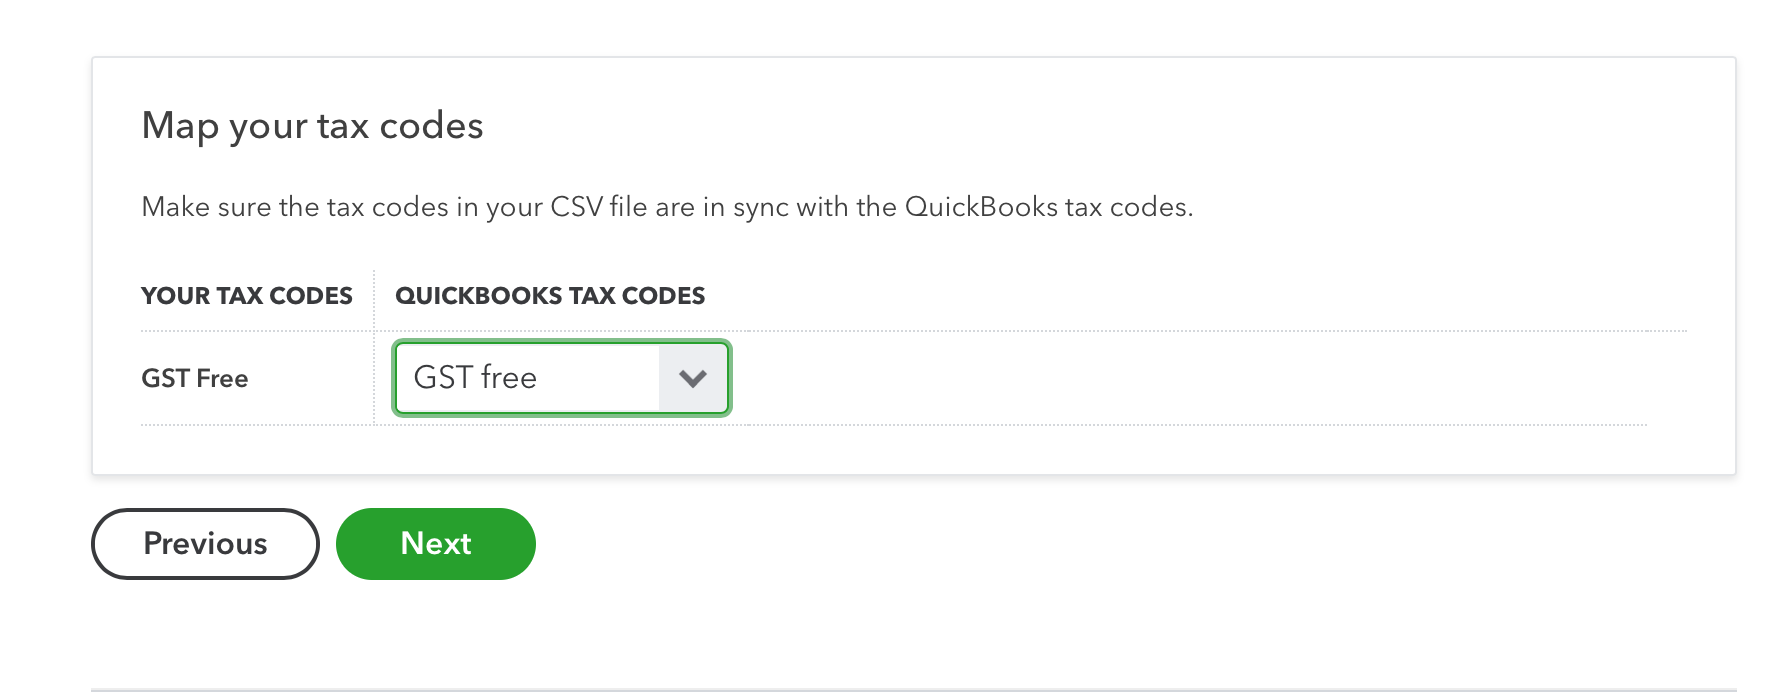
Map the Tax Code to the QuickBooks code from the drop down box and select the Next button.
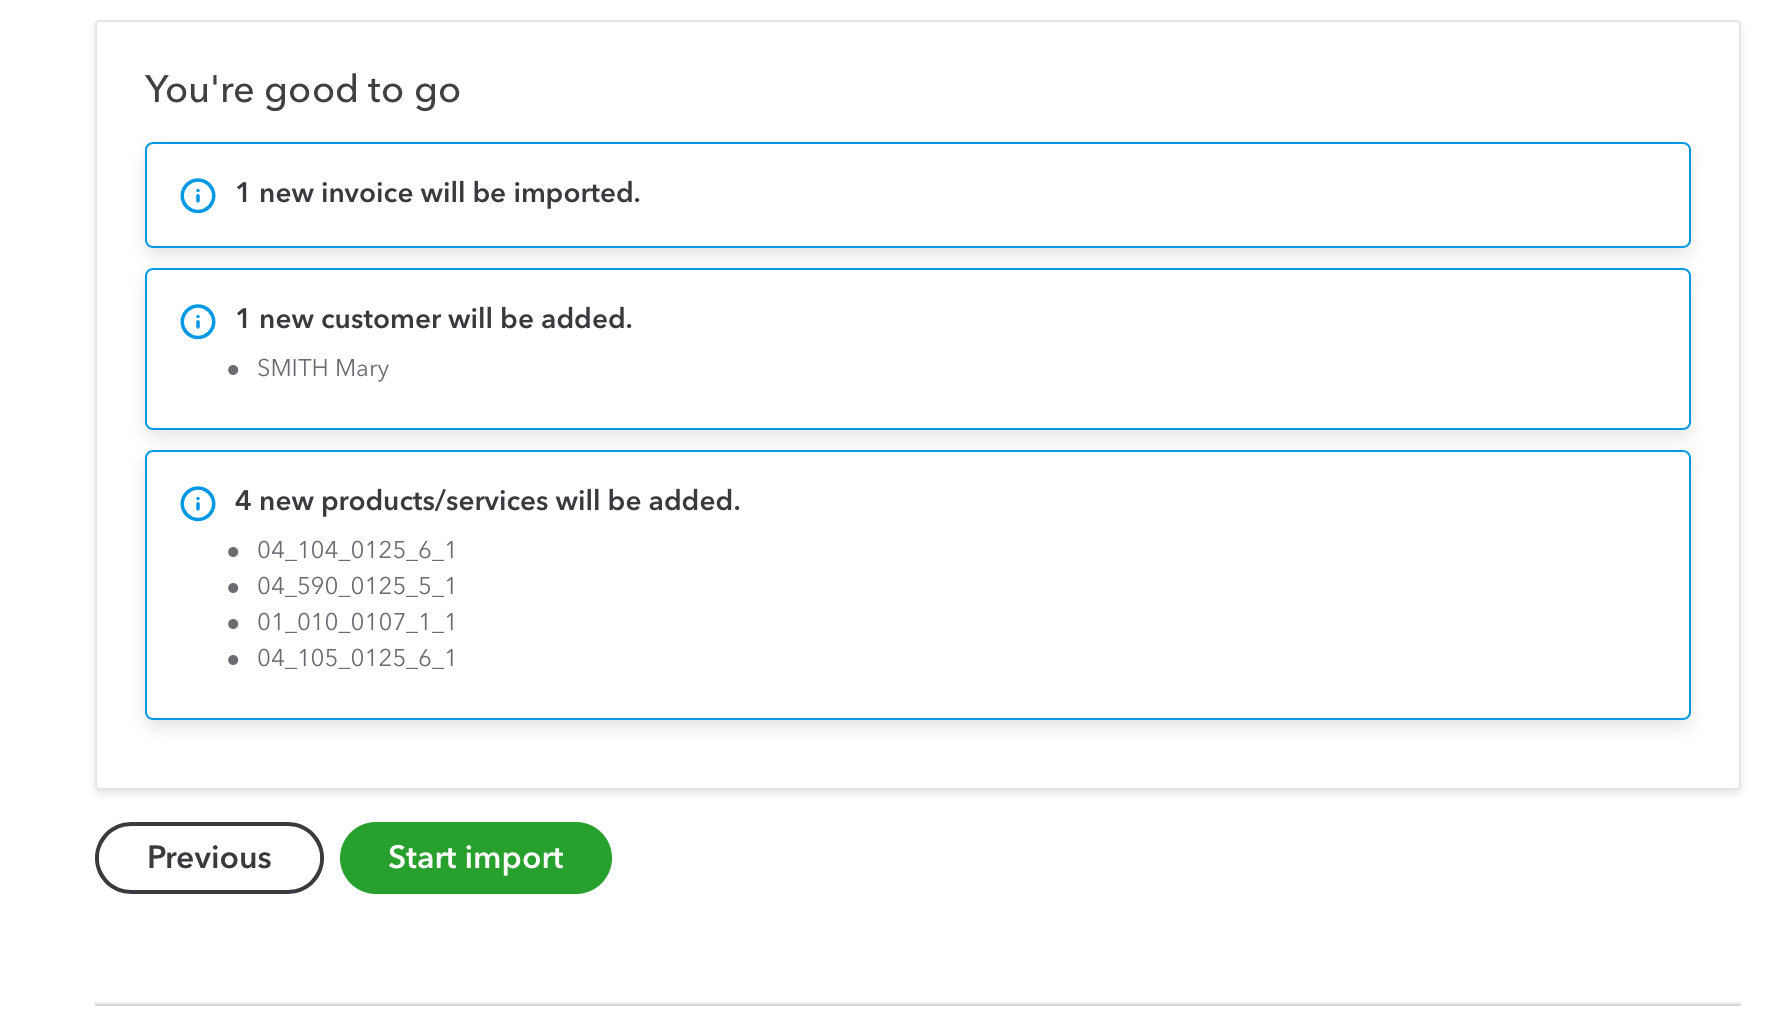
The system will then tell you what will occur next regarding adding invoices, products and customers. If this is all ready to go then select the Start import button.
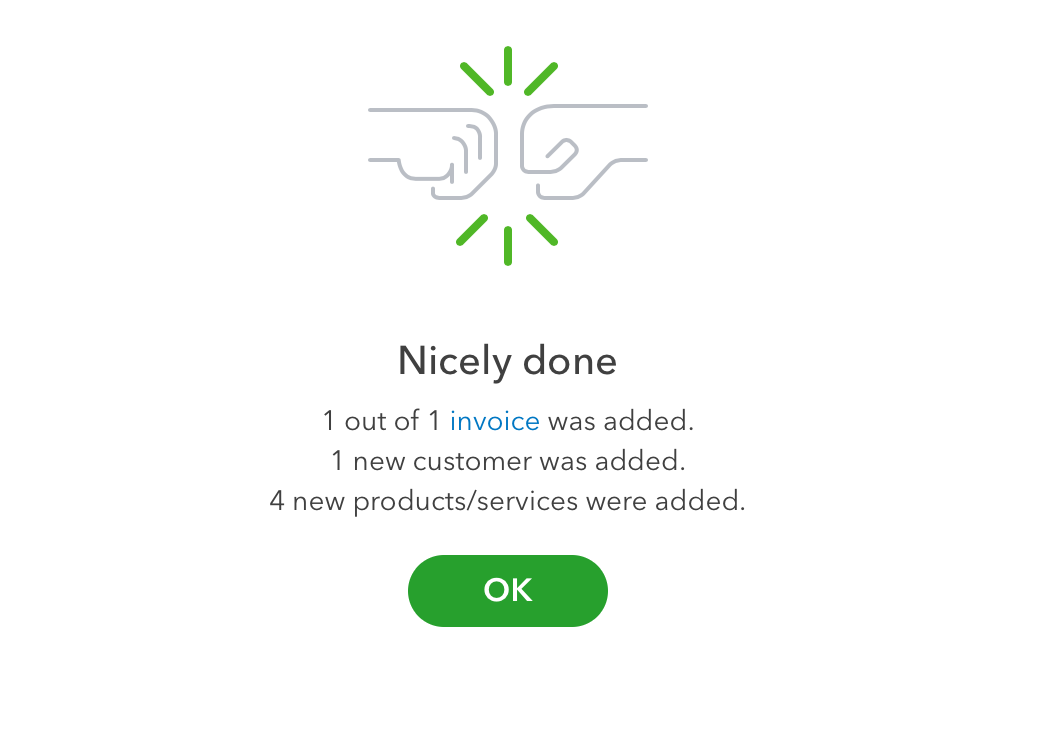
You should now receive a message saying the process is complete and what has actually occurred in the import. Select the OK button and you will go back to the invoice page. You can then process the invoices further within the system if required including sending them to their recipients.